The Devil Is In The Details
In our last tutorial we improved our treasure list to sort our items. But the treasure list only includes the name, price and type of all of our items. What about the rest of the information we put in the database, like wand spells and weapon bonuses? We want to see that too! So today we’ll be adding a way to look at all the details relating to the treasures in our database.
If you remember back to the design document our end goal is to let users click on treasure names in order to visit a page that lists all the treasure information. So our two tasks for today are creating those links and creating the page they need to point to.
Uniquely Identifying MongoDB Documents
If we want to create a page that shows the full details of one specific treasure the first thing we’ll need is a way to identify which treasure we want the details on. We can’t just tell MongoDB to “give us a ring” because it might give us the wrong ring. And even working with someone more specific, like treasure names, might not be enough. What if we have more than one item with the same name, like two “Swords of Fire” with different prices and weapon bonuses? How do you make sure you get the right one out of the database?
The answer is simple. Remember the _id field from way back in tutorial part 3, that random looking string of letters and numbers that was automatically added to every item we pushed into the database? That special id will be unique for every item in your collection. So if you know an item’s _id you can find it in the database without having to worry about accidentally grabbing the wrong item. Even if you have multiple identicle “Swords of Fire” they will each have a unique _id to help you keep track of which is which.
Getting the _id
You access the _id of a MongoDB document the same way you access any other attribute. In fact, if you copied my sample index.php file you already have it! Does this line look familiar?
$treasureID = $document['_id'];
If you’ve been writing your own pages instead of copying mine then now is the time to add a line like this to your code. Our goal is to get that _id for every item in our list and then create a link with that _id.
This is an intermediate tutorial, so I trust you’re already familiar with creating links. In our case we want to connect to a page named “viewItem.php” and that we want to include an “id” in the URL. To create that sort of link in our treasure list we need to open index.php and find the line where we print the treasure name. We then want to replace the plain name of the treasure:
<td>$name</td>
With an option that wraps the name inside of link. Notice the id argument we’ve added after the main url:
<td><a href='viewItem.php?id=$treasureID'>$name</a></td>
If you don’t see where you need to make the change, scroll to the bottom of this tutorial for a complete updated version of index.php
Creating viewItem.php
A link to viewItem.php isn’t very useful without an actual viewItem.php file to visit. If you tried clicking on a treasure name right now you would just get a page not found error. So our next step should be to create an actual viewItem.php file inside the same folder as the rest of our code. And of course we’re going to start out by inclding our header and footer:
include('header.php');
//Item view code will go here
include('footer.php');
Searching Based On _id
To search our database for a specific _id we need to have an _id to search for. But if you wrote your links properly we should be able to grab it out of the URL as easy as:
$itemID = $_GET['id'];
But wait, there’s more! In PHP MongoDB ids actually have their own class and that string of numbers and letters won’t do you any good until you wrap them up in the MongoId class:
$searchableItemID = new MongoId($itemID);
We’re almost there. Now all we have to do is tell MongoDB that we want to do a specific search for an item with that _id.
Searching in MongoDB is easy and uses the find function that you’re already familiar with. All you have to do is create a set of key/value pairs and include them as an argument to find and you’re done.
Let’s start by creating our key/value pair:
$criteria['_id'] = $searchableItemID;
And now we feed that data into find:
$cursor=$c->treasurebag->treasure->find($criteria);
find VS findOne
Remember how find returns a cursor instead of actual data? And how we had to put the cursor inside a loop to read all the data? That’s kind of pointless when you know you’re only to get one result. Why run an entire while loop just to grab one line of data? Calling $cursor->next() even once feels like a waste.
Luckily for us there is findOne. It works just like find except that it returns one result and it directly returns result data instead of returning a cursor. This makes it really useful for those situations where you’re only expecting one result or where you only care about the first result in a list. So instead of creating a cursor it’s much more convenient to use findOne to grab the needed treasure data all in one place.
$itemAttributes=$c->treasurebag->treasure->findOne($criteria);
Testing
Let’s give this a try and make sure our code is working by creating a page that grabs and id from the URL, creates a MongoID with it, searches for that id and then dumps the results to screen. Give it a try on your own first.
Ready to see my answer?
<?php
include('header.php');
$itemID = $_GET['id'];
$criteria['_id'] = new MongoId($itemID);
$c = new Mongo();

$itemAttributes=$c->treasurebag->treasure->findOne($criteria);

print_r($itemAttributes);

include('footer.php');
?>
If you’ve done everything right then this code should produce a simple page that dumps out all the information related to whatever treasure is in the URL. Feel free to play around with it by going back to the index and clicking on the viewItem links for other items and making sure that they dump different data. When you’re sure it’s working we can move on.
Display Item Details All Pretty Like
Grabbing the id and searching the database were the hard part. Now we just have the busy work of putting that information on the screen in a way that is prettier than a pure data dump.
Thinking back to our design document we notice that every single item is guaranteed to have a name, price and type. So the first thing we should probably do is print that to the screen:
echo '<b>Name:</b> '.$itemAttributes['Name'].'<br/>';
echo '<b>Type:</b> '.$itemAttributes['Type'].'<br/>';
echo '<b>Price:</b> '.$itemAttributes['Price'].'<br/>';
After printing the generic data for the item the next step is to print the type specific information. What information goes with each type is listed in our design document, so if you need a reminder just go back to tutorial 2.
The only sort-of tricky question here is how to handle attributes that can have more than one value. Printing a weapon bonus is as simple as just printing the weapon bonus but what do we do for the multiple Spells inside of each staff? The obvious answer is to put them into an unordered list, which we can build pretty easily with a foreach loop.
Now let’s take a shot at the type specific information printer. I’m using a switch statement here to choose which information to print based on the type of the item:
switch($itemAttributes['Type']){
  case 'Ring':
   echo '<b>Special Attribute:</b>'.$itemAttributes['Special Attribute'].'<br/>';
      break;
  case 'Weapon':
      echo '<b>Bonus:</b> '.$itemAttributes['Bonus'].'<br/>';
      echo '<b>Special Attributes:</b>';
      echo '<ul>';
      foreach($itemAttributes['Special Attributes'] as $specialAttribute){
          echo "<li>$specialAttribute</li>";
      }
      echo '</ul>';
      break;
  case 'Wand':
      echo '<b>Charges:</b> '.$itemAttributes['Charges'].'<br/>';
      echo '<b>Spell:</b> '.$itemAttributes['Spell'].'<br/>';
      break;
  case 'Staff':
      echo '<b>Charges:</b> '.$itemAttributes['Charges'].'<br/>';
      echo '<b>Spells:</b>';
      echo '<ul>';
          foreach($itemAttributes['Spells'] as $spell){
              echo "<li>$spell</li>";
          }
      echo '</ul>';
      break;
}
And that should be enough code to properly display the full attributes of every treasure in the system.
Screen Shots

See all those weird letters and numbers in the URL? That’s the Mongo ID
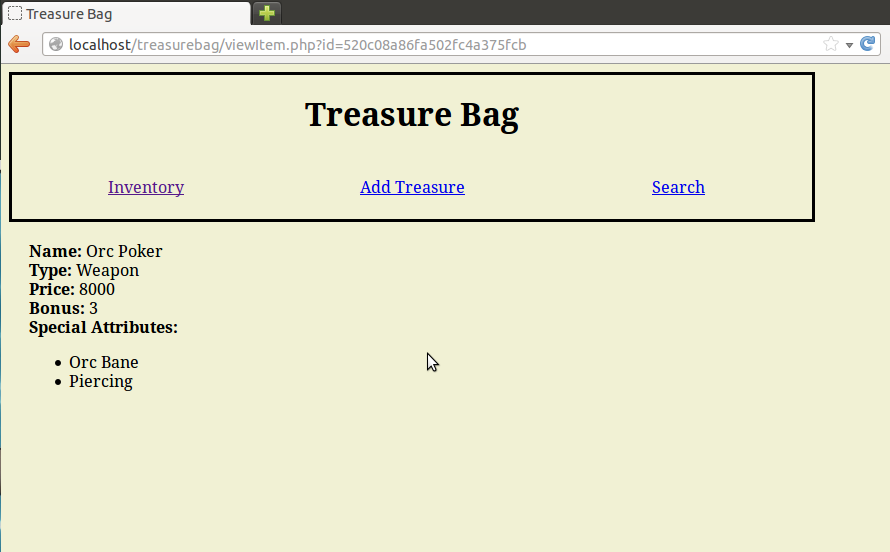
This sword has more than one special attribute
Complete Code
Updated index.php
<?php
include('header.php');
$connection = new Mongo();
$cursor = $connection->treasurebag->treasure->find();
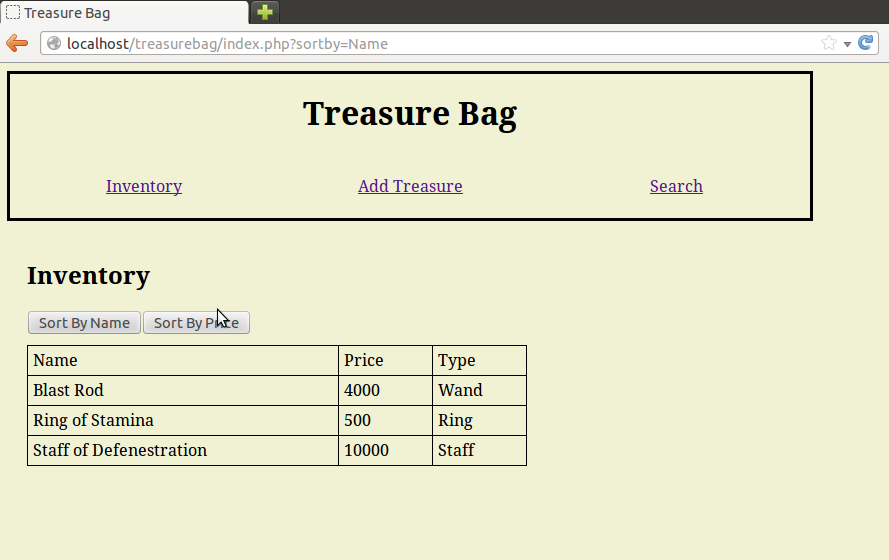
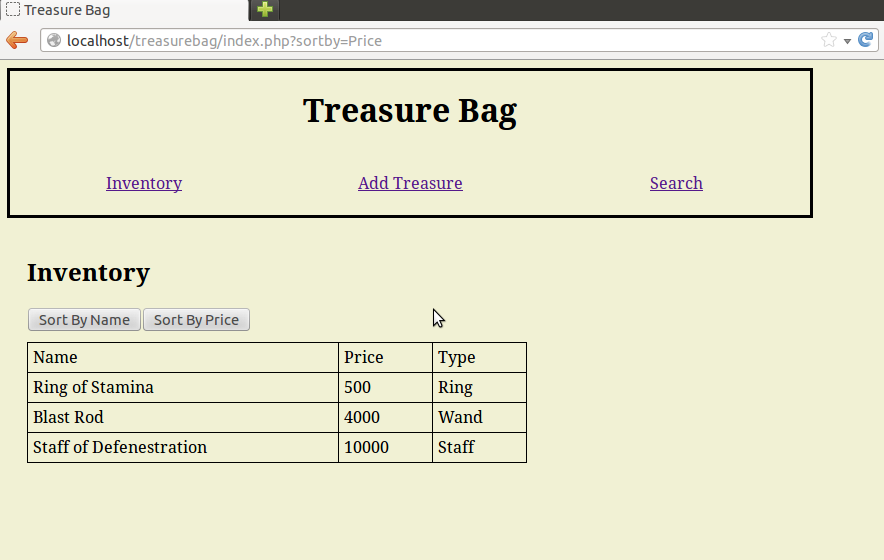
if(isset($_GET['sortby'])){
if($_GET['sortby']=='Price'){
$cursor->sort(array('Price'=>1));
}
elseif($_GET['sortby']=='Name'){
$cursor->sort(array('Name'=>1));
}
}
echo '<h2>Inventory</h2>';
echo '<button onclick="window.location.href=\'index.php?sortby=Name\'">
Sort By Name</button>';
echo '<button onclick="window.location.href=\'index.php?sortby=Price\'">
Sort By Price</button>';
echo '<table><tr><td>Name</td><td>Price</td><td>Type</td></tr>';
while($document = $cursor->getNext()){
$treasureID = $document['_id'];
$name = $document['Name'];
$price = $document['Price'];
$type = $document['Type'];
echo "<tr><td><a href='viewItem.php?id=$treasureID'>$name</a></td>
<td>$price</td>
<td>$type</td></tr>";
}
echo '</table>';
include('footer.php');
?>
Complete viewItem.php
<?php
include('header.php');
$itemID = $_GET['id'];
$criteria['_id'] = new MongoId($itemID);

$c = new Mongo();

$itemAttributes=$c->treasurebag->treasure->findOne($criteria);

echo '<b>Name:</b> '.$itemAttributes['Name'].'<br/>';
echo '<b>Type:</b> '.$itemAttributes['Type'].'<br/>';
echo '<b>Price:</b> '.$itemAttributes['Price'].'<br/>';

switch($itemAttributes['Type']){
 case 'Ring':
  echo '<b>Special Attribute:</b> '.$itemAttributes['Special Attribute'].'<br/>';
   break;
 case 'Weapon':
   echo '<b>Bonus:</b> '.$itemAttributes['Bonus'].'<br/>';
   echo '<b>Special Attributes:</b>';
   echo '<ul>';
      foreach($itemAttributes['Special Attributes'] as $specialAttribute){
          echo "<li>$specialAttribute</li>";
      }
   echo '</ul>';
        break;
 case 'Wand':
   echo '<b>Charges:</b> '.$itemAttributes['Charges'].'<br/>';
   echo '<b>Spell:</b> '.$itemAttributes['Spell'].'<br/>';
   break;
 case 'Staff':
   echo '<b>Charges:</b> '.$itemAttributes['Charges'].'<br/>';
   echo '<b>Spells:</b>';
   echo '<ul>';
      foreach($itemAttributes['Spells'] as $spell){
         echo "<li>$spell</li>";
      }
   echo '</ul>';
   break;
}

include('footer.php');
?>
Conclusion
So now we can sort and study all the treasure in our database. But at the moment the only way to put treasure into the system in the first place is to type it by hand straight into MongoDB. That’s not very user friendly! So join me next time as we write a page for entering treasure information through your browser instead of the command line.
BONUS!
What happens to itemView.php if you don’t include and id in the URL or if you type in an id not in the system? Improve the system so that if it can’t find a matching _id it displays a polite error message about not being able to locate the requested treasure.
BONUS BONUS!!
If you’ve been doing the bonus work so far you should already be storing adventurers in your database and have a page that shows them all in a list. Now add a characterView.php file to your application that lets you click on an adventurer and see his detailed stats. If you don’t have any detailed stats, then add some. A bio field with a quick character description might be an easy extra detail to add.