Let’s Program A JavaScript Game 2: The Canvas Of Dreams
No Time For HTML
This is “Let’s Program A JavaScript Game” not “Let’s Program A Website” so instead of discussing the fine points of HTML structuring I’m just going to drop the code for a very basic skeleton page that we can use for testing out the canvas. Just type or copy the following text into a file named something like “javascriptgame.html” and then open it up with your favorite modern browser (most up to date browsers support the canvas):
<!DOCTYPE html>
<html>
<head>
   <script>
      function canvasTest(){
         alert("Canvas Test");
      }
   </script>
</head>
<body>
   <canvas id="gameCanvas" width=600 height=400></canvas>
   <br/>
   <button onclick="canvasTest()">Canvas Test</button>
</body>
</html>
Not much to this. The HTML document has a HEAD, that holds our script, and a BODY that holds our canvas and one button. Clicking the button calls our script and if everything works properly you should get a screen sort of like this:
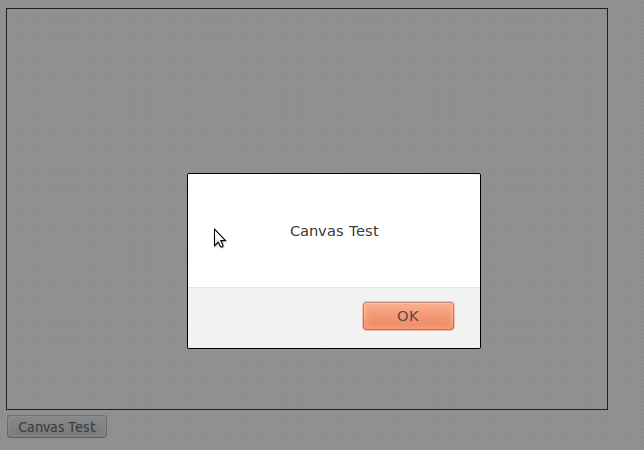
Just a quick test to make sure your button is connected to the script
Paint It Black
The first step to actually doing something interesting with our canvas is to put a reference to the canvas inside of a JavaScript variable. Then we use that reference variable to create a “context” object that can be used to do the actual work.
With our context all set up painting the entire canvas is as simple as setting the fillStyle of our context to whatever color we want and then calling the fillRect function. This function needs four arguments: the x and y coordinates of the top-left corner of the rectangle you want to draw along with the width and height of the rectangle.
Here’s our updated canvastTest function and a picture of what it should do. Remember to refresh the page in order to get the new code into the browser. If clicking on the button just shows the alert again odds are the old page is still in your browser memory and refreshing is the easiest way to force it to get rid of the old and grab the new.
function canvasTest(){
   var canvas = document.getElementById('gameCanvas');
   var context = canvas.getContext('2d');
   context.fillStyle = '#000000';
   context.fillRect(0,0,600,400);
}
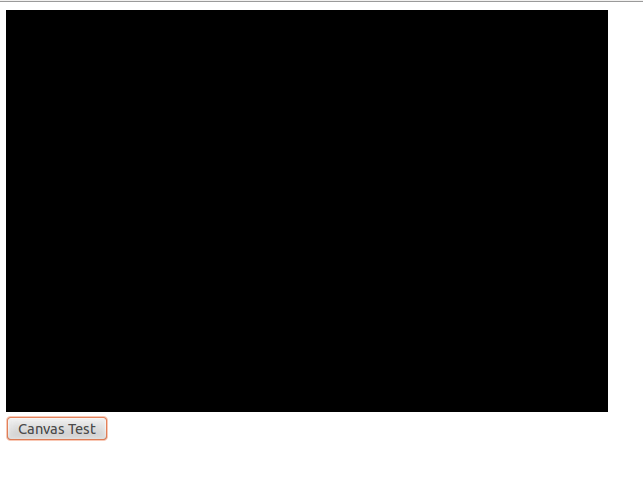
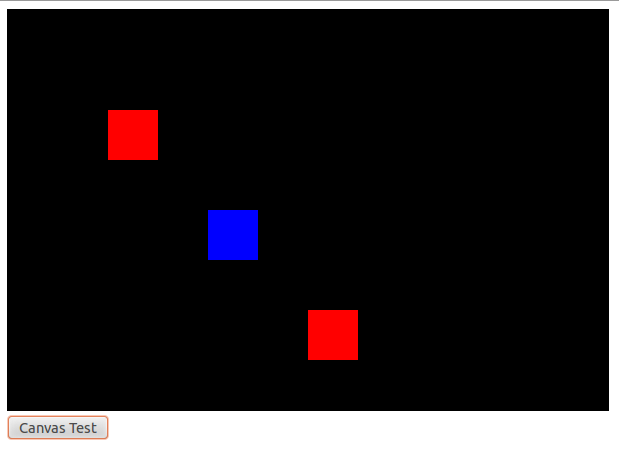
A boring but important first step: Painting the entire canvas all one color
Paint It Black, But With Polka Dots
Painting the entire screen black is kind of boring. Let’s add some color now by choosing a new fillStyle and then drawing some more rectangles on top of the black background rectangle.
Here’s an updated canvasTest that draws two red squares and a blue square when we hit the button:
function canvasTest(){
   var canvas = document.getElementById('gameCanvas');
   var context = canvas.getContext('2d');

   //Draw background
   context.fillStyle = '#000000';
   context.fillRect(0,0,600,400);

   //Draw red object
   context.fillStyle = '#ff0000';
   context.fillRect(100,100,50,50);
   context.fillRect(300,300,50,50);

   //Draw blue object
   context.fillStyle = '#0000ff';
   context.fillRect(200,200,50,50);
}
Notice that when drawing the two red squares we only had to set the fillStyle once.
Colorful Geometry Is Colorful
Graphics And Sprites And Images, Oh My!
Drawing colored boxes is nice, but not quite enough for a full game. People expect their games to actually look like things; the box has to be a robot or a soldier or an alien or an alien-robot-soldier.
So let’s add some graphics to this demo using these two bits of clipart I found on a free clipart website*. You’ll need to save them to the same folder as your code if you want to keep following along.


Before we can draw these images to the canvas we need to load them into our code, which we do easily enough by adding a few lines to the top of our script that will be automatically run when the page loads. But watch out! Loading images over the Internet can take a long time and trying to draw an image before loading it will crash your game. This won’t be a problem for your test, since the graphics are small and already on your computer, but for an actual online game with lots of graphics it can be a real problem. We’ll talk about how to fix that later.
Once the images are loaded drawing them to the screen is as easy as a call to drawImage. Note that I also changed the color of the background so that the black clipart shows up better. Otherwise you’ll have two black images on a black screen and you’ll have no way to tell if it’s working or not.
var cycleImage = new Image();
cycleImage.src = "cycle.png";

var virusImage = new Image();
virusImage.src = "virus.png";

function canvasTest(){
   var canvas = document.getElementById('gameCanvas');
   var context = canvas.getContext('2d');

   //Draw background
   context.fillStyle = '#dcdcdc';
   context.fillRect(0,0,600,400);

   //Draw red object
   context.fillStyle = '#ff0000';
   context.fillRect(100,100,50,50);
   context.fillRect(300,300,50,50);

   //Draw blue object
   context.fillStyle = '#0000ff';
   context.fillRect(200,200,50,50);

   //Draw Images
   context.drawImage(cycleImage, 300, 100);
   context.drawImage(virusImage, 300, 200);
}
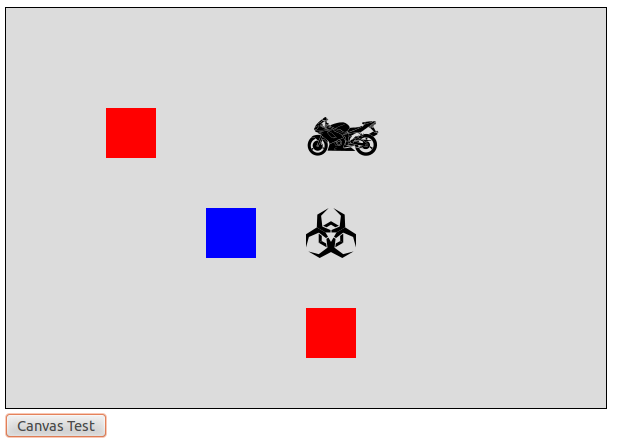
Motorcycles are cool! Hazard symbols are cool!
Animation! Sort of!
We’ve actually more or less covered everything we need to know to start prototyping our game. But just for fun let’s update our function to be “animated”: Every time you click the button the squares and clipart will move. We do this by creating a global “offset” variable right before our function. By adding an offset to the x or y coordinates of our drawings we can move them around the screen, and by constantly increasing the offset we can create the illusion that they are steadily moving in one direction.
So change your script to this and then click the “Canvas Test” button a few dozen times and see what happens.
var offset=0;

var cycleImage = new Image();
cycleImage.src = "cycle.png";

var virusImage = new Image();
virusImage.src = "virus.png";

function canvasTest(){
   var canvas = document.getElementById('gameCanvas');
   var context = canvas.getContext('2d');

   //Draw background
   context.fillStyle = '#dcdcdc';
   context.fillRect(0,0,600,400);

   //Draw red object
   context.fillStyle = '#ff0000';
   context.fillRect(100+offset,100,50,50);
   context.fillRect(300+offset,300-offset,50,50);

   //Draw blue object
   context.fillStyle = '#0000ff';
   context.fillRect(200,200-offset,50,50);

   //Draw Images
   context.drawImage(cycleImage, 300 - offset, 100);
   context.drawImage(virusImage, 300 + offset, 200);

   offset+=10;
}
A few things worth noticing here:
- When two objects overlap whichever one comes last in the code gets drawn last and shows up on top. Example: The blue and red square
- When an object is partially outside the canvas the part inside the canvas still gets drawn
- You can “draw” an object completely outside of the canvas without breaking anything. It just doesn’t show up.
Time To Decide What To Do With All This Cool Code
So we can draw screens now and have even covered the basics of animation. We’re basically all set to start building our game!
Or we would be if we had any idea what we were going to build. So next week I’m going to take some time and lay out a simple game design document.
* Original images can be found here:
https://openclipart.org/detail/191534/motorcycle-silhouette-vector-by-raimondi1337-191534
https://openclipart.org/detail/28408/malware-hazard-symbol-by-pbcrichton