Let’s Program A JavaScript Game 18: Moving Pictures

Game animations are important.

First off, they look cool. Watching a warrior swing his ax is much more entertaining than just watching him sit still while you pretend he’s swinging his ax. (No offense to old school RPGs, of which I own an embarrassing amount.)

Second, they make the game feel more realistic. A character who stands perfectly still while falling hundreds of feet feels fake. It’s much more immersive when the character has billowing clothing or flailing limbs to drive home the fact that he’s falling.

Finally, and maybe most importantly, animations give the player information about what’s happening in the game. They show when and how enemies are attacking and give hints about what the character can and can’t do.

I mean, imagine a game with a two second delay between attacks that you just had to remember. Frustrating! Now imagine a game with a two second animation of your character reloading his giant shotgun after every attack. Now it’s easy to see exactly when you can and can’t attack.

Pseudo Code

Animations are created by showing related images one after another at high speed. Take four pictures of a walking man, cycle through them a couple times a second and the human brain will see one walking man instead of four different pictures.

But in a game it’s (usually) not enough to have one animation. You have to have multiple animations you can switch between as needed. If the player is walking along and suddenly hits the jump button you need to be able to instantly switch from your walking animation to your jumping animation.

But even with that complication the logic of 2D game animation is pretty simple:

  1. Store what animation state your sprite is in (ex: walking, jumping, shooting)
  2. Store how long it’s been in that state (ex: 17 frames)
  3. Use that information to decide what image to show (ex: jump-image-3)

Now in a professional game step 3 can get pretty complicated. A running animation might have logic that looks like:

  • If the sprite has been in “running” state for less than five frames show “warm up 1”
  • If the sprite has been in “running” state for between five and fifteen frames show“warm up 2”
  • If the sprite has been in “running” state for between fifteen and twenty two frames show “warm up 3”
  • If the sprite has been in “running” state for more than twenty two frames switch between “running 1” and “running 2” every three frames.

Fortunately for us our only goal is to make our virus enemies spin while being grazed. That means we only have to worry about two sprite states (grazed and not-grazed) and our step three logic is going to be a pretty simple cycle.

How To Store An Animation

To show an animation you need to quickly switch between multiple related images. And while you could create every one of these images as an independent file we’re going to be using a “sprite sheet” instead.

A “sprite sheet” is one large image made up of multiple, related images glued together. For example, here’s a sprite sheet showing four different stages of a rotating virus enemy:

Load this into your virusImage object instead of the old single virus graphic

Load this into your virusImage object instead of the old single virus graphic

We load the image into the game once and can then create an animation by drawing different parts to the screen at different times. In JavaScript we do this by adding extra arguments to our drawImage calls.

You hopefully remember that by default drawImage accepts three arguments: the image we want to draw and the x and y coordinates of where we want to draw it on the canvas.

But there is also a nine argument version of drawImage. The first argument is still an image. The next four arguments define what part of the image we want to draw by creating a rectangle inside of the image. Then the last four arguments define a rectangle inside of the canvas showing where we want our sub-image to be draw and what size we want it to be stretched to.

So to draw the third frame of our 50×50 rotating virus at canvas coordinate (127, 33) we would do something like this:

context.drawImage(virusImage, 100, 0, 50, 50, 127, 33, 50, 50);

This nine argument function is really just asking for an image and two rectangles.

This nine argument function is really just asking for an image and two rectangles.

In other words: Grab the 50×50 sub image found at point (100, 0) of the virusImage and then draw it inside a 50×50 square at point (127, 33) on the canvas.

Make It So

With that we’re ready to upgrade our viruses so that they spin whenever the player grazes them.

First off, let’s define a new constant at the top of our code to help us keep track of what animation state our viruses are in. Since at the moment they can only be in state “grazed” or “not grazed” we really only need one constant:

var VIRUS_GRAZED = 1; //Used to identify a virus that is being grazed

Now we drop down into the graze logic of updateGame and have the viruses keep track of their current animation state:

//Virus logic
for( i = 0; i < viruses.length; i++){
   //Have all viruses move towards the player
   viruses[i].x-=VIRUS_SPEED;

   //See if the player is grazing this virus
   if(intersectRect(viruses[i], grazeHitbox)){
      grazeCollision = true;
      viruses[i].state = VIRUS_GRAZED;
      viruses[i].stateCounter++;
   }
   else{
      viruses[i].state = 0;
      viruses[i].stateCounter = 0;
   }

   //See if the player has had a lethal collission with this virus
   if(intersectRect(viruses[i], deathHitbox)){
      deathCollision = true;
   }
}

This is mostly the same virus enemy logic as before. But now when a virus is grazed it will set it’s state to VIRUS_GRAZED and increment a counter. And when a virus is not grazed it will erase that state and reset the counter.

Now that we know which viruses are being grazed and how long they’ve been grazed we can update our virus drawing logic down in drawScreen:

//Draw viruses
//Virus has a 200 pixel wide sprite sheet with four different 50x50 rotations all in a row
for(i = 0; i < viruses.length; i++){
   //By default draw the first virus
   virusSheetOffset = 0;

   //If the virus is being grazed make it spin by switching between rotations
   if(viruses[i].state = VIRUS_GRAZED){
      if( viruses[i].stateCounter % 8 < 2){
        virusSheetOffset = 0;
      }
      else if(viruses[i].stateCounter % 8 < 4){
         virusSheetOffset = 50;
      }
      else if(viruses[i].stateCounter % 8 < 6){
         virusSheetOffset = 100;
      }
      else{
         virusSheetOffset = 150;
      }
   }

   context.drawImage(virusImage, virusSheetOffset, 0, 50, 50, viruses[i].x, viruses[i].y, 50, 50);
}

Let’s analyze this by looking at the last line first:

context.drawImage(virusImage, virusSheetOffset, 0, 50, 50, viruses[i].x, viruses[i].y, 50, 50);

We always want to draw a 50×50 virus image at the x and y location of the current virus enemy. That’s why the last four arguments are viruses[i].x, viruses[i].y along with 50 width and 50 height.

We then choose between our four different virus sub-images by changing the “virusSheetOffset”. Since our sprite-sheet is just one big row we always leave the y coordinate of our frame as 0. Larger sprite sheets often have multiple rows and would need to calculate both an x and a y offset.

We choose our virusSheetOffest, and thus our sub-image, by seeing how long the virus has been grazed and switching every two frames. Four different sub-images at two frames each mean we complete a full cycle every eight frames so we calculate our current sub-image by using modulo eight to see whether we are at frame 0-1 of a cycle (image 1), 2-3 (image 2) 4-5 (image 3) or 6-7 (image 4).

Of course, all this only happens if the virus is being grazed. If not we just stick with an offset of 0 to get the default first frame. This means that only grazed viruses spin. The rest just sit there.

An Unrelated Tweak

Before we finish up this Let’s Program there’s one last little game flaw I want to fix.

Currently we start and restart the game by having the player press the up arrow key. Unfortunately if the player happens to already pressing the up key when he dies or wins he will immediately restart the game without any time to see the “game over”, “you win” or “start” screens.

To solve this I created a new global variable

var menuFrames = 0; //Has the player been on the menu long enough to press a button?

I then use this variable to force every menu screen to wait twenty frames before letting the player move on. Here’s an example from the win screen, but the other two functions were modified in the same way:

//Check to see if the user is ready to restart the game
//Slightly delay user input so they don't accidentally skip this screen
function updateWinScreen(){
   menuFrames++;
   if(playerInput.up && menuFrames >= 20){
      gameState = STATE_START_SCREEN;
      menuFrames = 0;
   }
}

Resetting the “menuFrames” counter before switching states is very important. Otherwise only the first menu of the game would have the input delay and then we’d be right back to being able to accidentally skip past important screens.

YOU WIN THE META-GAME!

We now have a complete game that shows off everything from basic animations, collision detection and sounds to real-time world generation and physics simulations. You can play the full version here and I strongly recommend downloading the page source so you can see the complete code.

And with that done all that’s left is a few final thoughts on what to do next.
Gengo Girls #108: Close One Door, Open Another

Gengo Girls #108: Close One Door, Open Another

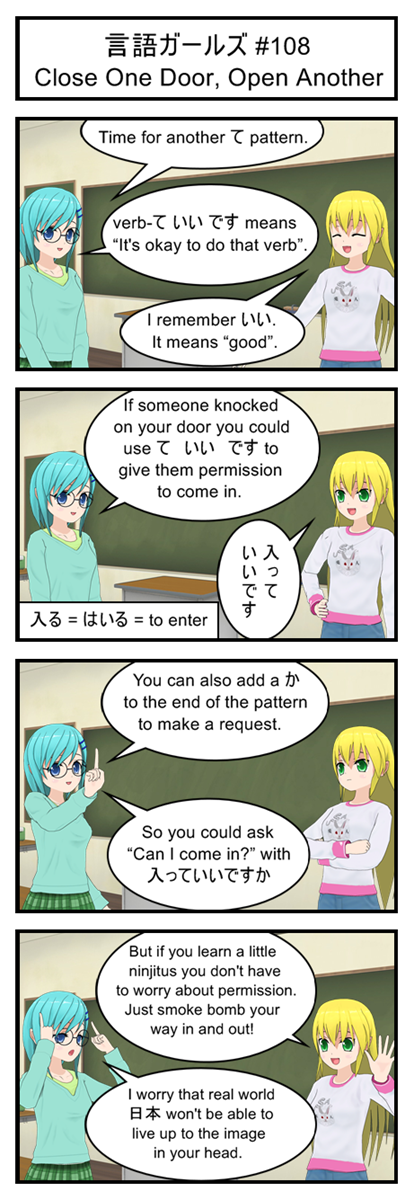
If you ask for permission and get it the answer will usually be a pretty straightforward “Sure, that’s fine”. But if you don’t get permission things can get a bit strange.

Since the Japanese tend to avoid conflict they will almost never directly say “no” to a request even when they want to. Instead they will kind of stall and mumble something like “Well… you see… maybe… but it’s kind of… I guess you could… but still…”

As an American you might take that kind of wishy washy answer as a weak “yes”. But what you are actually supposed to do is notice their reluctance and withdraw your request without forcing them to say no. That way everybody saves face and there is no conflict.

Vocabulary

入る = はいる = to enter

Transcript

言語ガールズ #108

Close One Door, Open Another

Blue: Time for another pattern.

Blue: verb-て いい です means “It’s okay to do that verb”.

Yellow: I remember いい. It means “good”.

Blue: So if someone knocked on your door you could us て いい です to give them permission to come in.

Yellow: 入っていいです

Blue: You can also add a to the end of the pattern to make a request.

Blue: So you could ask “Can I come in?” with 入っていいですか

Yellow: But if you learn a little ninjitus you don’t have to worry about permission. Just smoke bomb your way in and out!

Blue: I worry that real world 日本 won’t be able to live up to the image in your head.

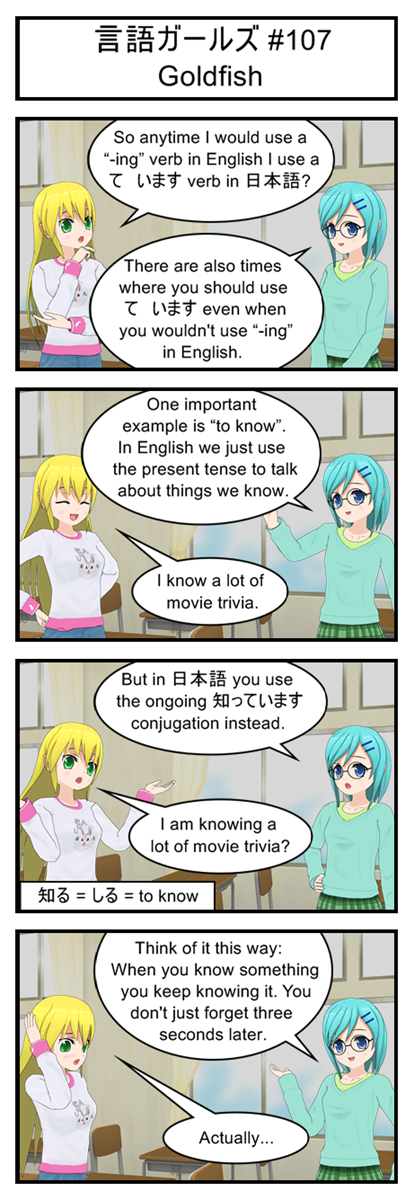
Gengo Girls #107: Goldfish

Gengo Girls #107: Goldfish

When you think about it the present tense in both English and Japanese has two uses:

1) To talk about something you do in general. “I write a blog.”

2) To talk about instantaneous actions. “I push the button”.

In English “to know” is used as a general present tense. “Yeah, I know the first ten digits of Pi. That’s a generally true statement about me.”

But in Japanese they prefer the ongoing “I am knowing” form instead of the general “I know”. Which is both fine and logical… but sure takes some getting used to. Just remember that “shitteru” and “shitteimasu” both mean “to know” and don’t worry too much about the grammar specifics.

Vocabulary

知る = しる = to know

Transcript

言語ガールズ #107

Goldfish

Yellow: So anytime I would use a “-ing” verb in English I use a て います verb in 日本語?

Blue: There are also times where you should use て います even when you wouldn’t use “-ing” in English.

Blue: One important example is “to know”. In English we just use the present tense to talk about things we know.

Yellow: I know a lot of movie trivia.

Blue: But in 日本語 you use the ongoing 知っています conjugation instead.

Yellow: I am knowing a lot of movie trivia?

Blue: Think of it this way: When you know something you keep knowing it. You don’t just forget three seconds later.

Yellow: Actually…

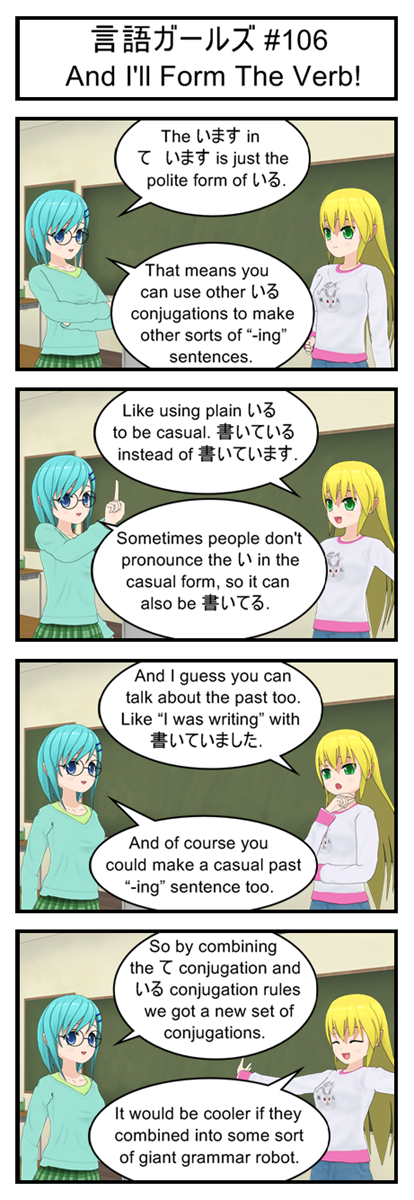
Gengo Girls #106: And I’ll Form The Verb!

Gengo Girls #106: And I'll Form The Verb!

It’s always nice when new grammar is actually just old grammar being recycled for new purposes.

Transcript

言語ガールズ #106

And I’ll Form The Verb!

Blue: The います in て います is just the polite form of いる.

Blue: That means you can use other いる conjugations to make other sorts of “-ing” sentences.

Yellow: Like using plain いる to be casual. “I am writing” as 書いている instead of 書いています.

Blue: Sometimes people don’t pronounce the in the casual form, so it can also be 書いてる.

Yellow: And I guess you can talk about the past too. Like “I was writing” with書いていました.

Blue: And of course you could make a casual past “-ing” sentence too.

Blue: So by combining the conjugation and いる conjugation rules we get a new set of conjugations.

Yellow: It would be cooler if they combined into some sort of giant grammar robot.

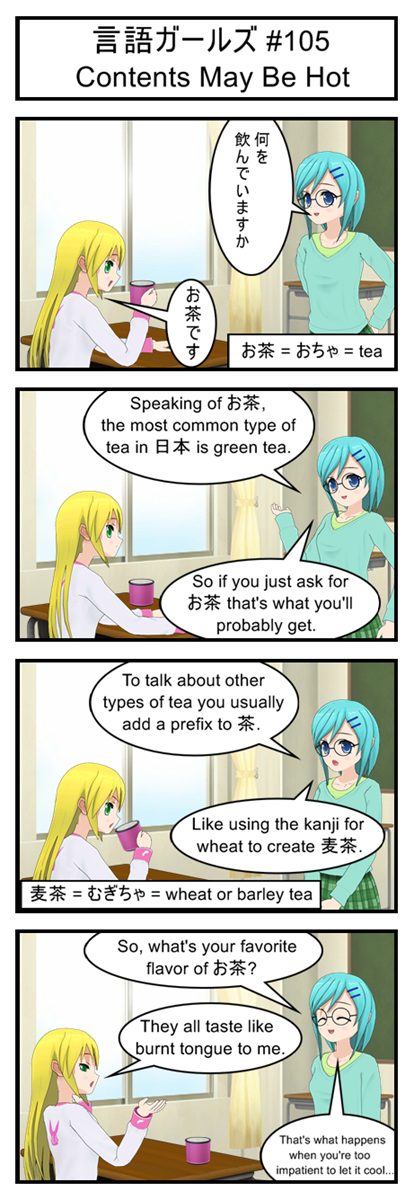
Gengo Girls #105: Contents May Be Hot

Gengo Girls #105: Contents May Be Hot

The Japanese drink a ton of tea and offering it to guests is an important part of their cultural manners. This can pose an interesting challenge for westerner visitors who either really don’t like tea or have dietary or religious restrictions against it. You don’t want to offend people by refusing their hospitality… but at the same time you also really don’t want the tea. Tread carefully if you find yourself in this situation.

Anyways, on a grammar note I hope you all noticed we used the te-imasu form of “nomu” to create the natural sounding question “What are you drinking?”. And as you can see “ocha” is yet another word that has an honorific “o” attached directly to it 99% of the time.

Vocabulary

お茶 = おちゃ = tea, usually green

麦茶 = むぎちゃ = wheat or barley tea

Transcript

言語ガールズ #105

Contents May Be Hot

Blue: 何を飲んでいますか

Yellow: お茶です

Blue: Speaking of お茶, the most common type of tea in 日本 is green tea.

Blue: So if you just ask for お茶 that’s what you’ll probably get.

Blue: To talk about other types of tea you usually add a prefix to .

Blue: Like using the kanji for wheat to create 麦茶.

Blue: So, what’s your favorite flavor of お茶?

Yellow: They all taste like burnt tongue to me.

Blue: That’s what happens when you’re too impatient to let it cool…

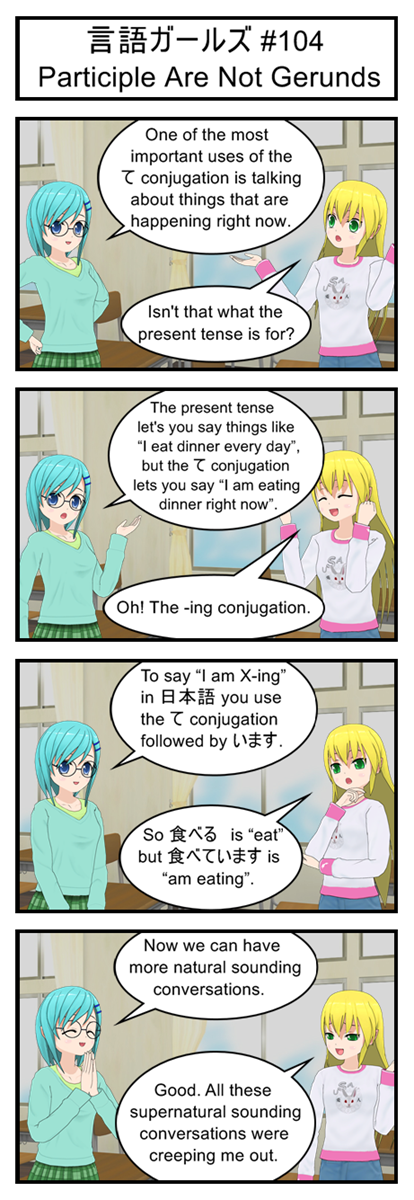
Gengo Girls #104: Participle Are Not Gerunds

Gengo Girls #104: Participle Are Not Gerunds

In English we also use -ing both to talk about ongoing verbs and to turn verbs into nouns. I am eating (ongoing verb). Eating is important (verb as noun).

But in Japanese the te-imasu form is ONLY for ongoing verbs. Using verbs as nouns uses different rules that we’ll probably eventually get around to.

Transcript

言語ガールズ #104

Participle Are Not Gerunds

Blue: One of the most important uses of the conjugation is talking about things that are happening right now.

Yellow: Isn’t that what the present tense is for?

Blue: The present tense let’s you say things like “I eat dinner every day”, but the conjugation lets you say “I am eating dinner right now”.

Yellow: Oh! The -ing conjugation.

Blue: To say “I am X-ing” in 日本語 you use the conjugation followed by います.

Yellow: So 食べる is “eat” but 食べています is “am eating”.

Blue: Now we can have more natural sounding conversations.

Yellow: Good. All these supernatural sounding conversations were creeping me out.

Gengo Girls #103: With A Cherry On Top

Gengo Girls #103: With A Cherry On Top

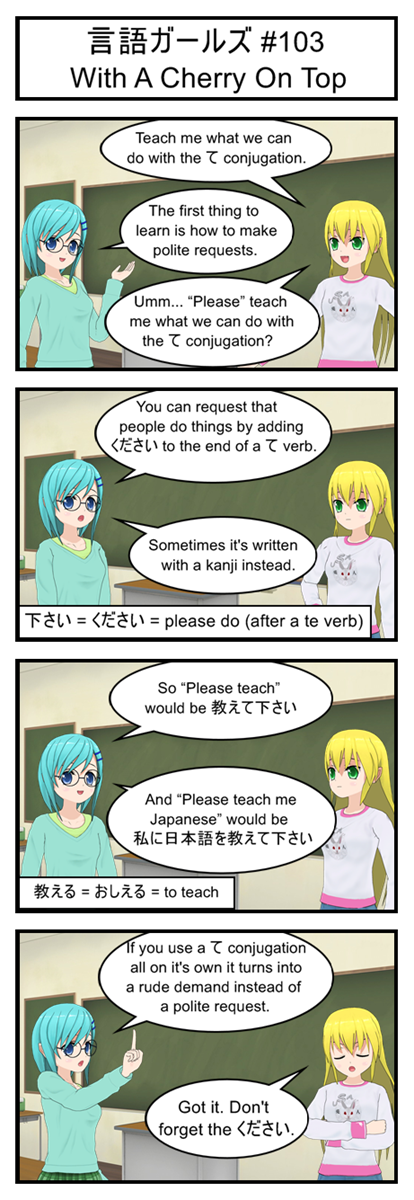
Pretty straightforward and I hope everyone can see why oshieru was conjugated the way it was. But I also want to point out that “ni” at the beginning of the sentence. In this case the “ni” is pointing out the target of our verb. Who do we want to get taught? “Me” or “Watashi”.

Just a quick example of “ni” being used for something more abstract than your normal “to mark a physical location”.

Vocabulary

下さい = ください = please do something for me

教える = おしえる = to teach

Transcript

言語ガールズ #103

With A Cherry On Top

Yellow: Teach me what we can do with the conjugation.

Blue: The first thing to learn is how to make polite requests.

Yellow: Umm… “Please” teach me what we can do with the conjugation?

Blue: You can request that people do things by adding ください to the end of a verb.

Blue: Sometimes it’s written with a kanji instead.

Blue: So “Please teach” would be 教えて下さい

Blue: And “Please teach me Japanese” would be 私に日本語を教えて下さい

Blue: If you use a conjugation all on it’s own it turns into a rude demand instead of a polite request.

Yellow: Got it. Don’t’ forget the ください.

Gengo Girls #102: Remixing A Classic

Gengo Girls #102: Remixing A Classic

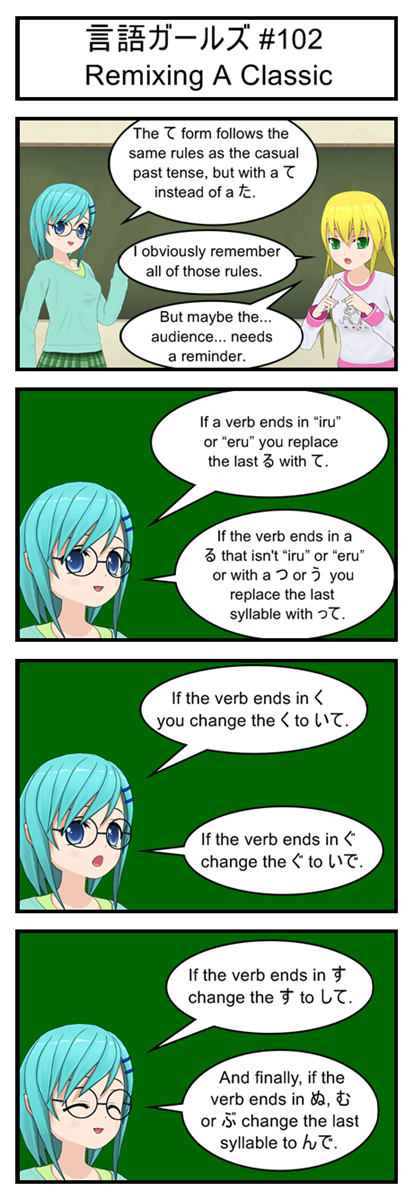
A boring but necessary review. Next time we’ll start to get into what you can actually do with your new “te” form verbs.

Transcript

言語ガールズ #102

Remixing A Classic

Blue: The form follows the same rules as the casual past tense, but with a instead of a .

Yellow: I obviously remember all of those rules.

Yellow: But maybe the… audience… needs a reminder.

Blue: If a verb ends in “iru” or “eru” you replacte the last with .

Blue: If the verb ends in a that isn’t “iru” or “eru” or with a or you replace the last syllable with って.

Blue: If the verb ends in you change the to いて.

Blue: If the verb ends in change the to いで.

Blue: If the verb ends in change the to して.

Blue: And finally if the verb ends in , or change the last syllable to んで

Let’s Program A JavaScript Game 17: Can You Hear Me Now?

If I Wanted To Do Legal Research I Would Have Been A Lawyer

Today we’re going to be adding music and sound effects to our game.

But we need to start with a quick reminder that using copyrighted music and images in your games is illegal. It’s also pretty tacky. Nobody is impressed by the fact that your game uses the battle music from Final Fantasy 7. And don’t get me started on all those Taylor Swift* tracks you slipped into the pause menu.

One way around this problem is to pay people for the right to use their music. You can also find a lot of people on the Internet who give their music away for free. Either way there are two big questions you need to get answered:

Commercial VS Non-Commercial

Want to sell your game? Maybe have some ads so you get paid every time someone plays it for free? Then you need to make sure any art, music or code that you got from other people has been cleared for “Commercial Use”. In other words, make sure you have the original author’s permission to use their work to help you make money.

This is important because MOST of the free art and music you can find online (and even some of the paid stuff) is “Non-Commercial Use Only”. If a game uses even one piece of “Non-Commercial” media it’s now illegal to sell it or even attach advertisements to it. You might even get in trouble for just giving it away for free on a website that has it’s own ads.

Doing a school project or building a game to share with friends? Non-Commercial is fine.

But if you want the freedom to do whatever you want with your game make sure everything you use is cleared for Commercial Use.

Attribution Requirements

The other big legal aspect of using other people’s art, music or code is that they usually require you to give them credit. For a game this usually means including their name in the end credits and in any “readme” files that you might have. Some authors just want a simple mention of their name while others have entire legal phrases they want you to copy and past into your product.

Of course, some authors don’t care.

Either way before you publish your game you need to make sure you know which author’s do and don’t require attribution.

Let’s Find Some Free Stuff!

For today’s project we need two things: Some background music for our main game and a sound effect for when the player is grazing viruses.

For the background music we’re going to head to Kevin MacLeod’s website.

MacLeod releases all of his music under a “Free Commercial Use With Attribution” license. That means you can use the music from his website for whatever you want as long as you remember to give him credit in your project.

Also, he’s one of those authors who has a very specific request on how he wants his attribution to show up. So if I want to use “Ouroboros” from his electronica section (and I do) I’ll have to include this in my game:

“Ouroboros” Kevin MacLeod (incompetech.com)
Licensed under Creative Commons: By Attribution 3.0

http://creativecommons.org/licenses/by/3.0/

For sound effects we’re going to go to Wikimedia Commons, a giant database of free sounds and pictures with a wide variety of licenses.

The sound effect I chose can be found here (though I renamed the file wubwub.ogg for my game). You’ll notice that its license is “Public Domain”. That means this particular sound now belongs to everyone and can be freely used for commercial products with no need to give credit to anyone.

Public Domain is a really convenient source of video game art and music, but it can also be difficult to find because it requires an author to completely give up ownership of his work.

Public Domain is most common with works of art that have outlived their copyright. Classic music, ancient artwork, old books and so on. But just because something is several decades old doesn’t mean it’s automatically Public Domain! Laws are constantly changing and copyright now lasts longer than ever so double check the legal status of any “old” media you want to use in your game.

Quick Sound File Edits

MacLeod’s music comes in mp3 format, but for JavaScript purposes it’s better to use the “ogg” format. It has slightly more cross-browser support at the moment. (OOPS! That’s not true. See here)

Also, the sound effect from Wikimedia also has an obnoxious pause at the end of the file that makes it impossible to loop.

A couple minutes with Audacity is enough to convert the mp3 to ogg and trim off the extra space from the sound effect. You can do this yourself or wait for me to post the complete game and borrow my copy of each file.

Can We Start Programming Yet?

The boring legal stuff is out of the way now. Time to write some actual code!

This time around we’re going to be using the Audio class. This lets us build objects for loading and playing sound files.

First things first: we’re going to need two global variables to hold our music and sound effect.

var bgMusic;
var grazeSFX;

Now to put our sounds into those variables. Just like with the image files we want to make sure that the music is properly loaded before we start the actual game.

One big difference is that Audio objects don’t have an onload function that triggers when they fully load. Instead they have an oncanplaythrough function that triggers when enough of the file has loaded that it can be safely played while the rest of the file keeps loading in the background.

With that in mind we can rewrite our resource loading chain to include a new loadGrazeSFX and loadBackgroundMusic function:

function startGame(){
   loadCycleImage();
}

function loadCycleImage(){
   cycleImage = new Image();
   cycleImage.onload=function(){loadVirusImage();};
   cycleImage.src='cycle.png';
}

function loadVirusImage(){
   virusImage = new Image();
   virusImage.onload=function(){loadGrazeSFX();};
   virusImage.src='virus.png';
}

function loadGrazeSFX(){
   grazeSFX = new Audio();
   grazeSFX.oncanplaythrough = function(){ grazeSFX.oncanplaythrough=0; loadBackgroundMusic();};
   grazeSFX.src = 'wubwub.ogg';
   grazeSFX.loop=true;
}

function loadBackgroundMusic(){
   bgMusic = new Audio();
   bgMusic.oncanplaythrough = function(){bgMusic.oncanplaythrough=0;gameLoop();};
   bgMusic.src = 'Ouroboros.ogg';
   bgMusic.loop=true;
}

You probably noticed that there are a couple differences between our audio loading functions and our image loading functions.

When setting up the audio files we set the loop property to true. This means that the music and sound effect will automatically restart after they reaches the end. This is obviously useful for a game that lasts longer than the soundtrack.

Now most of the time you don’t want sound effects to repeat. One gunshot should have one “bang” noise, not a constant loop of “bangbangbangbang….”. But we want our “wubwub” to play for as long as the player is grazing a virus so it actually makes sense to let it loop.

The other big difference is that our oncanplaythrough function deletes itself as soon as it runs. This is because oncanplaythrough can actually trigger more than once. Since we use these triggers to start the game loop multiple triggers would result in multiple game loops and really mess the game up. Having the trigger clear itself after running once prevents this.

One, Two, Three, Hit It!

Now that we have a pair of audio objects we can control them using handy functions like play, pause, and fastSeek. Play and pause do exactly what you’d expect while fastSeek is used for skipping to different points in an audio file. Most importantly for us fastSeek(0) rewinds a sound clip back to it’s start. (OOPS AGAIN! Don’t use fastSeek. See here for more details).

But where should we put these functions?

I personally only want music to play during the main game and to stop as soon as the player dies. This means the most logical place to first play the music is during the transition from the start screen to the end screen:

//Check to see if the user is ready to start the game
function updateStartScreen(){
   if(playerInput.up){
      initializeGame();
      gameState = STATE_RUNNING;
      bgMusic.play();
   }
}

And to get it the music (and sound effects) to stop on a game over we want to include a pause and fastSeek(0) anytime the player dies. That means an update to some of the last few if statements in updateGame:

//Gameover if the player falls off the screen or has hit a virus
if(player.y > SCREEN_HEIGHT){
   bgMusic.pause();
   bgMusic.fastSeek(0);
   grazeSFX.pause();
   grazeSFX.fastSeek(0);
   gameState = STATE_GAMEOVER;
}

if(deathCollision){
   bgMusic.pause();
   bgMusic.fastSeek(0);
   grazeSFX.pause();
   grazeSFX.fastSeek(0);
   gameState = STATE_GAMEOVER;
}

Everytime the player dies the music stops and is rewound back to the start for the next run.This code also stops and rewinds our sound effects… but when did they start in the first place? I guess that’s what we should code next.

Logically we want the sound effect to play as long as the player is grazing and virus and stop as soon as he isn’t. That suggests an update to the graze logic in updateGame:

if(grazeCollision){
   if(currentFrameCount % FRAMES_PER_POINT == Math.floor(FRAMES_PER_POINT/2)){
      currentPoints++;
   }
   if(grazeSFX.paused){
      grazeSFX.play();
   }
}
else{
   if(!grazeSFX.paused){
      grazeSFX.pause();
      grazeSFX.fastSeek(0);
   }
}

And that’s it. The game now has sound and music.

It’s Almost Like A Real Game

It’s amazing how much difference a good soundtrack makes to a game. To be honest the rest of the game actually feels pretty lame compared to MacLeod’s work. But hey, it’s an educational demo. What did you really expect.

Anyways, with that complete all that’s really left are a few more game tweaks and some special effects. Stay tuned!

* A singer that was recently famous for being… good? Bad? Easy to parody? I wasn’t really paying attention but I saw her name on the Internet once.

Gengo Girls #101: It’s Grammar Time!

Gengo Girls #101: It's Grammar Time!

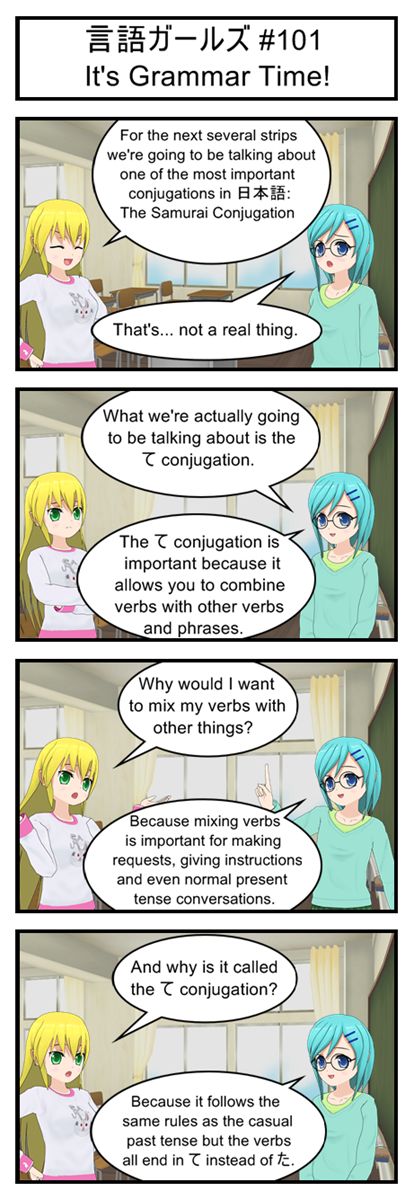
If you want to brush up on your casual past tense conjugations you’ll probably want to look here. But we’re going to spend at least a little time going over the “te” version of those rules so don’t worry if you only kind of remember.

Also, while there may be no such thing as the “Samurai Conjugation” fictional TV samurai and ninja often use extremely old fashioned conjugations such as “gozaru”. While fun to listen to this is something you should never use in real life. It will make you sound like a cartoon character with an embarrassingly bad Old English accent (on top of your default American accent) and it’s hard to imagine a situation where you would want that.

Transcript

言語ガールズ #101

It’s Grammar Time!

Yellow: For the next several strips we’re going to be talking about one of the most important conjugations in 日本語: The Samurai Conjugation.

Blue: That’s… not a real thing.

Blue: What we’re actually going to be talking about is the conjugation.

Blue: The conjugation is important because it allows you to combine verbs with other verbs and phrases.

Yellow: Why would I want to mix my verbs with other things?

Blue: Because mixing verbs is important for making requests, giving instructions and even normal present tense conversations.

Yellow: And why is it called the conjugation?

Blue: Because it follows the same rules as the casual past tense but the verbs all end in instead of .