Gengo Girls #55: Putting The Past Behind Us

Gengo Girls #55: Putting The Past Behind Us

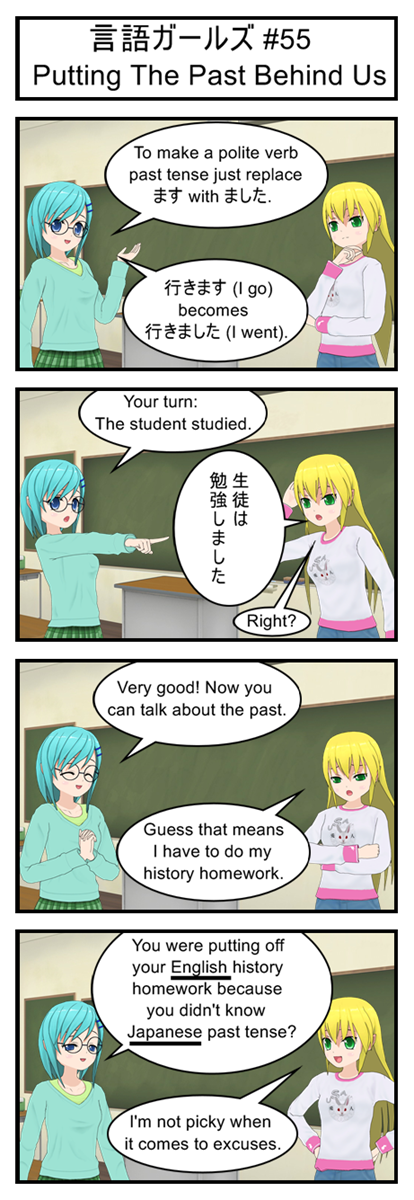
Trying to come up with present tense sample dialogue for the comics up to this point really drove home just how much we use the past tense in everyday conversation. But I guess it makes sense. The past is much bigger than the present so it makes sense a lot of conversations would be about past events.

Anyways, now that we’re learning past tense we can hopefully start working on some more natural sounding dialogue.

Transcript

言語ガールズ #55

Putting The Past Behind Us

Blue: To make a polite verb past tense just replace ます with ました.

Blue: 行きます(I go) becomes 行きました (I went).

Blue: Your turn: The student studied.

Yellow: 生徒は勉強しました

Yellow: Right?

Blue: Very good! Now you can talk about the past.

Yellow: Guess that means I have to do my history homework.

Blue: You were putting off your English history homework because you didn’t know Japanese past tense?

Yellow: I’m not picky when it comes to excuses.

Gengo Girls #54: There’s A Song Stuck In My Head

Gengo Girls #54: There's A Song Stuck In My Head

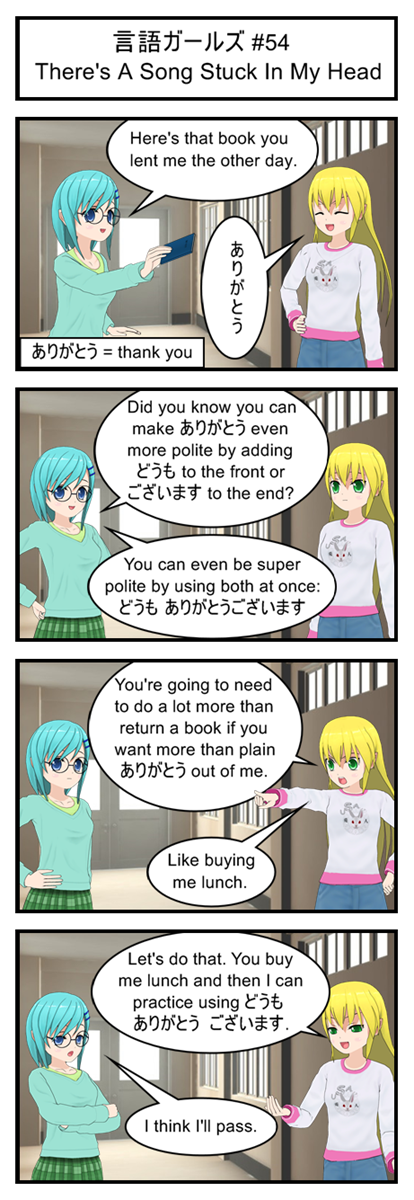
Interesting trivia: In Japanese you can say “thank you” in the past tense by conjugating “gozaimasu”. You then use the past tense “thank you” for favors that people did in the past. Example: If someone gave you a book you would use the present tense “thanks” because it was happening right now. But if someone mailed you a book you would use the past tense “thanks” the next time you saw them because the favor of mailing you the book was also a past tense event.

But wait! We don’t know how to conjugate for the past! I guess we’d better do something about that.

Vocabulary

ありがとう = thank you

どうも = thanks

ございま = extremely formal, ancient verb. Usually shows up in set phrases.

Transcript

言語ガールズ #54

There’s A Song Stuck In My Head

Blue: Here’s that book you lent me the other day.

Yellow: ありがとう

Blue: Did you know you can make ありがとう even more polite by adding どうも to the front or ございます to the end?

Blue: You can even be super polite by using both at once: どうも ありがとうございます

Yellow: You’re going to need to do a lot more than return a book if you want more than plain ありがとう out of me.

Yellow: Like buying me lunch.

Yellow: Let’s do that. You buy me lunch and then I can practice using どうも ありがとうございます.

Blue: I think I’ll pass.

Gengo Girls #53: Pleasantly Polite

Gengo Girls #53: Pleasantly Polite

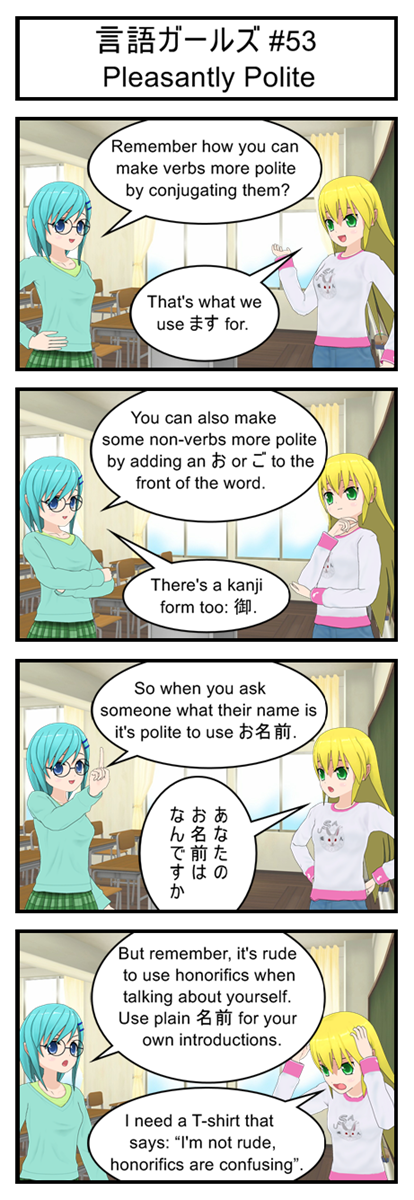
There are a few set phrases and words that come with “o” and “go” built right in. Things like “onegai”, “okyakusan”, “onamae ha nan desu ka” and so on. You can find these in just about any beginning level textbook or tourist guidebook and memorizing them would be a good way to spend an evening or two if you ever decide to actually go to Japan.

Outside of these set phrases it can be hard to figuring out when you should and shouldn’t add “o” or “go” to words. It’s something you just have to develop an instinct for by listening to lots of real Japanese. But don’t worry too much; as long as you remember to use polite verbs I imagine most Japanese will think you’re doing pretty good for a foreigner.

Vocabulary

= or = Honorific word prefix

Transcript

言語ガールズ #53

Pleasantly Polite

Blue: Remember how you can make verbs more polite by conjugating them?

Yellow: That’s what we use ます for.

Blue: Well, you can also make some non-verbs more polite by adding an or to the front of the word.

Blue: There’s a kanji form too: .

Blue: So when you ask someone what their name is it’s polite to use お名前.

Yellow: あなたのお名前はなんですか

Blue: But remember, it’s rude to use honorifics when talking about yourself. Use plain 名前 for your own introductions.

Yellow: I need a T-shirt that says: “I’m not rude, honorifics are confusing”.

Gengo Girls #52: Politely Pleasant

Gengo Girls #52: Politely Pleasant

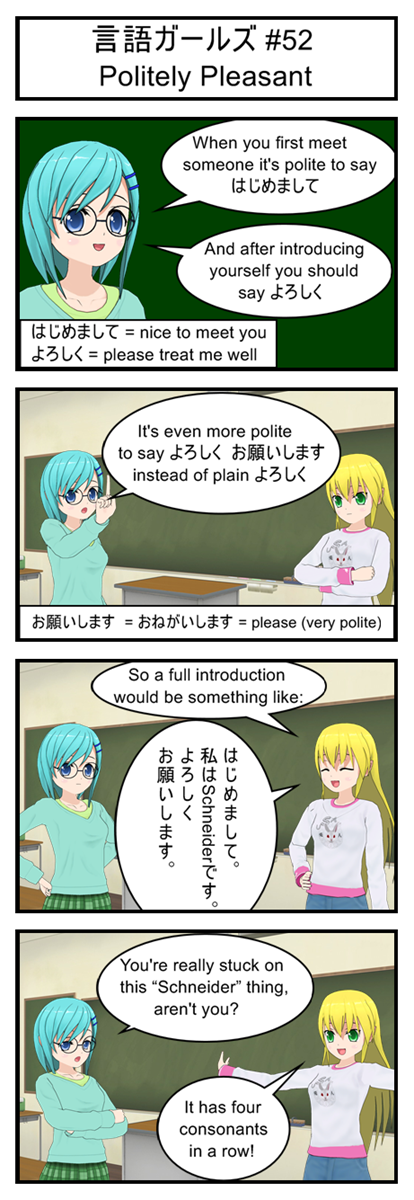
お願いします is actually two words, お願い (request) and します (polite form of “suru”, to do or to make). It literally translates as “I am humbly making a request” and is a fairly formal way to ask for favors. This is another common phrase that sticks out in most Japanese media, so see if you can find it in your favorite show, book, game or comic.

Vocabulary

はじめまして = nice to meet you

よろしく = please treat me well;

please take care of things

お願いします = おねがいします = please (very polite)

Transcript

言語ガールズ #52

Politely Pleasant

Blue: When you first meet someone it’s polite to say はじめまして

Blue: And after introducing yourself you should say よろしく

Blue: It’s even more polite to say よろしくお願いします instead of plain よろしく

Yellow: So a full introduction would be something like:

Yellow: はじめまして。私はSchneiderです。よろしくお願いします。

Blue: You’re really stuck on this “Schneider” thing, aren’t you?

Yellow: It has four consonants in a row!

Let’s Program A JavaScript Game 13: Some Much Needed Polish

This Is Only The Beginning…

Our code so far makes a good proof of concept. We’ve shown that we can indeed move the player around, land on platforms, crash into enemies and switch between different game states. In other words, we can safely say that it is possible to build our game using JavaScript.

But our code also has a lot of problems, glitches and loose ends. So today we’re going to be cleaning those up and starting the transition from “Semi-functional Prototype” to “Product You Wouldn’t Be Embarrassed To Show Your Friends”.

As part of this we’re going to be rewriting a TON of code. But don’t worry, I’ll post a link to a live version of code at the end of this article so if you have trouble following my description of what I’m doing you can just grab the complete code and take a look for yourself.

Wait! I’m Not Ready Yet

Here’s an interesting little fact for you: When you use JavaScript to assign an image to a variable the code doesn’t stop and wait, it keeps running and loads the image in the background. That means that your code might accidentally try to use an image that hasn’t finished loading yet, which is bad.

Now in a simple game with just a couple small images this probably isn’t a problem. But if you have a big background image or lots and lots of tiles and enemies and animations you might end up with a game that tries to run while 90% of its graphics are still being loaded.

To avoid this problem we’re going to have to tell our code specifically to not run any actual game logic until after the images are finished loading. An easy way to do this is with the onload property of the JavaScript image object. This lets you attach a function to an image and have that function run once the image finishes loading.

Using this we can chain together our images like this:

var cycleImage = new Image();
var virusImage = new Image();

function canvasTest(){
   loadCycleImage();
}

function loadCycleImage(){
   cycleImage = new Image();
   cycleImage.onload=function(){loadVirusImage();};
   cycleImage.src='cycle.png';
}

function loadVirusImage(){
   virusImage = new Image();
   virusImage.onload=function(){gameLoop();};
   virusImage.src='virus.png';
}

Now canvasTest doesn’t immediately start the game but instead calls loadCycleImage. loadCycleImage loads cycle.png and then calls loadVirusImage, which load virus.png and then starts the game loop.

Now obviously the more images you have the longer this chain gets, which introduces two problems: First, a long chain is hard to maintain by hand. Second, a large chain leaves your game “frozen” for several minutes since nothing gets drawn to the screen until the chain has completed.

You can solve the code maintenance problem by writing a new recursive function that accepts an entire list of image objects and object URLs. It sets up the first image to loading and when it’s done it then calls itself with the rest of the lest. When the list is finally empty it calls gameLoop() instead. This lets you have one function and one loop instead of having to hand type a hundred different loading functions that chain into each other.

The “frozen” game problem is easy too. Just write some sort of drawResourceLoadingScreen screen function that displays a helpful message like “Now loading image X out of 45”. Call that method at the beginning of every step of the chain so the user knows why the game hasn’t started yet.

But since I’m only loading two images I’ll leave both of these tasks as exercises for the reader.

Initialization: One of Top Ten Most Computer Programmy Word Out There

Let’s continue with this theme of “Things we shouldn’t just leave at the top of our script” and talk about initializing game objects.

Before our games starts we obviously need to generate the player’s position, the starting platforms and the starting viruses. Currently we do that all up at the top of code.

But this means that our game only gets set up once, when the player loads the page. This is the reason why the player can get stuck inside a virus after a game over. Once the virus is in play it stays in play no matter how many times the player dies and respawns.

It would be much better if the game was reset every time the player switched from the start screen to the main game. Then instead of getting stuck inside a virus the player would get a fresh virus-free start when they died.

This is an easy problem to refactor. We just grab the setup code from the top of the script and stuff it into a function named initializeGame. Then we call initialize game right before we switch to the main game state.

The only possible trick is that it’s important to remember that global variables like players, platforms and viruses need to stay at the top of the script so our game functions can share them. We’re only moving the code that sets their values into a function, the declarations can stay put.

//Put the player in the starting location and generate the
//first platforms and enemies
function initializeGame(){
   //Reset player location
   player.x = 100;
   player.y = 100;
   player.yVel = 0;
   player.onGround = false;

   //Generate starting platforms into global array
   //Uses global variables to control platfrom generation
   for(i = 0; i < maxPlatformCount; i++){
      var newPlatform = new Object();
      newPlatform.x = i * (maxPlatformLength + maxPlatformGap);
      newPlatform.y = 350;
      newPlatform.width = maxPlatformLength;
      newPlatform.height = 20;
      platforms[i] = newPlatform;
   }

   //Generate starting viruses into global array (all off screen at first)
   //Uses global variables to control virus generation
   for(i = 0; i < maxVirusCount; i++){
      var newVirus = new Object();
      newVirus.x = virusStartingOffset + i * (virusWidth + maxVirusGap);
      newVirus.y = 200;
      newVirus.width = virusWidth;
      newVirus.height = virusHeight;
      viruses[i] = newVirus;
   }
}

And then we just have to slip a reference to this code into our startScreenUpdate function:

//Check to see if the user is ready to start the game
function updateStartScreen(){
   if(playerInput.up){
      initializeGame();
      gameState = STATE_RUNNING;
   }
}

Side note: Initializing a game can take a long time, especially if you have to load new graphics or run an expensive algorithm. In these scenarios it’s considered polite to put up a “Loading” screen so the player knows the game isn’t stuck.

Since we’re only initializing a few dozen values this function will run too fast to notice, making a loading screen pointless. But if you were making a more complex game you might want to build a simple “Initializing next stage” screen drawing function and add it right before the initialize call.

Fixing A Few Minor Issues

That’s it for our big two problems, but as long as we’re disecting code let’s fix a few tiny bugs I noticed.

First off, the player shouldn’t be allowed to move off screen. So let’s add this code somewhere inside updateGame

//Keep the 75px wide player inside the bound of the 600px screen
if(player.x<0){
   player.x=0;
}

if(player.x+75>600){
   player.x=600-75;
}

Good programmers will notice that these functions use a crazy amount of magic numbers. It would probably be a good idea to replace them by constant variables like PLAYER_WIDTH and SCREEN_WIDTH.

Another quick issue: The player can currently do an air jump by falling off a platform and then hitting up. This is because we only set “onGround” to false when the player jumps. So let’s update our code to set that to false whenever the player starts moving downwards by changing this:

player.y += player.yVel;
player.yVel +=1;
if(player.yVel>=15){
   player.yVel=15;
}

into this:

player.y += player.yVel;
player.yVel +=1;
//Assume player is no longer on groud. Platfrom collision later in loop can change this
player.onGround=false;
if(player.yVel>=15){
   player.yVel=15;
}

The positioning of this code is very important! It comes AFTER the player tries to jump but BEFORE the platform collision code that sets onGround to true.

This means that if the player was on a platform at the end of last frame he can still jump because the onGround false code hasn’t kicked in yet.

It also means that if the player stays on a platform for the entire loop the onGround false code will be immediately reversed by the platform checking code that comes after it, so the player can still jump next frame even though onGround was temporarily false.

The only way for onGround to get set to false and stay false is if the player isn’t on a platform, which is exactly what we wanted. In fact, this works so well that you can remove the onGround=false from the up key handling code if you want. It’s redundant now.

As long as we’re changing things up, let’s have all viruses spawn at y=300 instead of y=200. This puts them at about the same level as the player and makes jumping over them easier during testing.

Finally, having to click a button just to start the game doesn’t make a lot of sense now that we have an actual Start Screen. So let’s rename canvasTest to startGame and link it to the loading of the page instead of a button press.

<body onload="startGame()" onkeydown="doKeyDown(event);" onkeyup="doKeyUp(event);">
   <canvas id="gameCanvas" width=600 height=400 style="border:1px solid black;"></canvas>
</body>

The Code So Far

Here it is. Play it. Download it. Study it.

I Want To Be A Winner

With the game a little bit cleaner than before we’re all set to add in a scoring system and a win condition. Then we’ll be able to actually beat our game instead of just jumping over the same boring obstacles again and again until we get bored.
Gengo Girls #51: AAAA

Gengo Girls #51: AAAA

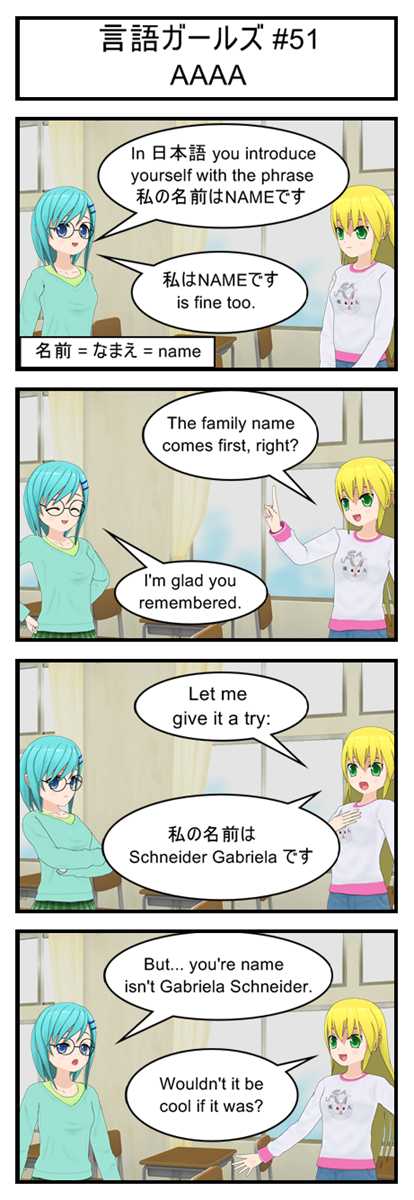
The Japanese word “namae” sounds and awful lot like the English word “name”, which might make you think that one language borrowed it from the other (happens all the time). But in this case no borrowing happened! It’s just a bizarre coincidence that these two different, unrelated languages developed similar words for the idea of “name”.

Also, Gabriela and Schneider are both fairly common German names. This comic is not a reference to any particular Gabriela Schneider. Although in retrospect finding a way to work some obscure movie or historical reference into this strip probably would have been funnier than just choosing a random name…

Vocabulary

名前 = なまえ = name

Transcript

言語ガールズ #51

AAAA

Blue: In 日本語 you introduce yourself with the phrase 私の名前はNAMEです

Blue: 私はNAMEです is fine too.

Yellow: The family name comes first, right?

Blue: I’m glad you remembered.

Yellow: Let me give it a try:

Yellow: 私の名前は Schneider Gabriela

Blue: But… you’re name isn’t Gabriela Schneider.

Yellow: Wouldn’t it be cool if it was?

ComiPo! “Comic Maker” Review

Summary: ComiPo! makes it easy for non-artistic people like me to put together decent looking comics with a school or office theme. On the other hand its limited poses and outfits might be frustrating to some artists. So if you’re looking for a tool to help you illustrate a high school drama or workplace comedy ComiPo! might be just what you need, but if you’re trying to make a fantasy battle comic you’re better of just learning how to draw.

How ComiPo! Helps Me

I can’t draw. I can barely doodle. But I’m a big fan of gag comic strips and often wished I could make my own. So stumbling across ComiPo! was pretty exciting and I immediately downloaded the free trial to see what it could do. Thirty minutes later I had the prototype for Gengo Girls, my Japanese educational comic.

The demo seemed promising so I bought the full version of ComiPo! and here I am four months later with 50 complete comics.

The Good

ComiPo! is incredibly easy to use and basically idiot-proof.

You create new characters by picking and choosing facial features, hair styles and colors from a set of drop down menus. Everything matches up pretty well so your character is almost guaranteed to turn out great.

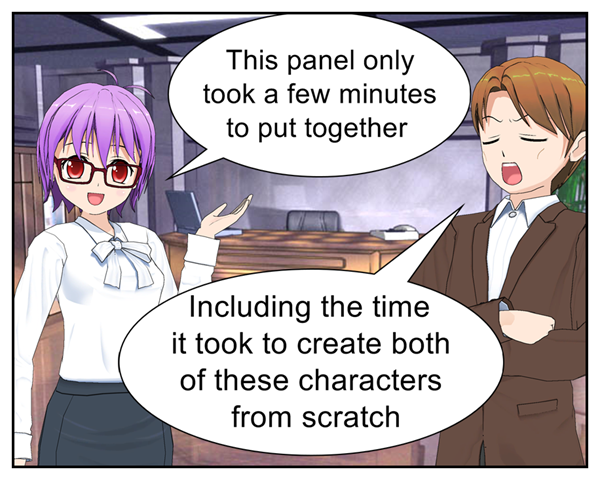
Then you build a comic by choosing a comic layout and dragging and dropping items into each comic panel. If you want two characters talking in the park you just grab the park background and drop it in your panel, then grab the two characters you want and drop them in too. You can rotate, re-size and re-position them however you want.

comipo_good

This is a hundred times better than anything I could have actually drawn

You pose characters by choosing from a list of over a hundred different options. Each pose is represented by a stick figure that shows you exactly what you’re about to get, so you don’t have to remember a lot of complicated names like “Running_3” or “Sitting_2”. Just click the image that’s closest to what you want your character to do and suddenly your character is running or singing or waving to a friend.

The same simple system works for facial expressions. You get a big list of different faces to look at and you just click on the one you want your character to have in the current panel.

Then from there you just drag and drop in some text bubbles and type in your dialogue. Maybe drag and drop in some props or special effects. Then you’re done. That’s all it took.

The Not So Good

Remember how I said ComiPo! was idiot-proof? Well, that’s mostly because they don’t let you do anything that might ruin your comic.

The biggest issue is that you can’t design your own character poses. You have to use the presets. That means it can be difficult to give characters unique body language and it’s more or less impossible to set up an interesting fight scene.

Now that’s not really a problem if you mostly plan on having characters walking around and talking to each other with only the occasional shove or punch at dramatic moments. And as a non-artist I wouldn’t want to try and manually pose a character anyways. But if you have very specific dreams of making characters dance or fight or wrestle you’re going to need something more flexible than ComiPo!.

Similarly you’re stuck using the school and office outfits that come with the software. You can’t build your own character models or design your own clothes. Then again, if you know how to build and pose 3D models you probably don’t need ComiPo! in the first place.

Limited poses and outfits mean that certain stories just won't work.

Limited poses and outfits mean that certain stories just won’t work.

There’s also an issue with the speech bubbles that kind of bugs me: They don’t have any sort of automatic text centering, so you have to manually indent and shift every line to make each bubble look good. You could probably get around this by using ComiPo! to make your comic and then adding in the text with a different tool, but it would have been nice if ComiPo! could have done it all on it’s own. It took a while but a recent update finally added text alignment tools. Making natural looking speech bubbles is pretty easy now.

Final Recommendation: ComiPo! will not make you an artist, but it does let you easily build pleasantly generic comics. From there it’s up to you and your dialogue to make a story or a gag that people will want to read. So if you’re a writer who wants to try their hand at comics you might as well download the free demo* and see what ComiPo! has to offer.

* The free demo lets you see how the software works but limits you to half-page comics and only has a couple of different character and background options. The full version has both male and female characters, tons of style options, hundreds of backgrounds and the ability to create full-page comics.

Gengo Girls #50: Mine! Mine! Mine!

Gengo Girls #50: Mine! Mine! Mine!

“anata” is kind of weird. It has a kanji symbol but it usually gets written using hiragana instead. I have no idea why. That’s just how it’s done.

Vocabulary

生徒 = せいと = student

貴方 = あなた = you (polite, usually written in hiragana)

Transcript

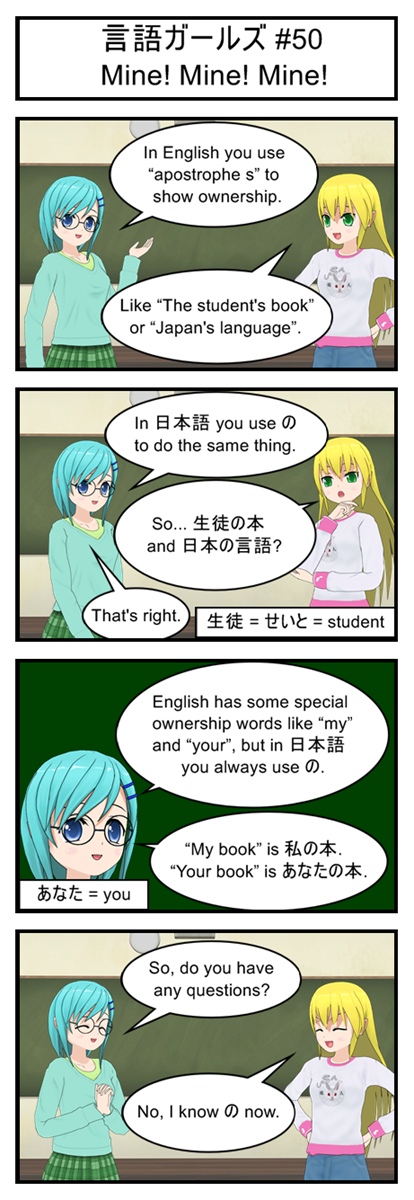
言語ガールズ #50

Mine! Mine! Mine!

Blue: In English you use “apostrophe s” to show ownership.

Yellow: Like “The student’s book” or “Japan’s language”.

Blue: In 日本語 you use to do the same thing.

Yellow: So… 生徒の本 and 日本の言語?

Blue: That’s right.

Blue: English has some special ownership words like “my” and “your”, but in 日本語 you always use .

Blue: “My book” is 私の本. “Your book” is あなたの本.

Blue: So, do you have any questions?

Yellow: No. I know now.

Gengo Girls #49: Inexpert Opinion

Gengo Girls #49: Inexpert Opinion

Remember, the marks the object of the sentence. In this case it marks exactly what is being seen.

We also have some good examples of implied sentence subjects here. In fact, none of the three Japanese sentences in this strip had an explicit subject.

In the first sentence it’s obviously the speaker who has just seen something because you don’t generally start conversations by telling other people what they see. (You might ask them if they saw something, but you wouldn’t just tell them.) There was no need to start with something like “Watashi wa”.

Then from there it’s obvious that the other two sentences are focused on the car that got brought up in the first sentence, so there’s no reason to explicitly mention it again and again.

Vocabulary

かっこいい = cool, stylish

= くるま = car

Transcript

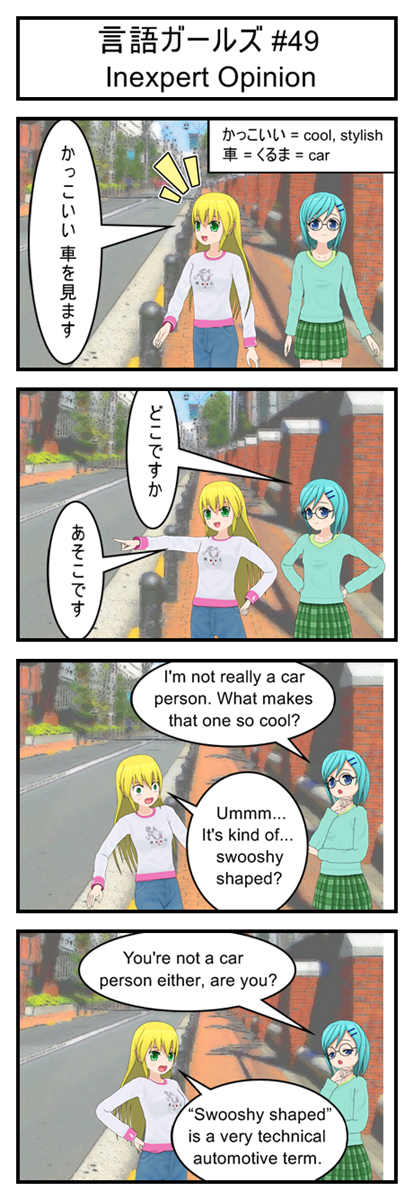
言語ガールズ #49

Inexpert Opinion

Yellow: かっこいい 車を見ます

Blue: どこですか

Yellow: あそこです

Blue: I’m not really a car person. What makes that one so cool?

Yellow: Umm…. It’s kind of… swooshy shaped?

Blue: You’re not a car person either, are you?

Yellow: “Swooshy shaped” is a very technical automotive term.

Gengo Girls #48: Co-dependence

Gengo Girls #48: Co-dependence

Here’s another set of super common words to help round out your vocabulary. They’re short and easy to understand too so see if you can pick them out of your favorite Japanese media.

The difference between “soko” and “asoko” is a lot like the difference between “sore” and “are”. When talking about a place far from you but close to your listener you use “soko”. When talking about a place far away from both of you you use “asoko”. That general guidline should get you through most situations until you start to pick up a real instinct for which word to use when.

Vocabulary

ここ = here

そこ = there

あそこ = way over there

どこ = where (question word)

Transcript

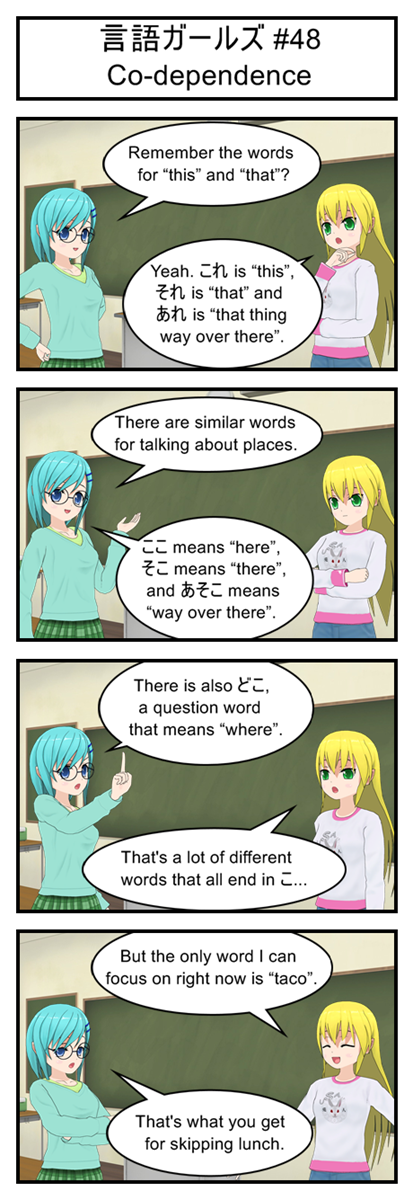
言語ガールズ #48

Co-dependence

Blue: Remember the words for “this” and “that”?

Yellow: Yeah. これ is “this”, それ is “that” and あれ is “that thing way over there”.

Blue: There are similar words for talking about places.

Blue: ここ means “here”, そこ means “there”, and あそこ means “way over there”.

Blue: There is also どこ, a question word which means “where”.

Yellow: That’s a lot of different words that all end in

Yellow: But the only word I can focus on right now is “taco”.

Blue: That’s what you get for skipping lunch.