Let’s Program A JavaScript Game 12: Making A STATEment

I’m Pretty Sure This Is What That Word Means…

There are two common definitions of “Game State”. At least two that I’ve heard. Who knows whether or not the big time developers use these. But my blog, my definitions. So… Game State:

The first definition is: A complete description of exactly what is going on in the game including the value of every variable. Very useful for creating save files or debugging glitches.

The second definition is: A high level description of what the game is currently doing, such as “paused”, “saving”, “in combat” or “showing world map”.

Our big focus today is going to be on the second definition, which is going to help us add a “Start Screen” and “Game Over Screen” to our current code. Or in other words, we are going to change from a game that only has one state (running) to a game that has three states (start, game over, main game).

But it’s not enough to have different game states. You also need a plan for switching between those game states. How does the player get to the “game over” state? Once he is in the “game over” state, how can he get back into the “main game” state? That sort of stuff.

This can all be described pretty well with a quick flowchart. Here’s an example of the four game states we want for Defrag Cycle and how they are related (although we’re only building three of them today:
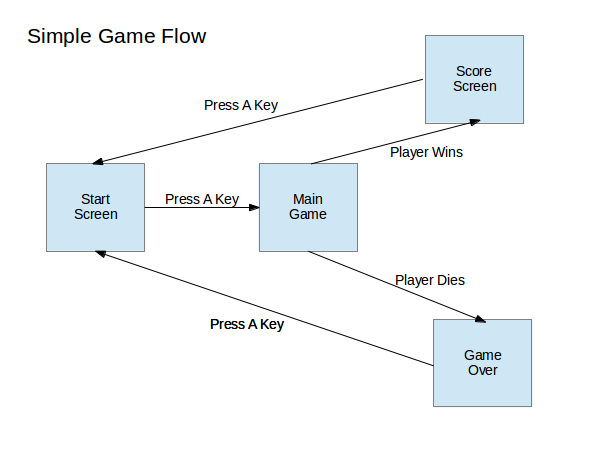
Everybody Loves Flowcharts!

Everybody Loves Flowcharts!

Pretty simple, right?

Of course, not all games are so straightforward. For example, here is a sample state chart for a generic RPG:
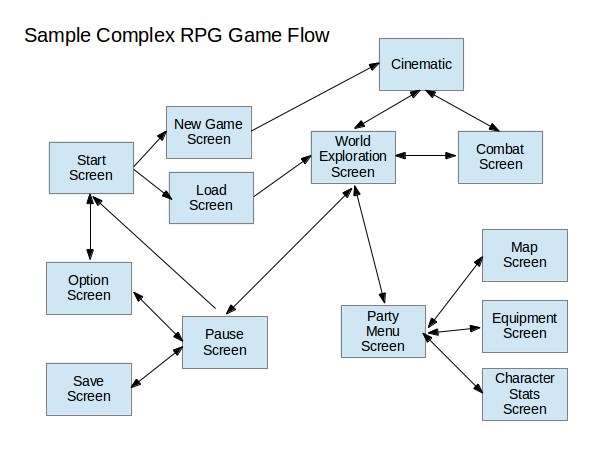
Whoops, looks like I forget to add a “game over” state, so let's just pretend this chart is for one of those games where losing a fight just sends you to the nearest hospital/temple/inn.

Whoops, looks like I forget to add a “game over” state, so let’s just pretend this chart is for one of those games where losing a fight just sends you to the nearest hospital/temple/inn.

Bonus Activity: Take your favorite game and try to draw a game state flowchart for it. Pay special attention to the transitions between states. Try to figure out which transitions go both ways (you can go from main game to pause screen and pause screen to main game) and which are one way (you can go from main game to game over, but it’s a one way trip).

Simple State Switching

First up we’re going to need a global variable for keeping tack of what state the game is in, along with some predictable values for the states themselves. So let’s just stick this somewhere near the top of our script along with the rest of our global variables and setup code:

//Game State "constants" (Javascript does not support true constants)
var STATE_RUNNING = 1;
var STATE_START_SCREEN = 2;
var STATE_GAMEOVER = 3;
var STATE_WIN = 4;

//Current Game State. Start game in "Start Screen" state
var gameState = STATE_START_SCREEN;

Now to put those states to good use. Update your gameLoop function like this:

//The main game loop
function gameLoop(){
   var startTime = Date.now();
   
   if(gameState == STATE_START_SCREEN){
      updateStartScreen();
      drawStartScreen();
   }
   else if(gameState == STATE_RUNNING){
      updateGame();
      drawScreen();
   }
   else if(gameState == STATE_GAMEOVER){
      updateGameover();
      drawGameoverScreen();
   }
   else if(gameState == STATE_WIN){
      // We'll implement this later
   }
   else{ //Fix the game if we somehow end up with an invalid state
      gameState = STATE_START_SCREEN;
   }

   var elapsedTime = Date.now()-startTime;
   
   if(elapsedTime>=50){ //Code took too long, run again immediately
      gameLoop();
   }
   else{ //Code didn't take long enough. Wait before running it again
      setTimeout("gameLoop()",50-elapsedTime);
   }
}

Can you see what we’re doing? The main gameLoop logic is the same as always. Make a note of what time it is, do some useful work, see how much time has passed and then decide when to run the next gameLoop. The big difference is that we now use the gameState variable to decide what kind of useful work we do.

When the state is STATE_RUNNING we just run the same old updateGame and drawScreen logic that we’ve already written. No need to make any changes here, unless you want to give them better function names like updateMainGame or updateRunningGame or something. I’m not going to mess with that just right now.

When the state is instead set to the start screen or the gameover screen we skip the game updates and instead run new functions specifically designed for those states. Functions that we haven’t written yet, but will in just a second.

As a side note, state switching like this can be an easy way to do pause screens. The main game update function only gets called during STATE_RUNNING, so by switching to a different state you can basically freeze the game world by preventing enemy and player position variables from updating.

New Code For Our New States

So… what should a start screen and an gameover screen actually do?

It seems to me a simple online game startscreen needs to do three things:

  1. Show the game’s title
  2. Explain how to play
  3. Explain how to move from the start screen to the main game

Similarly a gameover screen has two jobs:

  1. Show a gameover message
  2. Explain how to move from the gameover screen back to the start screen

In a real game we would hire a real artist to design some attractive screens for us. They would probably choose some lovely fonts and throw together a cool background filled with lasers and explosions.

But this is a game programming tutorial, not a game design tutorial, so I’m just going to throw together some text and call it a day.

//Draw the start screen with game title and instructions
function drawStartScreen(){
   var canvas = document.getElementById('gameCanvas');
   var context = canvas.getContext('2d');

   //Draw background
   context.fillStyle = '#dcdcdc';
   context.fillRect(0,0,600,400);

   //Draw black text
   context.fillStyle = '#000000';
   context.font = 'bold 70px impact';
   context.fillText("DEFRAG CYCLE", 20, 150);
   context.font = '20px impact';
   context.fillText("- Defrag the hard drive by avoiding pits and viruses", 20, 200);
   context.fillText("- When the counter reaches 1000 GB you win!", 20, 230);
   context.fillText("- LEFT and RIGHT arrow keys to move", 20, 260);
   context.fillText("- UP arrow key to jump", 20, 290);
   context.fillText("- Graze viruses to speed up the defrag counter", 20, 320);
   context.fillText("- Press UP arrow key to start game", 20, 350);
}

//Draw the gameover screen
function drawGameoverScreen(){
   var canvas = document.getElementById('gameCanvas');
   var context = canvas.getContext('2d');

   //Draw background
   context.fillStyle = '#000000';
   context.fillRect(0,0,600,400);

   //Draw green text
   context.fillStyle = '#00CC00';
   context.font = 'bold 80px impact';
   context.fillText("GAME OVER", 40, 200);
   context.font = '30px impact';
   context.fillText("Press UP arrow to retry", 120, 250);
}

Now all that’s left to do is fill in those two new update methods, which is really easy since all they do is check for the up key and then switch states (remember the flowchart):

//Check to see if the user is ready to start the game
function updateStartScreen(){
   if(playerInput.up){
      gameState = STATE_RUNNING;
   }
}

//Check to see if the user is ready to restart the game
function updateGameover(){
   if(playerInput.up){
      gameState = STATE_START_SCREEN;
   }
}

And with that the game now starts on the start screen and can be transitioned to the main game by tapping up. We’ve also built in the link between the gameover screen and then start screen. All that’s left is to link in the main game to the gameover screen.

Once again this is pretty easy. We already have a deathCollision flag that’s being set everytime we hit a virus and we already check to see if the player has fallen off the bottom of the screen. All we have to do is find inside the main updateGame function (it’s right at the bottom):

//Reset the player to default location when they fall off the screen
if(player.y > 400){
   player.x = 100;
   player.y = 100;
}

And change it to this:

//Gameover if the player falls of the screen or has hit a virus
if(player.y > 400){
   player.x = 100;
   player.y = 100;
   gameState = STATE_GAMEOVER;
}

if(deathCollision){
   gameState = STATE_GAMEOVER;
}

And now the game can flow between all three different states. Just ram yourself into a virus or fall into a pit and watch that transition to gameover.

This Is Actually Pretty Terrible

So… those of you who tried out your updated code probably noticed that it’s a little rough around the edges. Actually, that’s an understatement. These edges are downright serrated:

  • You can see the cycle jerk back into default position after falling off the screen but right before the game over message
  • Even if you just tap the up arrow key it will usually skip through both the gameover and start screen too fast to see
  • If you hit a virus you will immediately hit it again after you restart the game

This is obviously not anywhere near playable. But our goal was just to get the state switching working and that we have done!

Next time around we’ll start cleaning up some of these issues in preparation for adding the scoring system and a way to actually win.
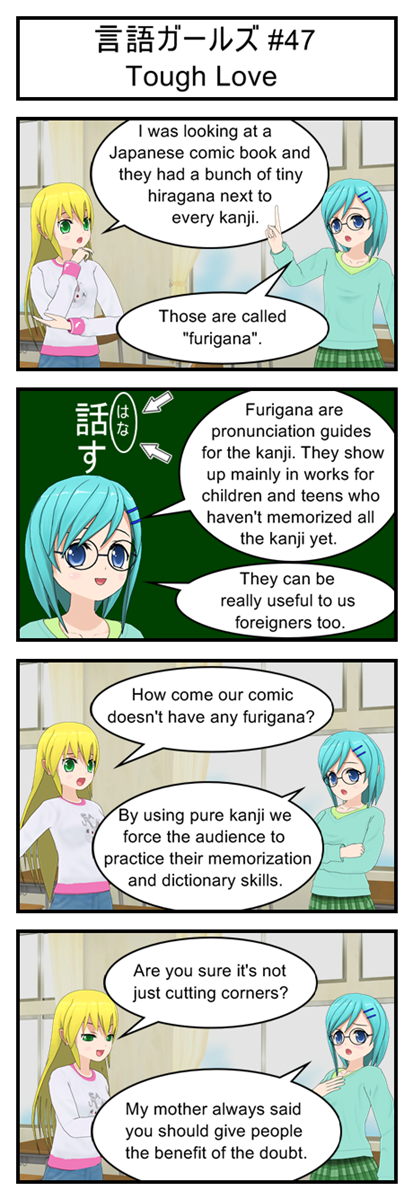
Gengo Girls #47: Tough Love

Gengo Girls #47: Tough Love

Have you noticed that after every comic there’s a transcript? And have you noticed that you can copy and paste kanji from this transcript? So if you can’t remember a word I’m using you can always just paste it into your favorite electronic dictionary to get the pronunciation and definition.

Although in the long run it’s probably better for you to do your best to memorize words when I first introduce them. And when you do forget a kanji it’s probably best if you try to look it up by radical or stroke-count before taking the easy way out and just copy pasting.

Transcript

言語ガールズ #47

Tough Love

Yellow: I was looking at a Japanese comic book and they had a bunch of tiny hiragana next to every kanji.

Blue: Those are called “furigana”.

Blue: Furigana are pronunciation guides for the kanji. They show up mainly in works for children and teens who haven’t memorized all the kanji yet.

Blue: They can be really useful to us foreigners too.

Yellow: How come our comic doesn’t have any furigana?

Blue: By using pure kanji we force the audience to practice their memorization and dictionary skills.

Yellow: Are you sure it’s not just cutting corners?

Blue: My mother always said you should give people the benefit of the doubt.

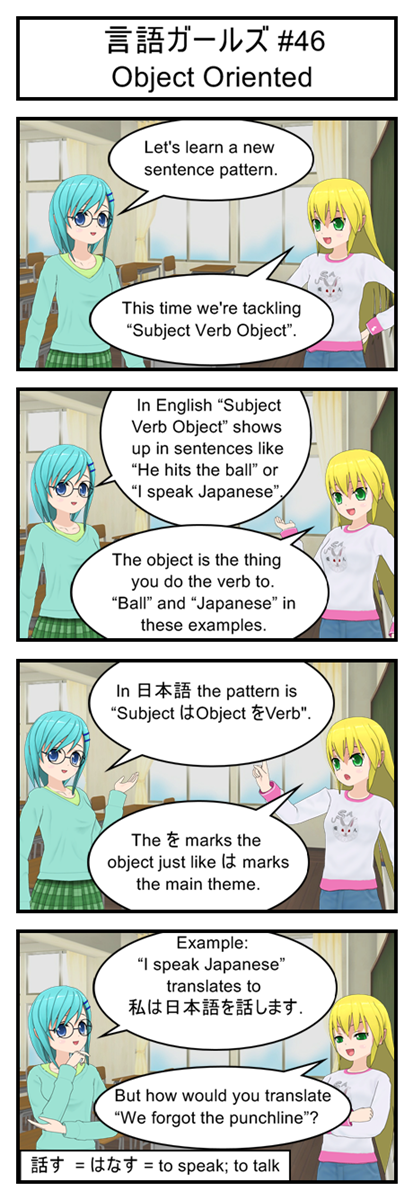
Gengo Girls #46: Object Oriented

Gengo Girls #46: Object Oriented

Objects really open up the sorts of sentences you can say. Now instead of just cryptically mumbling “I read” we can tell people exactly what we read. Instead of announcing “I see” we can tell people what we see. This is a definite upgrade!

Vocabulary

話す = はなす = to speak; to talk

Transcript

言語ガールズ #46

Object Oriented

Blue: Let’s learn a new sentence pattern.

Yellow: This time we’re tackling “Subject Verb Object”.

Blue: In English “Subject Verb Object” shows up in sentences like “He hits the ball” or “I speak Japanese”.

Yellow: The object is the thing you do the verb to. “Ball” and “Japanese” in these examples.

Blue: In 日本語 the pattern is “Subject Object Verb”.

Yellow: The marks the object just like marks the main theme.

Blue: Example: “I speak Japanese” translates to 私は日本語を話します.

Yellow: But how would you translate “We forgot the punchline”?

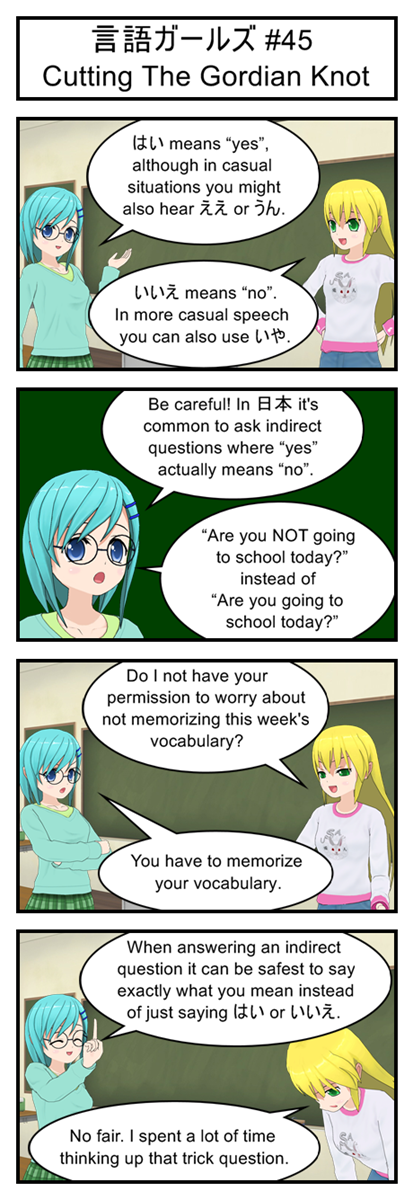
Gengo Girls #45: Cutting The Gordian Knot

Gengo Girls #45: Cutting The Gordian Knot

In English we use “yes” and “no” in a very flexible way. If someone asks “Are you not going to school?” we would interpret a “yes” to mean “Actually, yes, I AM going to school”.

But in Japanese “yes” and “no” are more literal. If someone asks “Are you not going to school?” an answer of “yes” means, “Yes, you are correct. I am NOT going to school.”

And since the Japanese love to pad their questions with polite modifiers that switch around the meaning of yes and no you can see why it’s a good idea to give a full answer to any question that you didn’t 100% fully understand. A native speaker might misinterpret what you mean by “yes” or “no” but there’s no room for confusion when you say “Yes, I want some ice cream”.

Vocabulary

はい = yes (polite)

ええ = yes (casual)

うん = yes (casual)

いいえ = no (polite)

いや = no (casual)

Transcript

言語ガールズ #45

Cutting The Gordian Knot

Blue: はい means “yes”, although in casual situations you might also hear ええ or うん.

Yellow: いいえ means “no”. In more casual speech you can also use いや.

Blue: Be careful! In 日本 it’s common to ask indirect questions where “yes” actually means “no”.

Blue: “Are you NOT going to school today?” instead of “Are you going to school today?”

Yellow: Do I not have your permission to worry about not memorizing this week’s vocabulary?

Blue: You have to memorize your vocabulary.

Blue: When answering an indirect question it can be safest to say exactly what you mean instead of just saying はい or いいえ.

Yellow: No fair. I spent a lot of time thinking up that trick question.

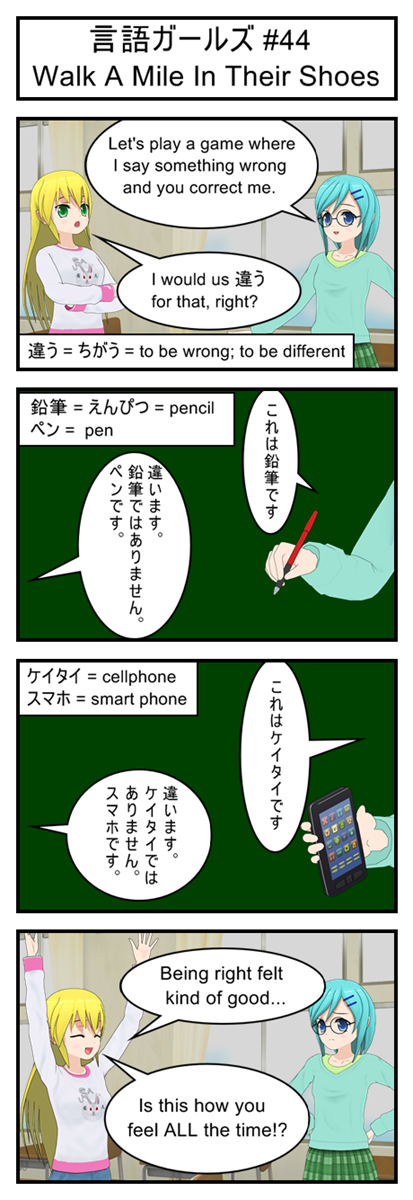
Gengo Girls #44: Walk A Mile In Their Shoes

Gengo Girls #44: Walk A Mile In Their Shoes

Lots of katakana today, so if you only memorized the hirogana you might need to reference a chart to memorize today’s vocabulary.

There’s probably some interesting cultural background to the fact that the Japanese use the same word (chigau) to mean both “to be different” and “to be wrong”, but I have no idea what. Was it considered more polite to tell people they were “different” instead of bluntly telling them they were “wrong”? Or was being different considered to be wrong? Or maybe it’s just the fact that being wrong means to say something that is different from the truth. Who knows? Not me.

Vocabulary

違う = ちがう = to be wrong; to be different

鉛筆 = えんぴつ = pencil

ペン = pen

ケイタイ = cellphone

スマホ = smart phone

Transcript

言語ガールズ #44

Walk A Mile In Their Shoes

Blue: Let’s play a game where I say something wrong and you correct me.

Yellow: I would us 違う for that, right?

Blue: これは鉛筆です

Yellow: 違います。鉛筆ではありません。ペンです。

Blue: これはケイタイです

Yellow: 違います。ケイタイではありません。スマホです。

Yellow: Being right felt kind of good…

Yellow: Is this how you feel ALL the time!?

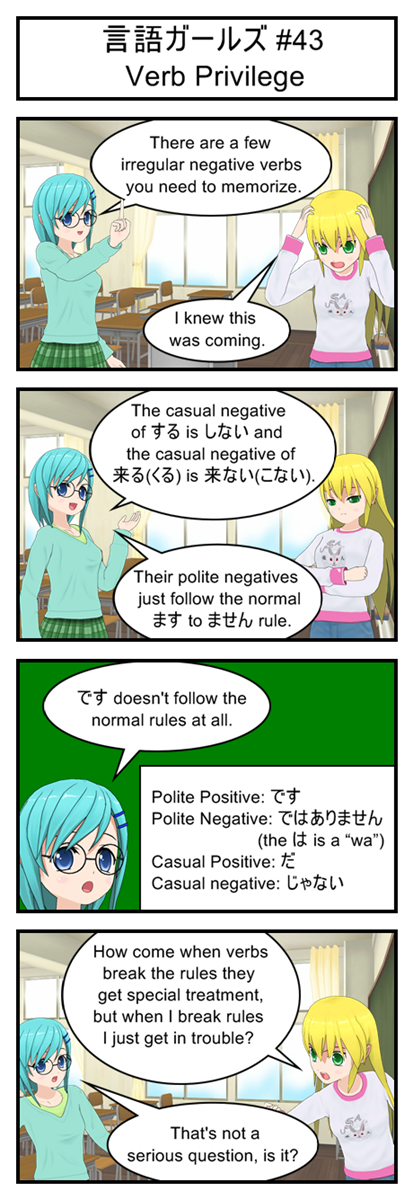
Gengo Girls #43: Verb Privilege

Gengo Girls #43: Verb Privilege

Desu doesn’t follow normal verb conjugation rules because it isn’t a normal verb, but is instead a verb-like copula. “Copula” is just a fancy linguistic term for “a word that links a subject to a predicate in an ‘A is B’ sort of pattern”. Which is interesting trivia but not something you actually need to know to speak Japanese. Just memorize those conjugations and you’ll be fine.

A piece of trivia that you DO need to know is that in casual Japanese “da” often gets left off the end of sentences, especially sentences of the “A is adjective” pattern. So don’t be surprised if you hear casual conservations involving “A wa B” with no desu or da. And since in Japanese you can also drop obvious subjects don’t be surprised if you hear sentences that are only one word long. It’s perfectly good casual Japanese grammar to say something like “oishii” (tasty) instead of “kore wa oishii desu”.

Transcript

言語ガールズ #43

Verb Privilege

Blue: There are a few irregular negative verbs you need to memorize.

Yellow: I knew this was coming.

Blue: The casual negative of する is しない and the casual negative of 来る(くる) is 来ない(こない).

Blue: Their polite negatives just follow the normal ます to ません rule.

Blue: です doesn’t follow the normal rules at all.

Chart: Polite Positive: です

Polite Negative: ではありません (the is a “wa”)

Casual Positive:

Casual negative: じゃない

Yellow: How come when verbs break the rules they get special treatment, but when I break rules I just get in trouble?

Blue: That’s not a serious question, is it?

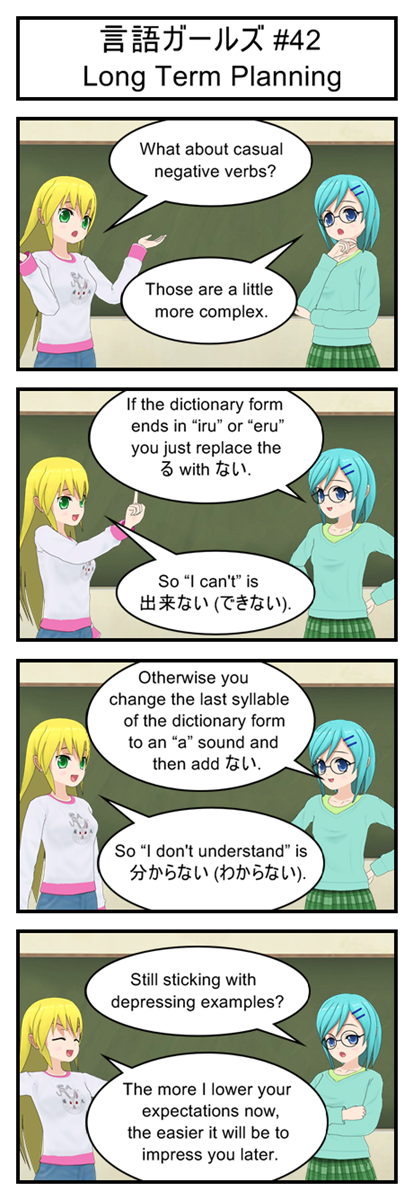
Gengo Girls #42: Long Term Planning

Gengo Girls #42: Long Term Planning

You might have noticed that the rules for casual negatives are a lot like the rules for positive polites. Words ending in “iru” or “eru” get a simple replacement while all other words have to be slightly transformed before getting their new ending.

The big difference is that in polites you transform sounds to “i” (ru becomes ri, su becomes shi, etc…) while in casual negatives you transform sounds to “a” (ru becomes ra, su becomes sa, etc…).

Transcript

言語ガールズ #42

Long Term Planning

Yellow: What about casual negative verbs?

Blue: Those are a little more complex.

Blue: If the dictionary form ends in “iru” or “eru” you just replace the with ない.

Yellow: So “I can’t” is 出来ない (できない).

Blue: Otherwise you change the last syllable of the dictionary form to an “a” sound and then add ない.

Yellow: So “I don’t understand” is 分からない (わからない).

Blue: Still sticking with depressing examples?

Yellow: The more I lower your expectations now, the easier it will be to impress you later.

Let’s Program A JavaScript Game 11: This Post Isn’t About Malware, Honest

Let’s Get Dangerous

We have a cycle for the player and an endlessly scrolling screen of platforms for them to jump along. The only piece we’re missing are the deadly virus enemies for the player to avoid.

Viruses are going to be implemented more or less the same as platforms. We’ll have an array of viruses that scroll that to the left. When a virus has moved entirely off screen we drop it from the front of the list and then pin a new virus to the back of the list. In the future we will randomize the location and timing of new viruses to make things a little less predictable but for now a couple viruses marching in a steady line will let us test everything we need to test.

Writing Simple Enemies

The code for the virus obstacles is almost identicle to the code for the platforms. Generate an array of objects, move them a little to the left every frame and check for collisions with the player. So nothing here should be especially mind blowing.

First up, we generate the original list of viruses at the top of code by putting this code right after the platform setup code:

var viruses = new Array();
var virusStartingOffset = 1000;
var maxVirusCount = 2;
var maxVirusGap = 400;
var virusWidth = 50;
var virusHeight = 50;

//Generate starting viruses (all off screen at first)
for(i = 0; i < maxVirusCount; i++){
   var newVirus = new Object();
   newVirus.x = virusStartingOffset + i * (virusWidth + maxVirusGap);
   newVirus.y = 200;
   newVirus.width = virusWidth;
   newVirus.height = virusHeight;
   viruses[i] = newVirus;
}

You also need to include this image related code somewhere so we can draw the viruses. I suggest putting it right after the cycle image code:

var virusImage = new Image();
virusImage.src = "virus.png";

Next up is adding virus code to the updateGame method. Just drop this in right after the big block of platform code:

//Virus logic
for( i = 0; i < viruses.length; i++){
   //Have all viruses move towards the player
   viruses[i].x-=5;
   
   //See if the player is grazing this virus
   if(intersectRect(viruses[i], grazeHitbox)){
      grazeCollision = true;
   }

   //See if the player has had a lethal collision with this virus
   if(intersectRect(viruses[i], deathHitbox)){
      deathCollision = true;
   }
}

//Remove viruses that have scrolled off screen and create new viruses to take their place
if(viruses[0].x + viruses[0].width < 0){
   //Drop first virus by shifting entire list one space left
   for( i = 0; i < viruses.length-1; i++){
      viruses[i] = viruses[i+1];
   }

   //Add new platfrom to end of list by placing it a certain distance after second to last platfor
   var newVirus = new Object();
   newVirus.x = viruses[viruses.length-2].x + virusWidth + maxVirusGap;
   newVirus.y = 200;
   newVirus.width = 50;
   newVirus.height = 50;
   viruses[viruses.length-1] = newVirus;
}

And finally we draw the viruses by adding this simple loop somewhere in our drawScreen method

//Draw viruses
for(i = 0; i < viruses.length; i++){
   context.drawImage(virusImage, viruses[i].x, viruses[i].y);
}

That’s it. You now have a couple of virus obstacles scrolling across the screen along with the platforms. You can jump near them and into them and watch your “graze” and “death” collision status change. These collisions won’t actually do anything yet, but just keeping track of them is the first step towards building a real game-over and bonus point system.

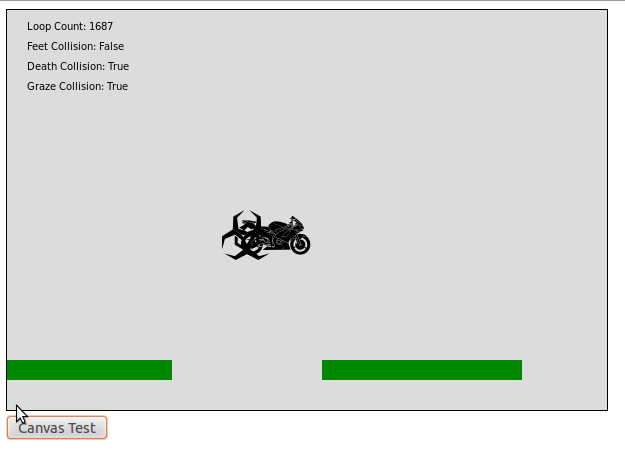
Both “Graze Collision” and “Death Collision” are true, showing we got just a little too close during this test

Both “Graze Collision” and “Death Collision” are true, showing we got just a little too close during this test

Why We Did What We Did

This entire branch of code was mostly just copy pasting the platform code and then renaming the variables, so no big ideas need to be explained. But there was one tiny design decisions that I think deserve a little extra analysis: Why did we give each virus a specific height and width instead of just using the height and width of the global virus image?

Two big reasons.

Reason one: Our collision detection function expects to be given two rectangle like objects that know their own x position, y position, width and height. Giving every virus a copy of this information means we can drop them directly into the collision detection function.

Reason two: We may not want our viruses to always be the same size as their picture. In the future we might decide that we want the virus’s collision box to be smaller than the virus picture in order to make collisions easier to avoid. So by keeping the virus’s height and weight independent form the size of the graphics we draw we give ourselves the freedom to make major changes in the future without breaking anything.

Next Up: Game-Over

With most of the basic game mechanics in place the next thing to do is finally let player’s lose, which is a surprisingly big tasks since it means we will have to introduce ideas like “game states” and “multiple possible screen renderers”.

But don’t worry, it’s actually a pretty simple once you get into it. And it involves flowcharts! Everyone loves flowcharts!

Gengo Girls #41: You Can’t Make Me

Gengo Girls #41: You Can't Make Me

Remember, there is no future tense in Japanese so you’re going to be using the same negative verbs for both describing the present and the future. Depending on the sentence you put it in “benkyou shimasen” can mean “I’m not studying right now”, “I don’t study in general” or “I am not going to study in the future”.

Vocabulary

出来る = できる = to be able to do something

Transcript

言語ガールズ #41

You Can’t Make Me

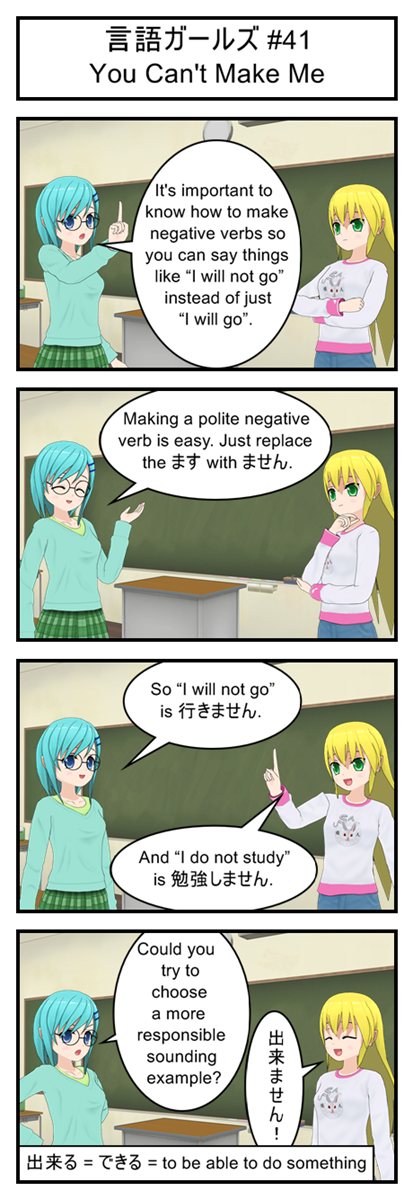
Blue: It’s important to know how to make negative verbs so you can say things like “I will not go” instead of just “I will go”.

Blue: Making a polite negative verb is easy. Just replace the ます with ません.

Blue: So “I will not go” is 行きません.

Yellow: And “I do not study” is 勉強しません.

Blue: Could you try to choose a more responsible sounding example?

Yellow: 出来ません!

Gengo Girls #40: Negative On That Positive Reinforcement

Gengo Girls #40: Negative On That Positive Reinforcement

Don’t you just love that feeling you get when a new idea finally clicks?

Vocabulary

= ふく = clothes

きれい = pretty

高い = たかい = expensive; tall, high

Transcript

言語ガールズ #40

Negative On That Positive Reinforcement

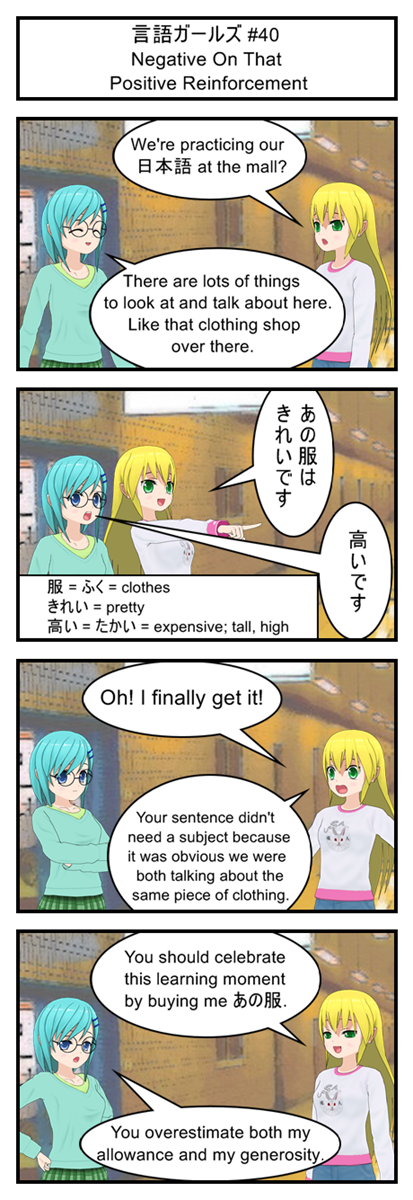
Yellow: We’re practicing our 日本語 at the mall?

Blue: There are lots of things to look at and talk a bout here. Like that clothing shop over there.

Yellow: あの服はきれいです

Blue: 高いです

Yellow: Oh! I finally get it!

Yellow: Your sentence didn’t need a subject because it was obvious we were both talking about the same piece of clothing.

Yellow: You should celebrate this learning moment by buying me あの服.

Blue: You overestimate both my allowance and my generosity.