Let’s Program A 3D Browser Game Part 9: Look, Shiny

Somebody Keeps Leaving Their Collectables Lying Around The Dungeon

While our game engine has basic movement it’s honestly still pretty boring, mostly because it’s pointless. You walk around a little maze, look at the walls and then eventually give up and close the browser window. There is no goal to work towards, no way to win or to tell if you are doing good or bad.

That’s why real dungeon crawlers have monsters and treasure chests and traps and special events and also why even the most amateur of rural corn mazes makes sure to include something like an exit to look for.

Now obviously we’re not going to try and build an entire RPG framework in a single Let’s Program, but we can at least try to add one interesting feature: some collectibles that the player can hunt for while exploring the maze.

Our requirements are simple: We want floating cubes that we can place on our map. When the player enters the same square as a cube “something” should happen, like a message being displayed. The floating cube should then disappear.

Like all non-trivial programming problems there are roughly a zillion different ways to accomplish this and I almost got sucked down an infinite rabbit hole of trying to figure out the best way to build a collectible system that could later be expanded into a full on custom event system.

That was dumb. Carefully planning out code is important but at some point you have to just give things your best shot and write some code. If it isn’t perfect you can always rewrite it.

So here’s the coding plan:

– We will have an array of “collectible” objects.

– Each collectible will keep track of it’s x location, y location, and what code to run when triggered.

– While setting the maze up we will loop through the “collectible” array, add a 3D cube to the scene for each collectible and then store a reference to that object inside the collectible.

100% Hand Crafted Artisanal Collectables

Let’s get started by writing a standalone function that returns an array of collectible objects. This way we can expand or change how this works without cluttering up our main dungeon code. Since this is just our prototype we will manually build an array and then manually push two manually built anonymous collectable objects onto it:

function createCollectiblesList(){
   var collectables = [];

   collectables.push(
      {
         x:0,
         y:1,
         action:function(){alert("You picked up a collectable");},
      });

   collectables.push(
      {
         x:1,
         y:0,
         action:function(){alert("You picked up a different collectable");},
      });

   return collectables;
}

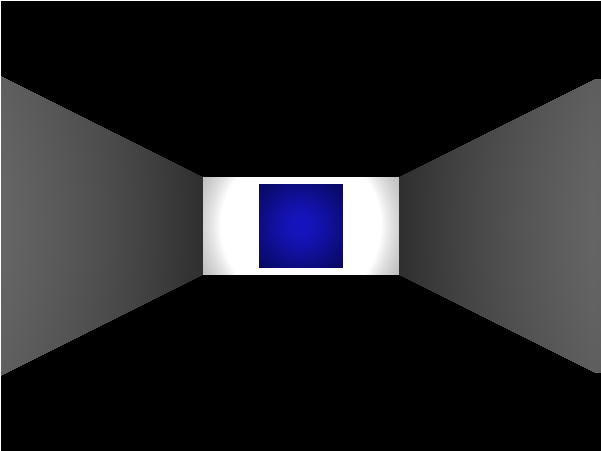
Now that we have a sample collectable array let’s write a second function that can use that array to add some collectables to the map. Collectables that will be represented as dark blue cubes 1/4th as wide as our 1 unit maze cells. Only tricky part here is that because I did a horrible job of lining our 3D space up with our with our map grid our collectable’s X position will map to Z in the 3D plane and it’s Y will map to X.

function placeCollectableGraphics(scene, collectables){
   var collectableGeometry = new THREE.BoxGeometry( 0.25, 0.25, 0.25 );
   var collectableMaterial = new THREE.MeshStandardMaterial( {color: 0x000088} );

   collectables.forEach(function(collectable){
      var collectableObject = new THREE.Mesh(collectableGeometry, collectableMaterial);
      collectableObject.position.z = collectable.x;
      collectableObject.position.x = collectable.y;
      scene.add(collectableObject);
   });
}

Wow. I really need to get around to rotating 3D space so it matches grid space better. But for now let’s just give our prototype a test run by inserting these functions into the setup portion of our runMaze function.

function runMaze(){
   var mazeCanvas = document.getElementById("mazeCanvas");

   var scene = new THREE.Scene();
   var renderer = new THREE.WebGLRenderer({ canvas: mazeCanvas });
   var camera = new THREE.PerspectiveCamera( 75, mazeCanvas.width/mazeCanvas.height, 0.1, 1000 );

   var mazeGrid = createMazeGrid();
   placeWallGraphics(scene, mazeGrid); 
   
   //New lines
   var collectables = createCollectiblesList();
   placeCollectableGraphics(scene, collectables);

   //Rest of function as normal

Look around the maze now and you should see a blue box to the east and south of the starting location.

Looks a bit flat but it really was made with 3D graphics. Honest!

Hmm.. that’s a little bit boring. Let’s spice things up by making them spin. All we have to do is add a bit of code near the end of our constantly repeating render function. Put this right after all the switch statements based on player state but before the recursive call to render:

//Make our collectables spin
collectables.forEach(function(collectable){
   var collectableObject = collectable.objectRef;
   collectableObject.rotation.x += 2 * deltaTime/1000;
   collectableObject.rotation.y += 2 * deltaTime/1000;
});

まわる まわる

Now for our last bit of functionality: When the user enters a block with a collectable the collectable’s function should trigger.

To implement this we are going to modify the code that runs when the player is MOVING_FORWARD. When this code detects the player has fully entered the new square it should cross reference the collectables list and look for matches before returning the player to the WAITING loop, which we can do with something like this:

if(state == MOVING_FORWARD)
{
   walkingDistance += 1 * deltaTime/1000;

   if(walkingDistance >= 1){
      walkingDistance = 1;
      state = WAITING;
      processCollectableCollisions(player.gridX, player.gridY,collectables,scene);
   }

   //Rest of the function stays as is

Pretty easy, mostly because we tossed all the hard work onto the processCollectableCollisions function. All we have to do is tell it what X and Y location the player is looking at along with what list of collectables and scene it should reference and it does all the hard work for us! Or at least it will after we write it.

Fortunately it’s not that hard to write. We just loop through the provided collectables and see if any match the provided player location. If we find a match we trigger the code linked to that collectable and then remove the collectable from both the 3D scene and from the list of collectables. Don’t want the player picking the same object up twice!

function processCollectableCollisions(x, y,collectables,scene){
   collectables.forEach(function(collectable,index){
      if(collectable.x == x && collectable.y == y){
         collectable.action(); //Run the object's event
         scene.remove(collectable.objectRef); //Remove graphics from scene
         collectables.splice(index,1); //Remove collectable from list
      }
   });
}

A little bit messy and the functional programmer in me hates the way the function deletes items from the array given to it… but it works! More or less. I think the way we’re using splice might break down if we ever have two collectables with the same X and Y location but for a rough draft prototype this will get the job done.

Beyond Collectables

Our only goal was to program a couple of collectables but we actually managed to prototype a pretty powerful event system. This is because we can put literally any JavaScript we want inside of collectable.action. Right now it just triggers an alert but there’s no reason we couldn’t have it increment a score or teleport the player across the map or add an item to their inventory or trigger a cutscene.

OK, we don’t have an inventory to add to or any cutscenes to trigger but if we took the time to program those sorts of things we could link them to our collectables pretty easily.

And what if instead of making all the collectables cubes we made it possible to assign them each different symbols? Treasure chests and warning signs and keys and silhouettes. Maybe even an invisible option for when we want something to happen on a certain square without the player seeing it ahead of time.

Now you have a flexible system for making any sort of location based event you can imagine. And while that’s not quite enough for building a complete dungeon crawler it would be a pretty good start.

Let’s Program A 3D Browser Game Part 8: Dungeon Maintanence

So our little dungeon crawling engine has all the basics down now including: walls, moving, and walls that prevent you from moving. Cool. Less cool is the fact that 95% of our code exists inside of one giant function: runMaze. Not really a problem for just playing with code but it does hurt readability and could make things harder to change and experiment with as we go on.

So let’s clean things up a little by moving as many variables and functions as we can out of our mega runMaze function and into the global top level of code.

Now at this point quite a few of your are probably pointing out that having a bunch of global functions and variables isn’t much better. Real modern game code should use object oriented design and name spaces and so on.

That’s all technically true. But also true is the fact that this isn’t a serious game engine. So our only real goal here is to do the bare minimum of clean up required to make the last experiments of this Let’s Program possible. Turning that end result into a full fledged professional grade game engine will be left as an exercise to the most ambitious among you.

First off let’s move our maze creation code outside of our mega-function. Instead we’ll put it in it’s own function like so:

function createMazeGrid(){
   function MazeCell(northWall, eastWall, southWall, westWall){
      this.northWall = northWall;
      this.eastWall = eastWall;
      this.southWall = southWall;
      this.westWall = westWall;
   }

   var mazeGrid = [Array(2), Array(2)];

   mazeGrid[0][0] = new MazeCell(true, false, false, true);
   mazeGrid[0][1] = new MazeCell(true, true, true, false);
   mazeGrid[1][0] = new MazeCell(false, true, true, true);
   mazeGrid[1][1] = new MazeCell(false,false,false,false);

   return mazeGrid;
}

We can also move the code we use for setting up the wall graphics into it’s own function like so:

function placeWallGraphics(scene, mazeGrid){
   var wallGeometry = new THREE.PlaneGeometry( 1, 0.5 );
   var wallMaterial = new THREE.MeshStandardMaterial( );

   mazeGrid.forEach(function(mazeRow, rowCount){
      mazeRow.forEach(function(mazeCell, colCount){
         if(mazeCell.northWall)
           placeWall(colCount, rowCount, 'n');
         if(mazeCell.eastWall)
           placeWall(colCount, rowCount, 'e');
         if(mazeCell.southWall)
            placeWall(colCount, rowCount, 's');
         if(mazeCell.westWall)
            placeWall(colCount, rowCount, 'w');
      });
   });

   function placeWall(x,y,direction){
      var wall = new THREE.Mesh( wallGeometry, wallMaterial );
      wall.position.z = y*1;
      wall.position.x = x*1;
      if(direction == 'n'){
         wall.position.z -= 0.5;
      }
      else if(direction == 'e'){
         wall.position.x += 0.5;
         wall.rotation.y = -Math.PI/2;
      }
      else if(direction == 's'){
         wall.position.z += 0.5;
         wall.rotation.y = Math.PI;
      }
      else if(direction == 'w'){
         wall.position.x -= 0.5;
         wall.rotation.y = Math.PI/2;
      }
      else{
         return false;
      }

      scene.add(wall);
   }
}

We still have a function nested inside a function here but that’s fine for now. At least the whole thing fits on a single screen. Barely. Depending on your screen and font size.

HOWEVER! This new function has changed our work flow a little bit. When the code for adding walls to the scene was inside of runMaze it had direct access to the local scene object. Now that it’s inside its own function it doesn’t have anywhere to actually put walls.

The easy solution to this is to make scene a required argument to the function. When we call placeWallGraphics the first thing we will do is show it what scene we want to add the walls to.

After pulling out those two big chunks of code our runMaze function starts like this now:

function runMaze(){
   var mazeCanvas = document.getElementById("mazeCanvas");

   var scene = new THREE.Scene();
   var renderer = new THREE.WebGLRenderer({ canvas: mazeCanvas });
   var camera = new THREE.PerspectiveCamera( 75, mazeCanvas.width/mazeCanvas.height, 0.1, 1000 );

   //Big chunk of code replaced with two clean function calls
   var mazeGrid = createMazeGrid();
   placeWallGraphics(scene, mazeGrid);

   //Code as usual from here on out

That really helps simplify our mega function and makes it obvious what these two chunks of code doing: They help set up the game by making the maze and then building graphics for it. Also be sure to note the placeWallGraphics function call. See how we’re passing it the scene so it knows where to put all the 3D objects it creates?

Give And Take

This is actually an interesting little demonstration of the fact that breaking one big function into multiple smaller functions isn’t always “free”. On the one hand we did indeed make our individual functions easier to read, understand and maintain. On the other hand we cut them off from local variables meaning we now have to explicitly pass them variables that they used to just have direct access to.

This is a general trend in programming. Big functions are hard to understand but let you use the same variables again and again and again. Smaller functions are easier to work with but require you to do a lot more variable passing and reference juggling. This is especially obvious in 3D programming where it’s not unusual for a function to require half a dozen references to things like image buffers and translation matrices and cameras and so on.

Now on the whole the benefit you get from splitting a thousand line mega-function into a dozen sub-hundred line helpers is bigger than the small cost you incur in the form of having to pass more variables. But it’s still valuable to be consciously aware that you are making a trade off and that in rare instances keeping a chunk of code local might be easier to understand than creating a long chain of functions that call functions, passing variables all along the way.

Still A Little Cleaning To Do

Anyways, with those two big chunks of code the only mega problem left with our mega function is the fact that we defined the entire validMove function right inside of it. Nesting functions like this is not only messy and kind of weird, it limits our ability to use that function elsewhere. For example, we might have an AI that also needs to know what are and aren’t valid moves and it can’t do that if this logic is locked up inside of runMaze. Let’s pull it out in the name of readability and reuse.

There is a tiny complication. validMove depends both on our constant definitions of NORTH, EAST, SOUTH, and WEST as well as on having access to the mazeGrid. So get this to work we’ll need to

1) Pull the constants out to global scope so that both the main function and our new helpers can access them

2) Pass mazeGrid as an argument to the new stand alone validMove function

So first thing to do is grab those constants and put them somewhere convenient, like all the way up at the top of our script:

var playerInput = new Object();

const NORTH = 100;
const EAST = 101;
const WEST = 102;
const SOUTH = 103;

Then we can pull the validMove function up to the top level, making sure to add a new argument for passing the local mazeGrid object to it now that it doesn’t live in the same scope as the maze.

function validMove(mazeGrid, x, y, direction){
   if(direction == NORTH)
   {
      return !mazeGrid[x][y].northWall;
   }
   else if(direction == EAST)
   {
      return !mazeGrid[x][y].eastWall;
   }
   else if(direction == SOUTH)
   {
      return !mazeGrid[x][y].southWall;
   }
   else if(direction == WEST)
   {
      return !mazeGrid[x][y].westWall;
   }
   return false;
}

And finally we go to the one line that depends on validMove and update it with by adding the mazeGrid to the call. Basically instead of just asking “Can the player move forward?” like we used to we’re now saying “Here’s what our maze looks like. Based on that, can the player move forward?”

else if(playerInput.up && validMove(mazeGrid, player.gridX, player.gridY, player.direction)){
   walkingDistance = 0;
   startX = camera.position.x;
   //etc...

Another possible advantage to splitting things out like this is that we can now use the same function on multiple mazes. That’s pretty useless to us since we only have one maze and one player… but imagine a more complex game with multiple floors and players and maybe even wandering monsters. You might wind up needing to ask simultaneously: “Can Bob move forward on Map A?”, “Can Sally move forward on Map C?”, “Can the monster move forward on Map G?”.

To be perfectly honest I’m still not very happy with this code. A lot of our functions are still poorly organized and overly long. But at least we’ve isolated the map creation code, which was my main objective here because that will really pave the way for the last two features I want to add to this little test game: Collectibles and Random Maps.

Let’s Program A 3D Browser Game Part 7: You Shall Not Pass

Looks Nice But Doesn’t Do Much

If we’re being perfectly honest at this point we haven’t programmed a dungeon crawler so much as a dungeon viewer. We can walk around and look at our walls but there’s no actual game logic preventing us from walking right off the border of the map and wandering off towards infinity (which is a lot more boring than it sounds).

So let’s start fixing things by making walls a bit more solid.

Traditionally video game walls act like walls thanks to collision detection. Basically once every frame you check whether the player’s geometry is mathematically overlapping with any wall geometry and then move/stop/kill the player as appropriate.

But for us that would be too overkill.

Because our maze is a grid we don’t have to worry about actual collisions. Instead we can just look up which square the player is standing in and see if it has a wall in the direction the player wants to move. If there is no wall we run the move logic like normal. If there is a wall no movement happens (although we could shake the screen a bit to give the player some feedback on their key press if we were feeling fancy). This is nice because it’s a much easier problem to solve than full object collision and is also a lot less demanding on the processor.

Where Am I?

At the moment we keep track of the player’s location entirely in terms of where the camera is. Unfortunately the camera exists in 3D graphic land and doesn’t help us a lot when it comes to figuring out where we are in 2D map land. That means we’re going to need to expand our code to also keep track of the player’s location in terms of his X and Y location in the grid.

Warning: Keeping track of these two bits of data separately introduces the risk of the player’s grid location getting out of sync with his camera location leading to all sorts of weirdness. Preventing this from happening will be one of our primary goals today.

Anyways, to help keep track of new variables let’s create a player object to hold player related game data.

var player = {};
player.gridX = 0;
player.gridY = 0;
player.direction = NORTH;

By default the player is in grid square [0, 0] and facing NORTH. This matches where our camera starts. If you ever decide to change the starting location or direction make sure to update it in both locations. In the future we could avoid this by setting the camera’s start position based on the player’s logical start location (or the other way around) but for our current experiment we can just personally promise ourselves to make sure they always match up.

Next step in making sure the player and the camera match up is to make sure they always point in the same direction. Fortunately we already have code that determines what direction the camera should point after each turn so all we have to do is update that code to also keep the player up to date.

if(playerInput.left){
   state = TURNING_LEFT;
   switch(direction){
      case NORTH:
         direction = WEST;
         break;
      case EAST:
         direction = NORTH;
         break;
      case SOUTH:
         direction = EAST;
         break;
      case WEST:
         direction = SOUTH;
         break;
   }
   player.direction = direction; //Sync player and camera
}

See that new line near the end where we update the player’s direction? Make that same change in the playerInput.right block.

Next up is making sure the player’s grid location properly updates on forward movement.

else if(playerInput.up){
   walkingDistance = 0;
   startX = camera.position.x;
   startZ = camera.position.z;
   state = MOVING_FORWARD;
   switch(direction){
      case NORTH:
         player.gridX--;
         break;
      case EAST:
         player.gridY++;
         break;
      case SOUTH:
         player.gridX++;
         break;
      case WEST:
         player.gridY--;
         break;
   }
 }

The only tricky part here is making sure you match X and Y up properly with NORTH-SOUTH and EAST-WEST. Which pairing is right depends on how we define the axis of our map array. If having X represent NORTH and SOUTH feels weird to you then try playing with the code that defines how the original maze was constructed.

Now that we feel confident our player’s position on the map matches up with the camera’s position in the 3D maze we can pretty easily check for valid vs invalid moves. We’re going to write a helper function to figure this out, so don’t just dump it in the render function like everything else. Instead maybe include it after all the wall placing functions in the first half of the script.

function validMove(x, y, direction){
   if(direction == NORTH){
      return !mazeGrid[x][y].northWall;
   }
   else if(direction == EAST){
      return !mazeGrid[x][y].eastWall;
   }
   else if(direction == SOUTH){
      return !mazeGrid[x][y].southWall;
   }
   else if(direction == WEST){
      return !mazeGrid[x][y].westWall;
   }
   return false;
}

Super simple, right? We pick which cell in the maze we want to look at and what direciton we want to move. We then see if there is NOT a wall there. No wall means we can move. Yes wall means we can’t.

With that handy function all set up we can now finally prevent the player from ghosting through walls. It’s as simple as updating our if(playerInput.up) code to also keep track of whether or not the player can move forward.

else if(playerInput.up && validMove(player.gridX, player.gridY, player.direction))

And that’s it! Load up your code now and you’ll be properly stuck in our little 3 cell “maze”. Exciting, if a little claustrophobic.

That’s really it as far as core dungeon crawling code goes. We move in nice predictable compass directional steps and we can tell when we hit a wall. Everything else is just icing.

But before you go off and start modding this code with traps and doors and keys and whatnot let’s spend a little time cleaning up our experimental code to make it a little more professional, understandable and extendable.