Gengo Girls #58: Details, Details

Gengo Girls #58: Details, Details

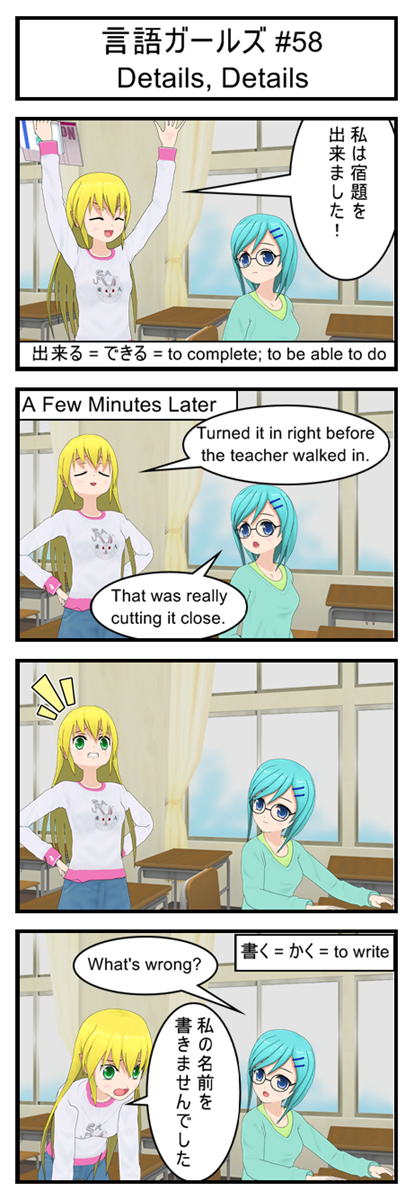
You’ve already seen “dekiru” as a verb meaning “to be able to do”. But when used in the past tense it also means “to have completed”.

This might seem a little confusing, but it actually makes a lot of sense. To be able to do something means being able to complete whatever tasks are associated with that thing. From that perspective it makes a lot of sense to use the same verb for “to be able” and “to complete”.

Vocabulary

出来る = できる = to complete; to be able to do

書く = かく = to write

Transcript

言語ガールズ #58

Details, Details

Yellow: 私は宿題を出来ました!

Yellow: Turned it in right before the teacher walked into class.

Blue: That was really cutting it close.

Blue: What’s wrong?

Yellow: 私の名前を書きませんでした

Immortal Boredom Would Never Kick In

As you might have guessed, I find immortality to be a fun theme for fiction. After all, I did make a game called Immortals Should Try Harder.

Today I want to talk about the “bored immortal”, a classic fantasy and sci-fi trope. He or she has lived for hundreds or thousands of years and has already seen everything there is to see and done everything there is to do and now they are just plain bored with life.

But would that really happen?

The basic idea seems to be that doing the same thing again and again eventually gets boring. Since immortals live forever they would eventually do everything often enough to get bored with everything.

But this skips over an important point: Boring activities become fun again if you just wait long enough.

Have you even eaten so much of a favorite food that you’ve gotten sick of the taste, only to suddenly start craving it again a few months later?

Do you have a favorite holiday that you enjoy year after year?

Have you ever had a sudden urge to reread a book, rewatch a movie or replay a game that you haven’t touched in years?

Do you sometimes find yourself wishing you had the free time to restart a hobby you gave up in the past?

My personal non-immortal life experiences show that:

  • Doing an activity too often causes a sort of boredom fatigue, but that fatigue heals with time
  • The brain doesn’t remember the fine details of books and movies for more than a few years, making them fun to reread
  • Actively having a good experience is superior to mere memories of that experience

All of which suggests that an immortal could keep themselves amused for pretty much forever by just switching between a few dozen lifestyles and having a really big collection of favorite books, movies, games and hobbies.

Spend a few years doing research at a big library. Then spend some time touring Europe and practicing cooking all their regional specialties. Then hunker down and run a small farm in the Alaskan frontier. Then switch to being an auto mechanic and learning how machines really work.

And eventually the immortal starts to miss some of their earlier lifestyle. They head back to the library or the kitchen or the farm and find that after a hundred years the activity they were once bored with has become fresh and entertaining once again. They reread the book they have forgotten. They rediscover favorite recipes. They find that the “boring old farm life” is actually a nice change of pace every once and a while.

And they repeat this cycle, happily, forever.

Now of course an immortal would still probably have their ups and downs and slumps. But I think breaking out of a period of depressing boredom would be as easy as finding something they used to enjoy decades ago and forcing themselves to give it another try.

So if you plan to live forever you had better start collecting books and movies now. You’re going to need a few thousand.

Discussion Prompt:

  • How often can you rewatch a movie or reread a book? How many would you need to fight off immortal boredom?
  • How many years worth of different activities and lifestyles do you think an immortal would need to keep the non-boredom cycle going? Or do you think the cycle would eventually degrade no matter how many different lifestyles they switched between?
  • Would an immortal with perfect memory be harder to entertain than a more human immortal whose memories tend to fade after a few decades or centuries?
  • Are there any activities that you never seem to get bored of, like getting a good night’s rest? Could just a few of these always good activities sustain an immortals mental health forever, even if they had perfect memory?

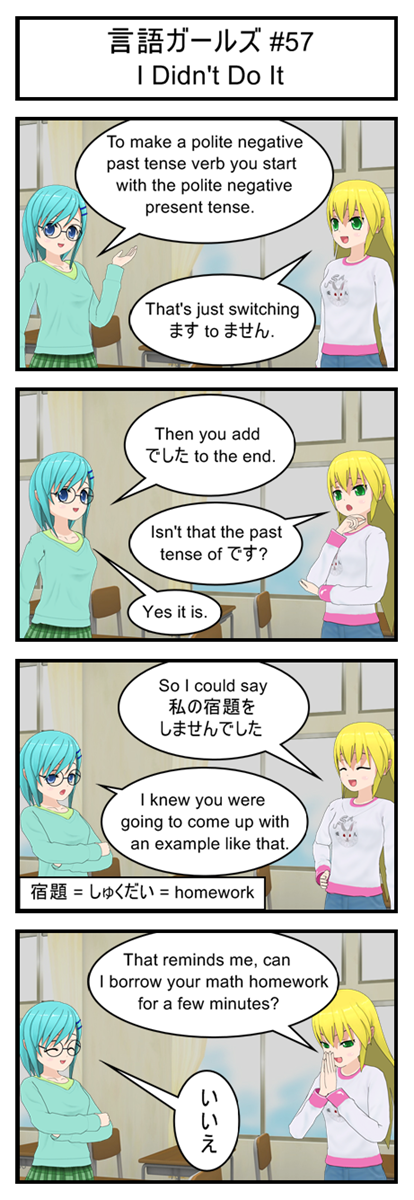
Gengo Girls #57: I Didn’t Do It

Gengo Girls #57: I Didn't Do It

Look at all the different rules all coming together in that one example! We’ve got an implied subject, a possessive, an object and a past tense irregular verb (“suru” to “shimasen” to “shimasen deshita”). Sure, it may not seem like a big deal to be able to say “I didn’t do my homework” but the amount of grammar represented in that one idea is actually pretty impressive. Good job reader for keeping up so far!

Vocabulary

宿題 = しゅくだい = homework

Transcript

言語ガールズ #57

I Didn’t Do It

Blue: To make a polite negative past tense verb you start with the polite negative present tense.

Yellow: That’s just switching ます to ません.

Blue: Then you add でした to the end.

Yellow: Isn’t that the past tense of です?

Blue: Yes it is.

Yellow: So I could say 私の宿題をしませんでした

Blue: I knew you were going to come up with an example like that.

Yellow: That reminds me, can I borrow your math homework for a few minutes?

Blue: いいえ

Let’s Program A JavaScript Game 14: A Winner Is You

Anybody Remember The Point Of This Game?

Way back in our game design segment we decided that our game is about a program (the player) defragmenting a hard drive. In order to win the player just has to stay alive long enough to rack up 1000GB of defrag points. The player can earn bonus defrag points by grazing viruses, allowing skilled players to complete the game with faster times.

Today we’re going to build that.

Keeping Score

In order to have a game about building up points until you win we obviously need to keep track of both how many points the player currently has and how many total points they need. We also want to know how long it took them to win. This is easy enough with a handful of global variables added up near the top of our script. Maybe right after all of our collision variables:

var currentFrameCount; //Keep track of how long it takes the player to
var currentPoints;
var TOTAL_POINTS_TO_WIN = 100;

Eventually we will want TOTAL_POINTS_TO_WIN to be one thousand, but for testing purposes let’s keep it low for now.

Since currentPoints and currentFrameCount get set back to zero every time the player loses we should set their value inside of the initializeGame function. I put it right after the code that resets the player’s location:

//Reset player location
player.x = 100;
player.y = 100;
player.yVel = 0;
player.onGround = false;

//Reset points and time
currentFrameCount=0;
currentPoints=0;

And finally let’s show this all to the player by updating our drawScreen function. Instead of printing out debug information about loops and collisions we’ll now print out the player’s current time and points so far by replacing this:

//Draw black text
context.fillStyle = '#000000';
context.fillText("Loop Count: "+loopCount, 20, 20);

if(feetCollision){
   context.fillText("Feet Collision: True", 20, 40);
}
else{
   context.fillText("Feet Collision: False", 20, 40);
}

if(deathCollision){
   context.fillText("Death Collision: True", 20, 60);
}
else{
   context.fillText("Death Collision: False", 20, 60);
}

if(grazeCollision){
   context.fillText("Graze Collision: True", 20, 80);
}
else{
   context.fillText("Graze Collision: False", 20, 80);
}

With this:

//Draw black text
context.fillStyle = '#000000';

//One frame should take 1/20 of a second
//For scoring purposes assume this is true even if the player is lagging
var time = currentFrameCount/20;
context.fillText("Time: "+ time.toFixed() + " seconds", 20, 20);
context.fillText("Progress: "+currentPoints+" out of "+TOTAL_POINTS_TO_WIN+" GB Defragged", 20, 40);

How Much Is A Point Worth?

Now that we have time and score variables we just have to figure out a good way to fill them up.

Time is easy enough. We just increase our frame count variable once per loop and we’re done.

function updateGame(){
   loopCount++;
   currentFrameCount++;
   // The rest of the function stays the same

Deciding how to update points is a little bit harder.

There are 20 frames per second in our game, so giving the player one point per frame would let them win the entire game in a mere 50 seconds. I think that’s a bit shorter than what we were hoping for.

So how long should the game last?

For a silly little web toy like this you can’t really expect players to concentrate for more than about three minutes.

Now if we give the player one point every 4 frames it will take them 4000 frames to collect the 1000 points they need to win. At twenty frames per second this is three and one third minutes and is a little bit longer than we want.

Or is it? Remember that players can graze to earn bonus points, which should shave half a minute or more off of the average player’s time. That cuts our three and one third minutes back down under the three minute limit.

So let’s try one point every four frames and see how that feels:

//Update the game by one step
function updateGame(){
   loopCount++;
   currentFrameCount++;
   if(currentFrameCount % 4 == 0){
      currentPoints++;
   }
   //Rest of the function doesn't change

Here we use the % “modulus” operator to find out whether or not the current frame count is evenly divisible by 4. If you’ve never used %, it just tells us what the remainder is from a piece of division. Example: 5 % 4 = 1, 7 % 4 = 3, 8 % 4 = 0, 122 % 4 = 2

Anyways, after giving the code a whirl I think that one point every four frames feels about right. The number goes up fast enough to feel satisfying but not so fast that the lowest digit is a mere blur.

Living Life On The Edge

Next goal is to implement bonus points from grazing. Exactly how many points grazing should be worth will take some experimentation but I’m going to start by having grazing be worth one point every four frames. That’s the same as our normal point rate and means that grazing will basically double your points per second.

Since we already keep track of grazing using the handy grazeCollision variable all we have to do to get graze points is copy our point code into a quick if statement somewhere near the end of updateGame. I put mine right before the code that checks if you’ve fallen off screen.

//Award bonus points if the player is grazing a virus
if(grazeCollision){
   if(currentFrameCount % 4 == 0){
      currentPoints++;
   }
}

Hmmm… this technically works but I don’t like how the score feels. It’s hard to tell at a glance that grazing makes you earn two points every four frames instead of the normal one. After all, the score is still being updated at the same old rate.

It would be much better if grazing made the player earn one point every two frames instead of two points every four frames. It’s mathematically the same but splitting the points up will make the score counter roll over faster and make it obvious the player is earning a bonus.

Making this happen is as simple as changing our bonus point code to kick in only when currentFrameCount is two frames past an even division by four. This way our normal points will kick in every fourth frame and our graze points will kick in two frames later.

//Award bonus points if the player is grazing a virus
if(grazeCollision){
   if(currentFrameCount % 4 == 2){
      currentPoints++;
   }
}

Victory

We’ve got points. We’ve got bonus points. All that’s left is popping up a victory screen when the player wins, which isn’t really all that different than the game over screen we’ve already designed.

First, we add some code to end of updateGame to check whether or not the player has enough points to win. If he does, we switch game state.

if(deathCollision){
   gameState = STATE_GAMEOVER;
}

if(currentPoints >= TOTAL_POINTS_TO_WIN){
   gameState = STATE_WIN;
}

And then we just write some quick code to handle the winning state.

//Check to see if the user is ready to restart the game
function updateWinScreen(){
   if(playerInput.up){
      gameState = STATE_START_SCREEN;
   }
}

//Show the player how long it took them to win the game
function drawWinScreen(){
   var canvas = document.getElementById('gameCanvas');
   var context = canvas.getContext('2d');

   //Draw background
   context.fillStyle = '#000000';
   context.fillRect(0,0,600,400);

   //Draw green text
   context.fillStyle = '#00CC00';
   context.font = 'bold 80px impact';
   context.fillText("YOU WIN!", 60, 100);
   
   context.font = 'bold 20px impact';
   var time = currentFrameCount/20;
   context.fillText("You defragmented the hard drive in "+ time.toFixed(1) + " seconds", 20, 200);
   context.fillText("Graze more viruses to improve your time", 20, 250);

   context.font = '30px impact';
   context.fillText("Press UP arrow to retry", 120, 350);
}

It’s up to you whether you want to keep these two functions next to each other in the code or split them up so all the “update” functions are next to each other and all the “draw” functions are next to each.

Anyways, with those two functions all that’s left is updating the main gameLoop function to properly call them when we’re in the winning state:

//The main game loop
function gameLoop(){
   var startTime = Date.now();
   
   if(gameState == STATE_START_SCREEN){
      updateStartScreen();
      drawStartScreen();
   }
   else if(gameState == STATE_RUNNING){
      updateGame();
      drawScreen();
   }
   else if(gameState == STATE_GAMEOVER){
      updateGameover();
      drawGameoverScreen();
   }
   else if(gameState == STATE_WIN){ //This is the new one!
      updateWinScreen();
      drawWinScreen();
   }
   else{ //Fix the game if we somehow end up with an invalid state
      gameState = STATE_START_SCREEN;
   }

   var elapsedTime = Date.now()-startTime;
   if(elapsedTime>=50){ //Code took too long, run again immediately
      gameLoop();
   }
   else{ //Code didn't take long enough. Wait before running it again
      setTimeout("gameLoop()",50-elapsedTime);
   }
}

And that’s that. You can test play the game and actually win now.

Kicking Things Up A Notch

It’s nice that everything works now, but the game is a little on the easy side with predictable enemies and small gaps. So next time I’ll be adding challenge by randomizing the platforms and enemies and even improving the game so that it gets more difficult the closer the player is to winning.
Gengo Girls #56: What Was THAT?

Gengo Girls #56: What Was THAT?

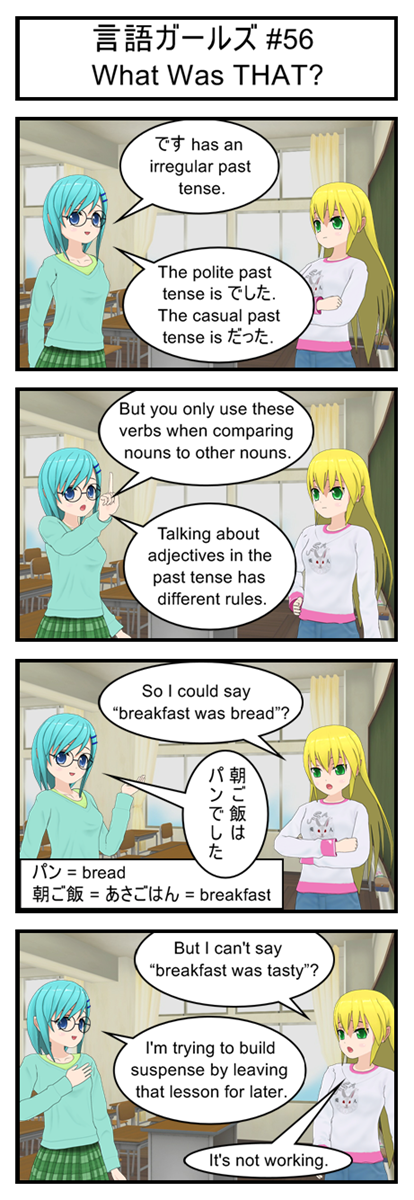
Those of you that speak Portuguese or it’s close relative Spanish might recognize “pan” as the word for “bread”. From what I’ve heard the Japanese’s first exposure to western style bread came from Portuguese traders so they adopted the Portuguese word for the food.

Vocabulary

朝ご飯 = あさごはん = breakfast

パン = bread

Transcript

言語ガールズ #56

What Was THAT?

Blue: です has an irregular past tense.

Blue: The polite past tense is でした. The casual past tense is だった.

Blue: But you only use these verbs when comparing nouns to other nouns.

Blue: Talking about adjectives in the past tense has different rules.

Yellow: So I could say “breakfast was bread”?

Blue: 朝ご飯はパンでした

Yellow: But I can’t say “breakfast was tasty”?

Blue: I’m trying to build suspense by leaving that lesson for later.

Yellow: It’s not working.


Gengo Girls #55: Putting The Past Behind Us

Gengo Girls #55: Putting The Past Behind Us

Trying to come up with present tense sample dialogue for the comics up to this point really drove home just how much we use the past tense in everyday conversation. But I guess it makes sense. The past is much bigger than the present so it makes sense a lot of conversations would be about past events.

Anyways, now that we’re learning past tense we can hopefully start working on some more natural sounding dialogue.

Transcript

言語ガールズ #55

Putting The Past Behind Us

Blue: To make a polite verb past tense just replace ます with ました.

Blue: 行きます(I go) becomes 行きました (I went).

Blue: Your turn: The student studied.

Yellow: 生徒は勉強しました

Yellow: Right?

Blue: Very good! Now you can talk about the past.

Yellow: Guess that means I have to do my history homework.

Blue: You were putting off your English history homework because you didn’t know Japanese past tense?

Yellow: I’m not picky when it comes to excuses.

Gengo Girls #54: There’s A Song Stuck In My Head

Gengo Girls #54: There's A Song Stuck In My Head

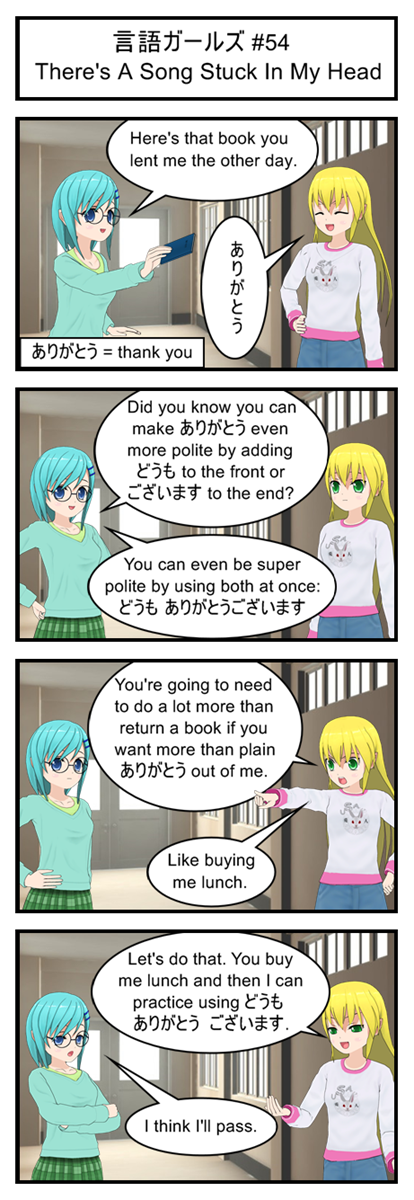
Interesting trivia: In Japanese you can say “thank you” in the past tense by conjugating “gozaimasu”. You then use the past tense “thank you” for favors that people did in the past. Example: If someone gave you a book you would use the present tense “thanks” because it was happening right now. But if someone mailed you a book you would use the past tense “thanks” the next time you saw them because the favor of mailing you the book was also a past tense event.

But wait! We don’t know how to conjugate for the past! I guess we’d better do something about that.

Vocabulary

ありがとう = thank you

どうも = thanks

ございま = extremely formal, ancient verb. Usually shows up in set phrases.

Transcript

言語ガールズ #54

There’s A Song Stuck In My Head

Blue: Here’s that book you lent me the other day.

Yellow: ありがとう

Blue: Did you know you can make ありがとう even more polite by adding どうも to the front or ございます to the end?

Blue: You can even be super polite by using both at once: どうも ありがとうございます

Yellow: You’re going to need to do a lot more than return a book if you want more than plain ありがとう out of me.

Yellow: Like buying me lunch.

Yellow: Let’s do that. You buy me lunch and then I can practice using どうも ありがとうございます.

Blue: I think I’ll pass.

Gengo Girls #53: Pleasantly Polite

Gengo Girls #53: Pleasantly Polite

There are a few set phrases and words that come with “o” and “go” built right in. Things like “onegai”, “okyakusan”, “onamae ha nan desu ka” and so on. You can find these in just about any beginning level textbook or tourist guidebook and memorizing them would be a good way to spend an evening or two if you ever decide to actually go to Japan.

Outside of these set phrases it can be hard to figuring out when you should and shouldn’t add “o” or “go” to words. It’s something you just have to develop an instinct for by listening to lots of real Japanese. But don’t worry too much; as long as you remember to use polite verbs I imagine most Japanese will think you’re doing pretty good for a foreigner.

Vocabulary

= or = Honorific word prefix

Transcript

言語ガールズ #53

Pleasantly Polite

Blue: Remember how you can make verbs more polite by conjugating them?

Yellow: That’s what we use ます for.

Blue: Well, you can also make some non-verbs more polite by adding an or to the front of the word.

Blue: There’s a kanji form too: .

Blue: So when you ask someone what their name is it’s polite to use お名前.

Yellow: あなたのお名前はなんですか

Blue: But remember, it’s rude to use honorifics when talking about yourself. Use plain 名前 for your own introductions.

Yellow: I need a T-shirt that says: “I’m not rude, honorifics are confusing”.

Gengo Girls #52: Politely Pleasant

Gengo Girls #52: Politely Pleasant

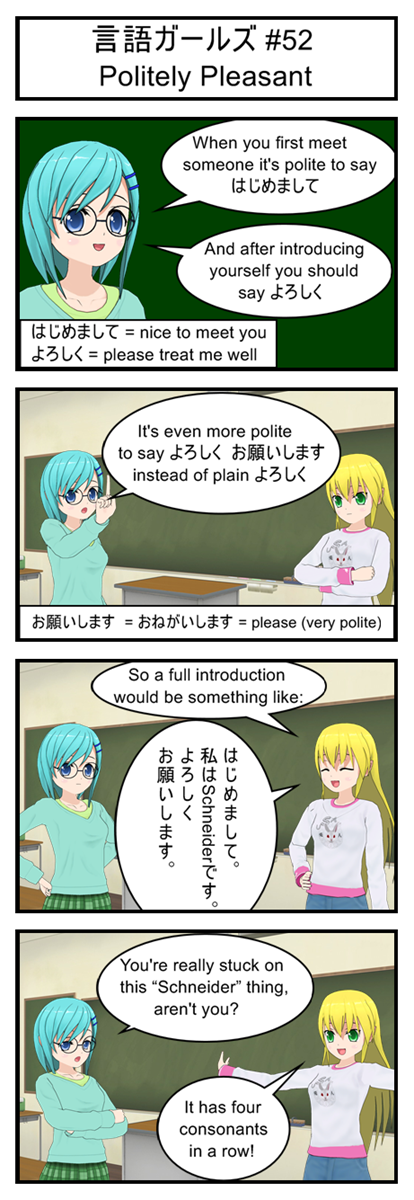
お願いします is actually two words, お願い (request) and します (polite form of “suru”, to do or to make). It literally translates as “I am humbly making a request” and is a fairly formal way to ask for favors. This is another common phrase that sticks out in most Japanese media, so see if you can find it in your favorite show, book, game or comic.

Vocabulary

はじめまして = nice to meet you

よろしく = please treat me well;

please take care of things

お願いします = おねがいします = please (very polite)

Transcript

言語ガールズ #52

Politely Pleasant

Blue: When you first meet someone it’s polite to say はじめまして

Blue: And after introducing yourself you should say よろしく

Blue: It’s even more polite to say よろしくお願いします instead of plain よろしく

Yellow: So a full introduction would be something like:

Yellow: はじめまして。私はSchneiderです。よろしくお願いします。

Blue: You’re really stuck on this “Schneider” thing, aren’t you?

Yellow: It has four consonants in a row!

Let’s Program A JavaScript Game 13: Some Much Needed Polish

This Is Only The Beginning…

Our code so far makes a good proof of concept. We’ve shown that we can indeed move the player around, land on platforms, crash into enemies and switch between different game states. In other words, we can safely say that it is possible to build our game using JavaScript.

But our code also has a lot of problems, glitches and loose ends. So today we’re going to be cleaning those up and starting the transition from “Semi-functional Prototype” to “Product You Wouldn’t Be Embarrassed To Show Your Friends”.

As part of this we’re going to be rewriting a TON of code. But don’t worry, I’ll post a link to a live version of code at the end of this article so if you have trouble following my description of what I’m doing you can just grab the complete code and take a look for yourself.

Wait! I’m Not Ready Yet

Here’s an interesting little fact for you: When you use JavaScript to assign an image to a variable the code doesn’t stop and wait, it keeps running and loads the image in the background. That means that your code might accidentally try to use an image that hasn’t finished loading yet, which is bad.

Now in a simple game with just a couple small images this probably isn’t a problem. But if you have a big background image or lots and lots of tiles and enemies and animations you might end up with a game that tries to run while 90% of its graphics are still being loaded.

To avoid this problem we’re going to have to tell our code specifically to not run any actual game logic until after the images are finished loading. An easy way to do this is with the onload property of the JavaScript image object. This lets you attach a function to an image and have that function run once the image finishes loading.

Using this we can chain together our images like this:

var cycleImage = new Image();
var virusImage = new Image();

function canvasTest(){
   loadCycleImage();
}

function loadCycleImage(){
   cycleImage = new Image();
   cycleImage.onload=function(){loadVirusImage();};
   cycleImage.src='cycle.png';
}

function loadVirusImage(){
   virusImage = new Image();
   virusImage.onload=function(){gameLoop();};
   virusImage.src='virus.png';
}

Now canvasTest doesn’t immediately start the game but instead calls loadCycleImage. loadCycleImage loads cycle.png and then calls loadVirusImage, which load virus.png and then starts the game loop.

Now obviously the more images you have the longer this chain gets, which introduces two problems: First, a long chain is hard to maintain by hand. Second, a large chain leaves your game “frozen” for several minutes since nothing gets drawn to the screen until the chain has completed.

You can solve the code maintenance problem by writing a new recursive function that accepts an entire list of image objects and object URLs. It sets up the first image to loading and when it’s done it then calls itself with the rest of the lest. When the list is finally empty it calls gameLoop() instead. This lets you have one function and one loop instead of having to hand type a hundred different loading functions that chain into each other.

The “frozen” game problem is easy too. Just write some sort of drawResourceLoadingScreen screen function that displays a helpful message like “Now loading image X out of 45”. Call that method at the beginning of every step of the chain so the user knows why the game hasn’t started yet.

But since I’m only loading two images I’ll leave both of these tasks as exercises for the reader.

Initialization: One of Top Ten Most Computer Programmy Word Out There

Let’s continue with this theme of “Things we shouldn’t just leave at the top of our script” and talk about initializing game objects.

Before our games starts we obviously need to generate the player’s position, the starting platforms and the starting viruses. Currently we do that all up at the top of code.

But this means that our game only gets set up once, when the player loads the page. This is the reason why the player can get stuck inside a virus after a game over. Once the virus is in play it stays in play no matter how many times the player dies and respawns.

It would be much better if the game was reset every time the player switched from the start screen to the main game. Then instead of getting stuck inside a virus the player would get a fresh virus-free start when they died.

This is an easy problem to refactor. We just grab the setup code from the top of the script and stuff it into a function named initializeGame. Then we call initialize game right before we switch to the main game state.

The only possible trick is that it’s important to remember that global variables like players, platforms and viruses need to stay at the top of the script so our game functions can share them. We’re only moving the code that sets their values into a function, the declarations can stay put.

//Put the player in the starting location and generate the
//first platforms and enemies
function initializeGame(){
   //Reset player location
   player.x = 100;
   player.y = 100;
   player.yVel = 0;
   player.onGround = false;

   //Generate starting platforms into global array
   //Uses global variables to control platfrom generation
   for(i = 0; i < maxPlatformCount; i++){
      var newPlatform = new Object();
      newPlatform.x = i * (maxPlatformLength + maxPlatformGap);
      newPlatform.y = 350;
      newPlatform.width = maxPlatformLength;
      newPlatform.height = 20;
      platforms[i] = newPlatform;
   }

   //Generate starting viruses into global array (all off screen at first)
   //Uses global variables to control virus generation
   for(i = 0; i < maxVirusCount; i++){
      var newVirus = new Object();
      newVirus.x = virusStartingOffset + i * (virusWidth + maxVirusGap);
      newVirus.y = 200;
      newVirus.width = virusWidth;
      newVirus.height = virusHeight;
      viruses[i] = newVirus;
   }
}

And then we just have to slip a reference to this code into our startScreenUpdate function:

//Check to see if the user is ready to start the game
function updateStartScreen(){
   if(playerInput.up){
      initializeGame();
      gameState = STATE_RUNNING;
   }
}

Side note: Initializing a game can take a long time, especially if you have to load new graphics or run an expensive algorithm. In these scenarios it’s considered polite to put up a “Loading” screen so the player knows the game isn’t stuck.

Since we’re only initializing a few dozen values this function will run too fast to notice, making a loading screen pointless. But if you were making a more complex game you might want to build a simple “Initializing next stage” screen drawing function and add it right before the initialize call.

Fixing A Few Minor Issues

That’s it for our big two problems, but as long as we’re disecting code let’s fix a few tiny bugs I noticed.

First off, the player shouldn’t be allowed to move off screen. So let’s add this code somewhere inside updateGame

//Keep the 75px wide player inside the bound of the 600px screen
if(player.x<0){
   player.x=0;
}

if(player.x+75>600){
   player.x=600-75;
}

Good programmers will notice that these functions use a crazy amount of magic numbers. It would probably be a good idea to replace them by constant variables like PLAYER_WIDTH and SCREEN_WIDTH.

Another quick issue: The player can currently do an air jump by falling off a platform and then hitting up. This is because we only set “onGround” to false when the player jumps. So let’s update our code to set that to false whenever the player starts moving downwards by changing this:

player.y += player.yVel;
player.yVel +=1;
if(player.yVel>=15){
   player.yVel=15;
}

into this:

player.y += player.yVel;
player.yVel +=1;
//Assume player is no longer on groud. Platfrom collision later in loop can change this
player.onGround=false;
if(player.yVel>=15){
   player.yVel=15;
}

The positioning of this code is very important! It comes AFTER the player tries to jump but BEFORE the platform collision code that sets onGround to true.

This means that if the player was on a platform at the end of last frame he can still jump because the onGround false code hasn’t kicked in yet.

It also means that if the player stays on a platform for the entire loop the onGround false code will be immediately reversed by the platform checking code that comes after it, so the player can still jump next frame even though onGround was temporarily false.

The only way for onGround to get set to false and stay false is if the player isn’t on a platform, which is exactly what we wanted. In fact, this works so well that you can remove the onGround=false from the up key handling code if you want. It’s redundant now.

As long as we’re changing things up, let’s have all viruses spawn at y=300 instead of y=200. This puts them at about the same level as the player and makes jumping over them easier during testing.

Finally, having to click a button just to start the game doesn’t make a lot of sense now that we have an actual Start Screen. So let’s rename canvasTest to startGame and link it to the loading of the page instead of a button press.

<body onload="startGame()" onkeydown="doKeyDown(event);" onkeyup="doKeyUp(event);">
   <canvas id="gameCanvas" width=600 height=400 style="border:1px solid black;"></canvas>
</body>

The Code So Far

Here it is. Play it. Download it. Study it.

I Want To Be A Winner

With the game a little bit cleaner than before we’re all set to add in a scoring system and a win condition. Then we’ll be able to actually beat our game instead of just jumping over the same boring obstacles again and again until we get bored.