Let’s Program A JavaScript Game 4: V8 600HP Game Engine

Reinventing The Wheel


Let’s be honest: Building our own game engine from scratch is probably not a great idea. There are already open-source JavaScript game engines that do everything we need but better. If you need to quickly and efficiently build a bug free JavaScript game looking at one of these existing solutions would definitely be your first step.


But this is a Let’s Program! Doing things from scratch and learning the hard way is our goal.


Your Game Comes With The Following Pieces…


When you get right down to it, all games are made up of the following two things:


  1. Game Rules: How the game works.
  2. Game State: What is going on in the game right now.


This is true for board games, card games and videogames.


In a board game the rules are usually written on the back of the box and the game’s state is where the pieces are on the board. In a card game the rules usually come in a little pamphlet and the state is the cards in each person’s hand. In a videogame the rules are built into the code and the state is kept track of by computer variables.


Conceptionally there is no real difference between Bob and Sally playing checkers by reading the back of a box and moving pieces around a board and Bob and his computer playing Grand Theft Auto by reading millions of lines of code and moving bits of data around inside memory.


Sure, a video game like Grand Theft Auto has dozens of “turns” per second to simulate real time action, but behind the scenes it’s still just the same old board-game mechanic of “follow the rules”, “make your move”, “update where the pieces are”.


How To Play The Game


Now that we’re all on board with the ideas of game rules and game state we can simplify running a game to a process of three repeating steps:


  1. Check for player input
  2. Update the game state based on the game rules and the player input
  3. Redraw the screen based on the current game state


As an example, let’s imagine that the user presses the up key.


In step one the game checks for input and notices that the user has pressed the up key.


In step two it starts updating the game state. The game rules say that if the player presses the up key while standing on the ground he should “jump” by setting his up velocity to 20. The rules also say that the player and every enemy should move velocity pixels per update, so the game moves the player up 20 pixels and also moves two enemies on screen 10 pixels to the left. The rules also say the game should check for player/enemy collisions but the game doesn’t find any so it stops.


In step three the game now redraws the screen. It draws the player 20 pixels up in the air and draws the two enemies 10 pixels to the left of where they used to be.


50 milliseconds later the loop repeats.


In step one the game checks for input and notices that the user is still pressing the up key.


In step two the game checks the rules. The rules say that the up key only makes the player jump if he is standing on the ground, which he no longer is, so the input gets ignored. But the rules also say that characters in the air should have their velocity decreased by 5, so the player’s upward speed drops from 20 to 15. The game then updates all the characters, moving the player up by 15 pixels and the enemies left by 10. It checks for collisions and still doesn’t find any.


The game now redraws the screen. The player is now 35 pixels up in the air and the enemies are 20 pixels to the left of where they started.


50 milliseconds later the loop repeats a third time. And then a fourth time and a fifth time and so on.


Since the loop happens several dozen times a second the player gets the illusion that everything is happening in real time, but when you get right down to it the whole game could be converted into a turn-based boardgame no problem. Not that anyone would want to play a boardgame where it takes a few hundred turns to cross a room and the rulebook is written mostly in math terms… but the idea is still sound.


Looping In Javascript


Warning: We’re going to be experimenting with loops. Odds are good that you will make a mistake, create a crazy infinite loop, freeze your browser and have to force it to shut down. So don’t panic if your test page suddenly stops responding. Just close the browser and double check whatever code you just typed in.


Now our final goal for the game loop is to have it run once every 50 milliseconds. That’s 20 times a second, which is honestly a little on the low side for a video game but still high enough to feel like smooth-ish animation and interaction. Most importantly it’s slow enough that we can basically guarantee our code will complete inside of each loop, giving us plenty of wiggle room when prototyping messy code. After that’s done we can always go back and adjust the loop to run more often if the game feels too jerky.


Now the most obvious approach to make a loop run once every 50 milliseconds would be be to use “setInterval”, which allows us to schedule a function to repeat again and again every X milliseconds. It sounds perfect and this approach can work. I’ve used it in demo games before.


But running the algorithm once every 50 milliseconds does have one big issue: What happens if your function takes longer than 50 milliseconds? You can wind up in a situation where setInterval triggers a new game loop while the old one is still running, which is a bad bad thing. Having two functions trying to control your game at the same time can corrupt variables, double move characters and generally mess everything up.


To avoid this we will use this strategy instead:

  1. Check what time it is at the start of our game loop.
  2. Check what time it is at the end of our game loop.
  3. If more than 50 milliseconds have passed, immediately call the game loop function again.
  4. If less than 50 milliseconds have passed, use setTimeout, which lets us schedule a function to be called only once after a timer runs out.


Because we don’t schedule the next game loop until after we know the current game loop has finished we can now guarantee that we will never end up with multiple game loops interfering with each other. If a loop takes longer than 50 milliseconds we just wait for it finish before moving on. This will cause slight lag, but that’s better than having the engine actually break.


Now on to the nitty gritty technical details. When using setTimeout the first argument has to be a STRING copy of the code you want to run and the second argument is how many milliseconds the browser should wait before running it.


Making sure the first argument is a string is important. If the first argument is actual code it will be called immediately* instead of after the timer goes off. You can see this for yourself by experimenting with code like this:


//Wrong! The alert is called immediately
setTimeout(alert('Time Is Up!'), 2000);
//Right! The code inside the string gets called after two seconds
setTimeout("alert('Time Is Up!')", 2000);


The big risk here is creating infinite loops. For instance, our upcoming gameLoop function ends by scheduling another gameLoop. If you accidentally call gameLoop immediately instead of properly quoting it and scheduling it for later you will end up with an infinite loop of hyper-fast gameLoops instead of the steady one-loop-per-50-milliseconds you were hoping for. This will also probably freeze your browser. Happened to me. Don’t let it happen to you.


Prototyping The Loop


Open up the test code from two posts ago and replace whatever script you had with this:


var loopCount=0;

function canvasTest(){
   gameLoop();
}

//The main game loop
function gameLoop(){
   var startTime = Date.now();
   getInput();
   updateGame();
   drawScreen();

   var elapsedTime = Date.now()-startTime;
   if(elapsedTime>=50){ //Code took too long, run again immediately
      gameLoop();
   }
   else{ //Code didn't take long enough. Wait before running it again
      setTimeout("gameLoop()",50-elapsedTime);
   }
}

//Get the player's input
function getInput(){
   //Empty prototype
}

//Update the game by one step
function updateGame(){
   loopCount++;
}

//Draw the screen
function drawScreen(){
   var canvas = document.getElementById('gameCanvas');

   var context = canvas.getContext('2d');
   
   //Draw background
   context.fillStyle = '#dcdcdc';
   context.fillRect(0,0,600,400);

   //Draw black text
   context.fillStyle = '#000000';
   context.fillText("Loop Count: "+loopCount, 20, 20);
}


Now click the “Canvas Test” button and watch that counter climb at a speed of approximately 20 loops per second.


Let’s walk through the code really fast.


Clicking the button triggers canvasTest like usual, and canvasTest calls gameLoop.


gameLoop takes a note of what time it is (in milliseconds) by calling Date.now. The game loop then runs the three steps of our game (get player input, update game, and draw screen) and then checks how much time has passed by comparing the stored “startTime” to a second call to Date.now. If 50 or more milliseconds have passed we are running slow and need to call gameLoop again immediately. Otherwise we set a timer and have gameLoop run again later.


The three steps of the game are pretty empty at this point. We don’t care about player input so we leave that function blank. Our only game update is to increase the global “counterLoop” and painting the screen involves nothing but redrawing the background and printing a message about how many loops we have seen.


Next Time: Let’s Get Interactive


We’ve just built a simple but serviceable game engine skeleton. Now it’s time to start filling in the prototype functions, starting with getInput. Join me next week to see how that goes.


* There is one scenario where putting a function call in setTimeout would be a good idea: When the function’s main purpose is to return a string containing the code you actually want to schedule. Maybe you have a “builScheduledCode” function that returns different string wrapped functions depending on the state of the program. Like, if the debug flag is set it returns “logState();runLogic();” but if the debug flag is clear is only returns “runLogic()”;
Gengo Girls #11: Mouthwatering Metaphor

Gengo Girls #11: Mouthwatering Metaphor

Next Comic >>

<< Previous Comic

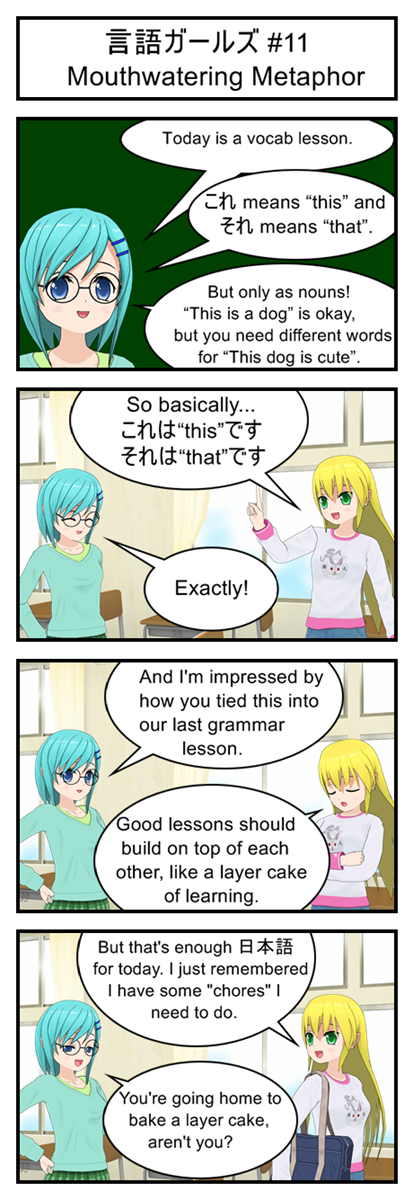
What’s better than a cake? Two cakes glued together with frosting.

What’s better than two cakes glued together with frosting? Three cakes glued together with frosting!

Vocabulary

これ = this (noun)

それ = that (noun)

Transcript

言語ガールズ #11

Mouthwatering Metaphor

Blue: Today is a vocab lesson.

Blue: これ means “this” and それ means “that”. But only as nouns!

Blue: But they can only be used as nouns!

“This is a dog” is okay, but you need different words for “This dog is cute”.

Yellow: So basically…

これは“this”です

それは“that”です

Blue: Exactly!

Blue: And I’m impressed by how you tied this into our last grammar lesson.

Yellow: Good lessons should build on top of each other, like a layer cake or learning.

Yellow: But that’s enough 日本語 for today. I just remembered I have some “chores” I need to do.

Blue: You’re going home to bake a layer cake, aren’t you?

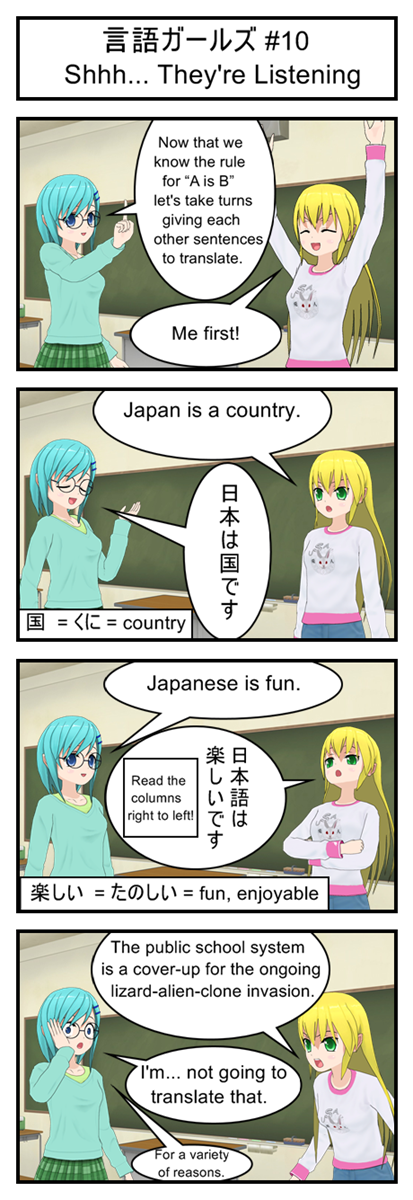
Gengo Girls #10: Shhh… They’re Listening

Gengo Girls #10: Shhh... They're Listening

Next Comic >>

<< Previous Comic

I did my best to come up with a comically outrageous conspiracy theory… but instinct tells me there’s probably at least one person out there who sincerely believes this. Which is silly because we all know the real alien threat is cybernetically enhanced war hamsters, not lizard clones.

Vocabulary

= くに = country

楽しい = たのしい = fun, enjoyable

Transcript

言語ガールズ #10

Shhh… They’re Listening

Blue: Now that we know the rule for “A is B” let’s take turns giving each other practice sentences to translate.

Yellow: Me first!

Yellow: Japan is a country.

Blue: 日本は国です

Blue: Japanese is fun.

Yellow: 日本語は楽しいです

Note: Read the columns right to left!

Yellow: The public school system is a cover-up for the ongoing lizard-alien-clone invasion.

Blue: I’m… not going to translate that.

Blue: For a variety of reasons.

Gengo Girls #9: Fill In The Blanks

Gengo Girls #9: Fill In The Blanks

Next Comic >>

<< Previous Comic

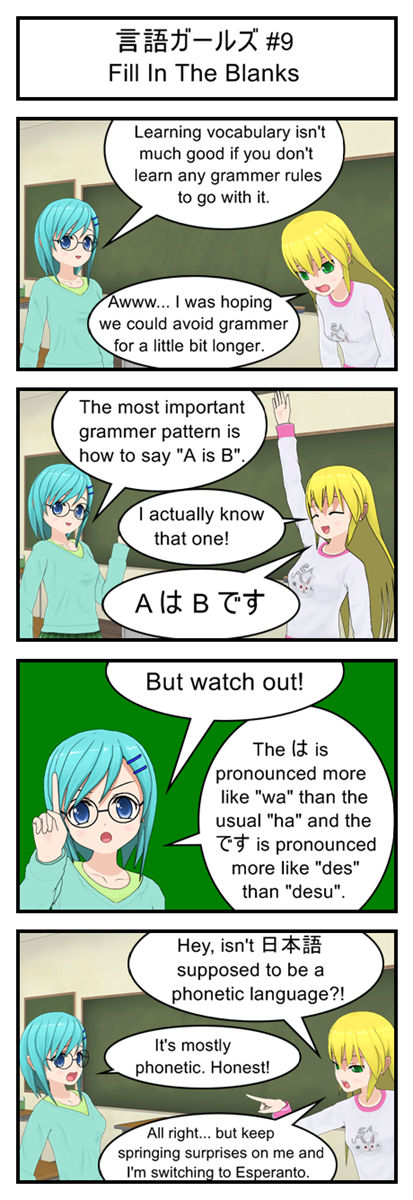
Esperanto is an artificial language specially designed to be easy for Europeans and other Westerners to learn. It’s actually been really successful as far as artificial languages go but it doesn’t look like it’s ever going to become the universal, global tongue the inventors hoped it could be.

Transcript

言語ガールズ #9

Fill In The Blanks

Blue: Learning vocabulary isn’t much good if you don’t learn any grammer rules to go with it.

Yellow: Awww… I was hoping we could avoid grammer for a little bit longer.

Blue: The most important grammer pattern is how to say “A is B”.

Yellow: I actually know that one!

Yellow: AはB です “.

Blue: But watch out!

Blue:The は is pronounced more like “wa” than the usual “ha” and the です is pronounced more like “des” than “desu”.

Yellow: Hey, isn’t 日本語supposed to be a phonetic language?!

Blue: It’s mostly phonetic. Honest!

Yellow: All right… but keep springing surprises on me and I’m switching to Esperanto.

Let’s Program A JavaScript Game 3: Designing “Defrag Cycle”

Some Obvious Game Design Theory


Videogames are a combination of gameplay and theme.


In Dragon Quest, an RPG, gameplay consists of exploring grids, navigating menus and trying to make your team’s numbers go up while the enemy team’s numbers go down. But the theme is “Fantasy Adventure” which turns the grids into dungeons and the number manipulations into tense combat with all sorts of magic and monsters.


In Counter Strike, an FPS, gameplay is all about moving around a big piece of geometry and trying to tag other players with various vectors. But the theme turns the geometry into a modern day battlefield and the vector tagging into guns and bullets.


When designing a game sometimes you start with a gameplay idea and then come up with a theme that fits it. Other times you start with a theme in mind and then come up with gameplay that lets you tell the story you want. And quite often the theme and gameplay evolve together in the designer’s mind, each one influencing the other.


Designing Our Gameplay


For this Let’s Program we’re going to take a “Gameplay First” approach to design. Mostly because we’re here as programmers and as programmers our main focus is on writing interesting code, not writing interesting stories. We can talk about the fine art of game theme design some other time.


One easy way to design a game is to play a lot of other games and then adopt (a.k.a. shamelessly copy) whatever gameplay elements you enjoy the most. This Let’s Program is going to focus on the “Running” genre of casual browser games. These are games where the player controls an avatar that constantly runs to the right and the player’s goal is to jump over various obstacles in order to see how far they can go.


Here are a few examples (built using Flash, not JavaScript, but you get the idea):


These games were both built by people with significantly more time and artistic talent than me, so my final product isn’t going to look anywhere near as nice or have as many special features. But I will still be following the same basic gameplay pattern.


A Picture Is Worth A Thousand Words


OK, so the basic idea is that the player has to move along a path while avoiding obstacles. In my game the two main obstacles are going to be:

  1. Gaps in the path
  2. Moving projectiles


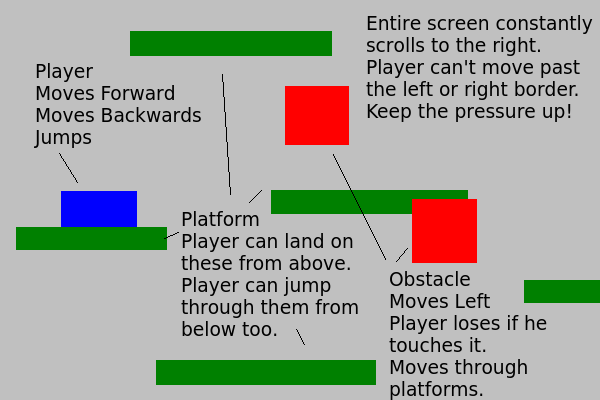
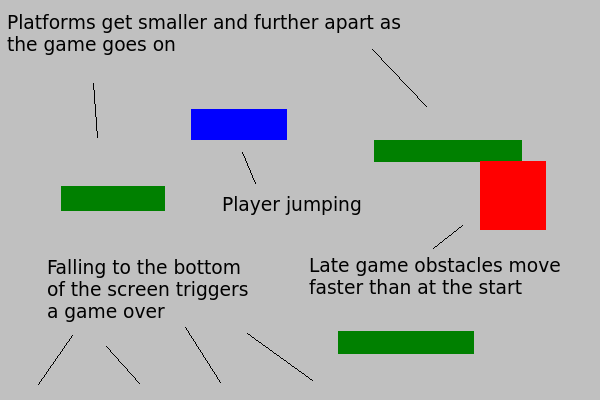
In order to avoid these obstacles the player can move left, right and perform simple jumps. To help keep the pressure on the player the entire screen will scroll constantly, forcing them to keep moving. We will also make the game get harder as it goes on by making the projectiles faster and the platforms smaller as time goes on.


Here are a couple rough pictures that help explain the gameplay I’m aiming for.

roughdesign1

Try to imagine all the pieces moving around

roughdesign2

Try making some sound effect noises while looking at this picture. It helps.

Introducing: Defrag Cycle!


Now that we have the basic gameplay under control we can start working on adding a theme to the game.


Our gameplay is pretty basic and with the right art you could turn the game into just about anything. A hero jumping along cliffs while avoiding fireballs. A ninja jumping from tree to tree while avoiding shurikens. Or even something completely crazy like a plumber jumping around on pipes while avoiding flying turtles.


But I can’t draw, so my choice of game themes is somewhat limited. I’m going to have to rely on free clipart for all my graphics, like the motorcycle and virus from the canvas tutorial.


In fact, let’s use those two exact graphics. What kind of game theme can we come up with that involves a motorcycle and a bunch of viruses?


How about… the motorcycle represents a “defragmentation” computer program that helps clean up hard drives. The obstacle course that the player has to navigate represents a fragmented hard drive and the viruses represent (obviously) computer viruses. The player’s goal is to completely defrag the harddrive by avoiding the viruses and not failing off the path.


Yeah, I realize it sounds kind of like Tron. But is that really a bad thing?


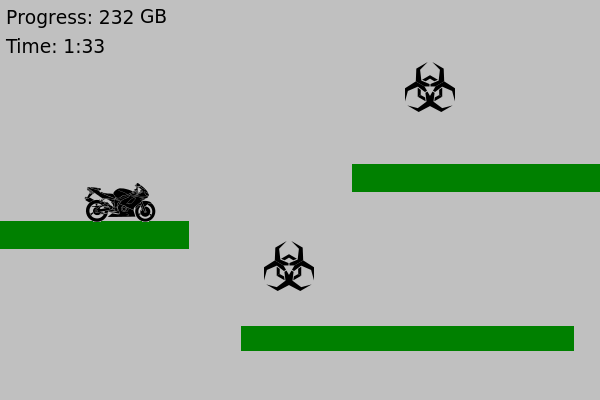
Anyways, the game will have two score counters: a “progress” and a “time”. Both will automatically go up as long as the player isn’t dead. When the “progress” count reaches 1,000 GB the hard drive is completely defragged, the player wins and their total time is shown.


To help reward good players we will introduce a “graze” mechanic where people who get really close to a virus without actually colliding with it will be awarded bonus “progress” points. This will let good players defrag the hard drive faster than usual and give them a much lower total time.


Here are a couple screen shots of what I had in mind:

roughdesign3

Not bad for a game built entirely around two pieces of free clipart

roughdesign4

I don’t actually like games with graze mechanics. Why am I doing this? What I have become!?


Next Time: Start Your (Game) Engines


Now that we have a basic game design document we can start to actually program our game. So join me next week as we take the first step towards building the custom JavaScript we need to actually run our game.

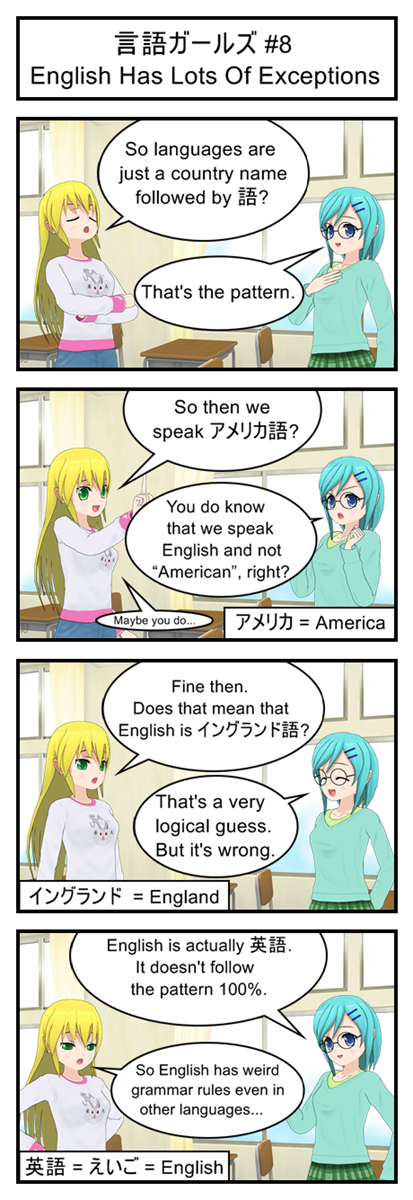
Gengo Girls #8: English Has Lots Of Exceptions

Gengo Girls #8: English Has Lots Of Exceptions

Next Comic >>

<< Previous Comic

It’s easy to make fun of English for having lots of strange grammar exceptions and weird spellings, but it really isn’t that much worse than your average language.

Also, here’s a fun thought: America was named after the explorer Amerigo Vespucci. Which means there was a very real chance it could have been called “Vespuccica” instead.

Vocabulary

アメリカ = America

イングランド = England

英語 = えいご = English

Transcript

言語ガールズ #8

English Has Lots Of Exceptions

Yellow: So languages are just a country name followed by ?

Blue: That’s the pattern.

Yellow: So then we speak アメリカ語?

Blue: You do know that we speak English not “American”, right?

Yellow: Maybe you do…

Yellow: Fine then. Does that mean that English is イングランド語

Blue: That’s a very logical guess. But it’s wrong.

Blue: English is actually 英語. It doesn’t follow the pattern 100%.

Yellow: So English has weird grammar rules even in other languages…

Gengo Girls #7: Go, Go Gengo Rangers!

Gengo Girls #7: Go, Go Gengo Rangers!

Next Comic >>

<< Previous Comic

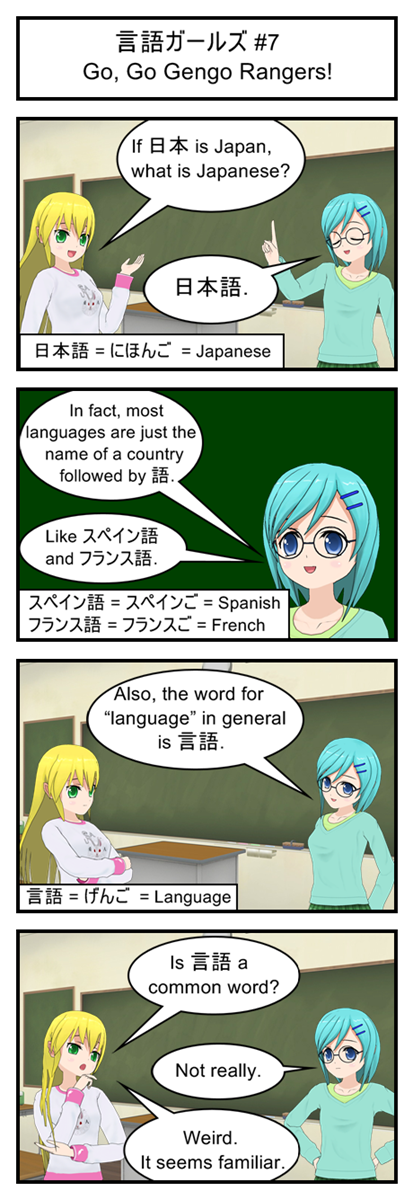
Here’s a comic to test how many of you actually went ahead an memorized the katakana along with the hiragana. You’ll be the ones who recognize スペイン as “supein” (Spain) and フランス as “furansu” (France).

Also, I’ve been thinking and it seems to me that “Genki Gengo Girls” is too long of a title to just roll of the tongue. So from now on this comic is just “Gengo Girls”. Much catchier, isn’t it? I’ll eventually get around to editing the first six strips with the new title.

Vocabulary

日本語 = にほんご = Japanese

スペイン語 = スペインご = Spanish

フランス語 = フランスご = French

言語 = げんご = Language

Transcript

Yellow: If 日本 is Japan, what is Japanese?

Blue: 日本語.

Blue: In fact, most languages are just the name of a country followed by .

Blue: Like スペイン語 and フランス語.

Blue: Also, the word for “language” in general is 言語.

Yellow: Is 言語 a common word?

Blue: Not really.

Yellow. Weird. It seems familiar.


Gengo Girls #6: Made In Japan?

Genki Gengo Girls #6: Made In Japan

Next Comic >>

<< Previous Comic

One popular theory for the origin of “Japan” is that the English originally heard about the country from a European explorer who originally heard about the country from the Chinese. After a multilingual game of telephone like that it’s really no surprise that “Nippon” wound up a little warped by the time it made it into our dictionaries.

Vocabulary

日本 = にほん = Japan

日本 = にっぽん = Japan

Transcript

元気 言語 ガールズ #6

Made In Japan?

Yellow: Hey, what’s the Japanese symbol for Japan?

Blue: The symbol for Japan looks like this. It’s pronounced にほん.

Yellow: にほん?! That doesn’t sound like “Japan” at all!

Blue: It can be pronounced as にっぽん too.

Yellow: Still not “Japan”!

Yellow: It’s a country name so it should be the same everywhere, right? Why is it different in English?

Blue: I’m really not sure, but we could probably find the answer online.

Yellow: Never mind then. I’m not that curious.

Blue: It would only take a few minutes to research…

Yellow: Yeah, but I only had about thirty seconds worth of curiosity.

Let’s Program A JavaScript Game 2: The Canvas Of Dreams

Let’s Program A JavaScript Game 2: The Canvas Of Dreams


No Time For HTML


This is “Let’s Program A JavaScript Game” not “Let’s Program A Website” so instead of discussing the fine points of HTML structuring I’m just going to drop the code for a very basic skeleton page that we can use for testing out the canvas. Just type or copy the following text into a file named something like “javascriptgame.html” and then open it up with your favorite modern browser (most up to date browsers support the canvas):


<!DOCTYPE html>
<html>
<head>
   <script>
      function canvasTest(){
         alert("Canvas Test");
      }
   </script>
</head>
<body>
   <canvas id="gameCanvas" width=600 height=400></canvas>
   <br/>
   <button onclick="canvasTest()">Canvas Test</button>
</body>
</html>


Not much to this. The HTML document has a HEAD, that holds our script, and a BODY that holds our canvas and one button. Clicking the button calls our script and if everything works properly you should get a screen sort of like this:

Just a quick test to make sure your button is connected to the script

Just a quick test to make sure your button is connected to the script

Paint It Black


The first step to actually doing something interesting with our canvas is to put a reference to the canvas inside of a JavaScript variable. Then we use that reference variable to create a “context” object that can be used to do the actual work.


With our context all set up painting the entire canvas is as simple as setting the fillStyle of our context to whatever color we want and then calling the fillRect function. This function needs four arguments: the x and y coordinates of the top-left corner of the rectangle you want to draw along with the width and height of the rectangle.


Here’s our updated canvastTest function and a picture of what it should do. Remember to refresh the page in order to get the new code into the browser. If clicking on the button just shows the alert again odds are the old page is still in your browser memory and refreshing is the easiest way to force it to get rid of the old and grab the new.


function canvasTest(){
   var canvas = document.getElementById('gameCanvas');
   var context = canvas.getContext('2d');
   context.fillStyle = '#000000';
   context.fillRect(0,0,600,400);
}


A boring but important first step: Painting the entire canvas all one color

A boring but important first step: Painting the entire canvas all one color


Paint It Black, But With Polka Dots


Painting the entire screen black is kind of boring. Let’s add some color now by choosing a new fillStyle and then drawing some more rectangles on top of the black background rectangle.


Here’s an updated canvasTest that draws two red squares and a blue square when we hit the button:


function canvasTest(){
   var canvas = document.getElementById('gameCanvas');
   var context = canvas.getContext('2d');

   //Draw background
   context.fillStyle = '#000000';
   context.fillRect(0,0,600,400);
 
   //Draw red object
   context.fillStyle = '#ff0000';
   context.fillRect(100,100,50,50);
   context.fillRect(300,300,50,50);

   //Draw blue object
   context.fillStyle = '#0000ff';
   context.fillRect(200,200,50,50);
}

Notice that when drawing the two red squares we only had to set the fillStyle once.


Colorful Geometry Is Colorful

Colorful Geometry Is Colorful


Graphics And Sprites And Images, Oh My!


Drawing colored boxes is nice, but not quite enough for a full game. People expect their games to actually look like things; the box has to be a robot or a soldier or an alien or an alien-robot-soldier.


So let’s add some graphics to this demo using these two bits of clipart I found on a free clipart website*. You’ll need to save them to the same folder as your code if you want to keep following along.

cyclevirus

Before we can draw these images to the canvas we need to load them into our code, which we do easily enough by adding a few lines to the top of our script that will be automatically run when the page loads. But watch out! Loading images over the Internet can take a long time and trying to draw an image before loading it will crash your game. This won’t be a problem for your test, since the graphics are small and already on your computer, but for an actual online game with lots of graphics it can be a real problem. We’ll talk about how to fix that later.


Once the images are loaded drawing them to the screen is as easy as a call to drawImage. Note that I also changed the color of the background so that the black clipart shows up better. Otherwise you’ll have two black images on a black screen and you’ll have no way to tell if it’s working or not.


var cycleImage = new Image();
cycleImage.src = "cycle.png";

var virusImage = new Image();
virusImage.src = "virus.png";

function canvasTest(){
   var canvas = document.getElementById('gameCanvas');
   var context = canvas.getContext('2d');

   //Draw background
   context.fillStyle = '#dcdcdc';
   context.fillRect(0,0,600,400);

   //Draw red object
   context.fillStyle = '#ff0000';
   context.fillRect(100,100,50,50);
   context.fillRect(300,300,50,50);

   //Draw blue object
   context.fillStyle = '#0000ff';
   context.fillRect(200,200,50,50);

   //Draw Images
   context.drawImage(cycleImage, 300, 100);
   context.drawImage(virusImage, 300, 200);
}


Motorcycles are cool! Hazard symbols are cool!

Motorcycles are cool! Hazard symbols are cool!


Animation! Sort of!


We’ve actually more or less covered everything we need to know to start prototyping our game. But just for fun let’s update our function to be “animated”: Every time you click the button the squares and clipart will move. We do this by creating a global “offset” variable right before our function. By adding an offset to the x or y coordinates of our drawings we can move them around the screen, and by constantly increasing the offset we can create the illusion that they are steadily moving in one direction.


So change your script to this and then click the “Canvas Test” button a few dozen times and see what happens.


var offset=0;

var cycleImage = new Image();
cycleImage.src = "cycle.png";

var virusImage = new Image();
virusImage.src = "virus.png";

function canvasTest(){
   var canvas = document.getElementById('gameCanvas');
   var context = canvas.getContext('2d');

   //Draw background
   context.fillStyle = '#dcdcdc';
   context.fillRect(0,0,600,400);

   //Draw red object
   context.fillStyle = '#ff0000';
   context.fillRect(100+offset,100,50,50);
   context.fillRect(300+offset,300-offset,50,50);

   //Draw blue object
   context.fillStyle = '#0000ff';
   context.fillRect(200,200-offset,50,50);

   //Draw Images
   context.drawImage(cycleImage, 300 - offset, 100);
   context.drawImage(virusImage, 300 + offset, 200);

   offset+=10;
}


A few things worth noticing here:


  • When two objects overlap whichever one comes last in the code gets drawn last and shows up on top. Example: The blue and red square
  • When an object is partially outside the canvas the part inside the canvas still gets drawn
  • You can “draw” an object completely outside of the canvas without breaking anything. It just doesn’t show up.


Time To Decide What To Do With All This Cool Code


So we can draw screens now and have even covered the basics of animation. We’re basically all set to start building our game!


Or we would be if we had any idea what we were going to build. So next week I’m going to take some time and lay out a simple game design document.


* Original images can be found here:

https://openclipart.org/detail/191534/motorcycle-silhouette-vector-by-raimondi1337-191534

https://openclipart.org/detail/28408/malware-hazard-symbol-by-pbcrichton


Gengo Girls #5: Baby Steps

Genki Gengo Girls #5: Baby Steps

<< Previous Comic

Next Comic >>

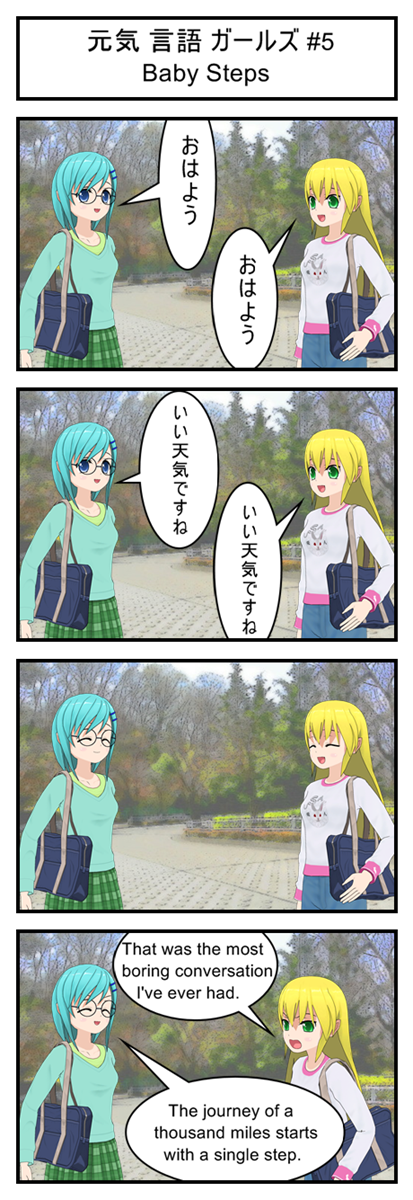
Hey, look! Vertical text. The comic’s feeling awfully Japan-y today.

Although this does bring up a really weird problem: Japanese and English comics arrange their speech bubbles differently. In English you expect to read the bubbles top to bottom, left to right. In Japaense you are supposed to read the bubbles from top to bottom, right to left.

So how exactly am I supposed to arrange the speech bubbles in a bilingual comic!?

I figure as long as I follow the top to bottom ordering rule it doesn’t matter so much which bubbles are to the left and right of each other. I hope this doesn’t cause too much confusion.

Transcript

Blue: おはよう

Yellow: おはよう

Blue: いい天気ですね

Yellow: いい天気ですね

Yellow: That was the most boring conversation I’ve ever had.

Blue: The journey of a thousand miles starts with a single step.