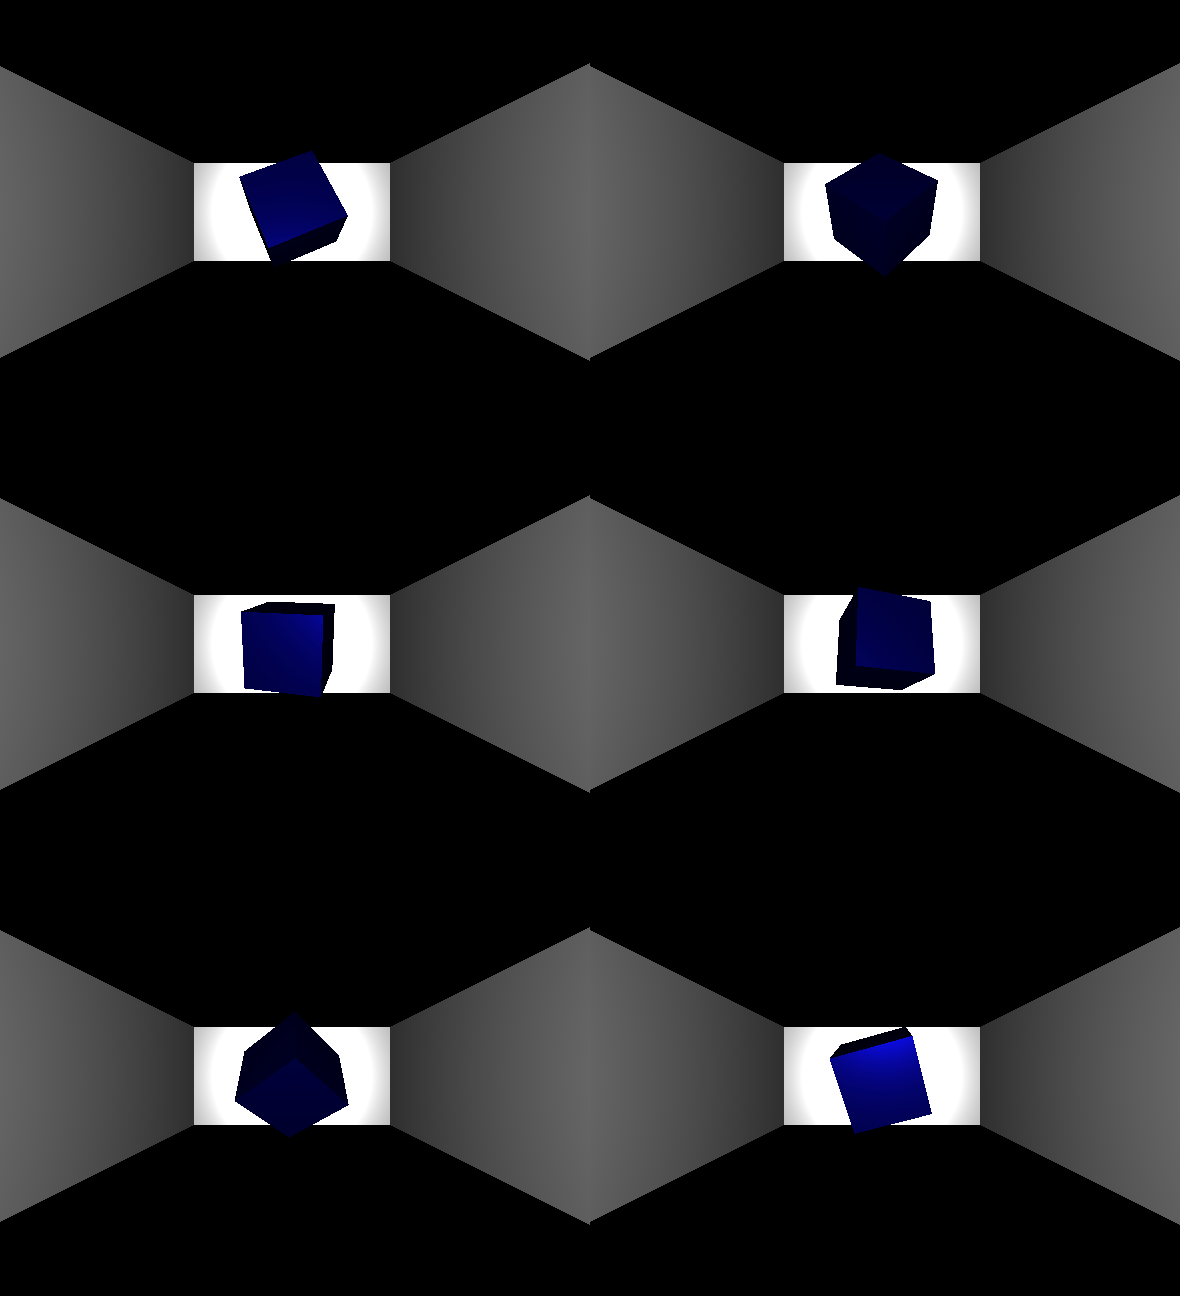
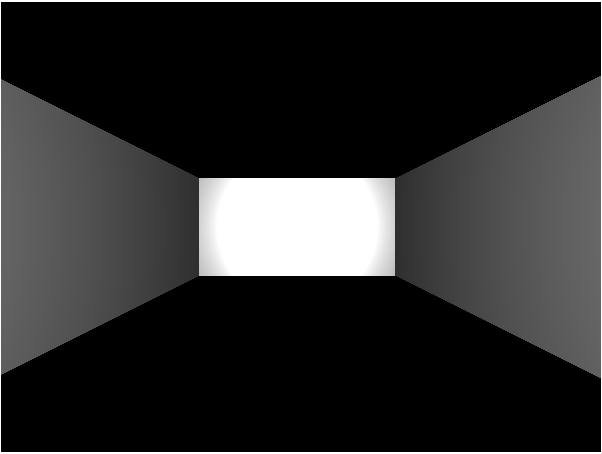
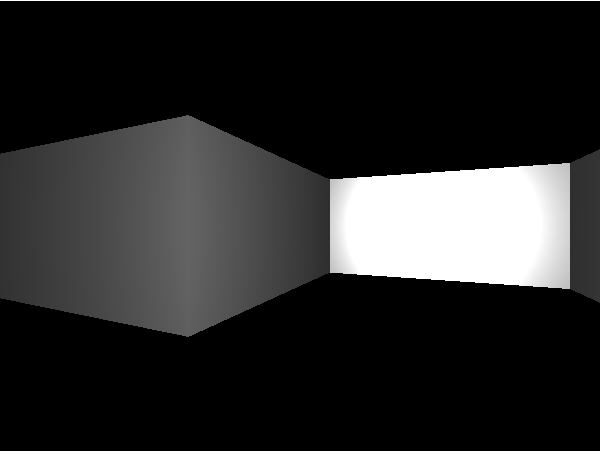
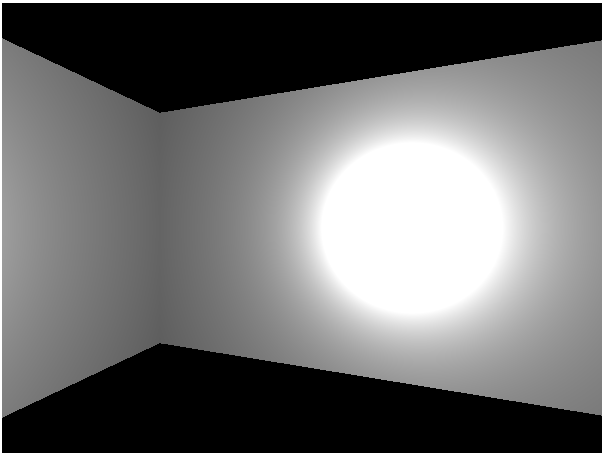
Can We Buy The Internet Back From Advertisers?

Recently people have become a little disturbed by how much of their personal information is being collected and processed by big Internet companies like Google and Facebook.

But the only reason those companies care about collecting all that personal data is because it’s the most efficient way to sell advertising.

And the only reason they care about advertising is because selling ads is the most effective way to make money off of a free service.

And the only reason their services are free is because no one is willing to pay a monthly fee for access to social media and search engines.

Or are they?

It’s true that when these technologies first went mainstream people weren’t really sure what to do with them. They were reluctant to spend real money on virtual products. As a result giving access away for free was pretty much the only way to get any users.

But now? People know how valuable an effective search engine is. People have seen how helpful social media is for keeping up with friends and family (and arguing with strangers). People believe the Internet is a genuine necessity of modern life ranking only slightly behind food and water.

And now that people understand how useful these services are, maybe they are also finally willing to directly pay for them. Maybe even pay enough money to make ads unnecessary and make data mining less lucrative.

The big question is: How much would Google or Facebook or Whatever Inc. have to charge to survive without any ads? And how many people would be willing to pay that?

Casual research (a.k.a. some random articles I found on the web) suggests that the average user provides Google with $200 worth of ad revenue per year, and about half that much to social media companies like Facebook and Twitter.

That’s… really not that bad. Less than phone service and about the same as other major software as service platforms. With that in mind I bet a lot of people would gladly pay $200 a year for a “pro” level Google account with no ads or $100 to keep in touch with family on some sort of genuinely “privacy-first” social media platform.

In some ways I think this transition is already happening. Netflix has made paying for software as a service a mainstream idea and a lot of other websites already offer the choice to remove ads with a paid membership. Now that data privacy is also becoming a mainstream concern I really wouldn’t be surprised to naturally see more and more “free (with ads)” products offering privacy enhanced “pro” membership options.

So while a lot of people are worried we’re rapidly hurtling towards some sort of distopian corporate panopticon it’s also very possible that we’ve reached peak digital insecurity and that things are going to start getting better as more and more companies shy away from unpopular advertising tactics and instead tap into the growing wave of customers who place a premium on responsible data handling.

Let’s Program A 3D Browser Game Part 11: Hunting For Treasure

It’s time to finish this game up by adding a “win” condition. Fortunately we already have all the pieces we need to pull this off: collectables that run customizable bits of code when collected.

The plan here is simple: After randomly generating the maze we will also randomly place several collectables. When collected the collectables will run a piece of code that checks how many the player has picked up. When the player gathers the last collectable the game will display a “You Win!” message.

One Week Too Late For An Easter Bunny Joke

Let’s ignore the collectable counting logic for now and just focus on randomly placing collectables throughout the maze. At first glance this seems like an easy task: Pick a random X and Y coordinate, put a collectable there, repeat as necessary.

The trick is that we don’t want to ever accidentally put two objects on the same space. Not only would this be bad game design, it would probably crash our code because of a slight mistake we made in the way we remove collected objects from our global collectables list? (Extra Credit: Find the bug and fix it!).

Not really much of a trick though. All it means is that our object placing code needs to go inside of a loop that keeps choosing random spaces until it finds one that is empty.

function createCollectiblesList(number, grid){

   var collectables = [];

   var width = grid[0].length;
   var height = grid.length;

   for(var i=0; i < number; i++){
      var x;
      var y;
      var unique = false; //Set loop flag up so the loop runs at least once

      while(!unique){
         x = Math.floor(Math.random()*width);
         y = Math.floor(Math.random()*height);
         unique = true; //Assume the random coordinate is empty
         collectables.forEach(function(collectable){
            if(collectable.x == x && collectable.y == y){
               unique = false; //Oops! Square already has a collecatble. Reset flag so we loop again
            }
         });
      }

      //If we've gotten here the loop must have found an empty square and exited
      collectables.push({
         x:x, 
         y:y, 
         action:function(){alert("You picked up a collectable");}
      });
   }

   return collectables;
}

How I learned To Stop Worrying And Love Semi-Nondeterministic Code

I’ll be honest: Every time I write a loop that depends on finding a unique random value I find myself worrying “But what if the computer, in a huge coincidence, keeps generating the same random numbers again and again for hours on end and so it never breaks out of the loop.”

This is silly. The odds of a computer generating the same set of random coordinates trillions of times in a row is so phenomenally low that your user is more likely to be killed by random meteorite strike than they are to get stuck for even a single minute while waiting for your code to finish filling the map with collectables.

In fact, just for fun, I made a 20 x 20 maze and filled it with 400 collectables. That means our random algorithm should constantly be bumping into it’s own filled slots and having to guess again. The last collectable in particular should take a long time to place since there is only a 1 in 400 chance of the computer randomly finding the last remaining open space. This seems like the perfect chance for slow code!

The maze still generated itself almost immediately.

It’s easy to forget just how crazy fast computers have become. Sure, industrial code that deals with millions or billions of records still has to be carefully designed with speed in mind but if you’re only juggling a few thousand pieces of data around you can pretty much do whatever you want with no worries. Odds are good it will run plenty fast and if it doesn’t you can always fix it later. It’s a waste of valuable developer time to overly obsess up front.

Weren’t We Programming Something?

Let’s get back to our game. With that edit made why not update your maze building code with something like var collectables = createCollectiblesList(5, mazeGrid); and see what happens?

Just make sure the total number of collectables you place is smaller than the maze. Trying to randomly find unique spaces for 30 collectables in a maze with only 25 spaces WILL lock you into an infinite loop. All things considered we probably should update createCollectiblesList to throw an error when given impossible input or maybe automatically adjust the total collectables to a min or zero and a max of 1 per grid space.

Who’s Keeping Score?

Our final task is simultaneously one of the easiest but most difficult parts of this entire Let’s Program.

In order to let the player “Win” all we need to do is:

1) Keep track of how many collectables there are in total

2) Create a “collectables collected” variable that starts at zero

3) Update the custom code inside each collectable to update the “collected” variable by one

4) When the “collected” variable equals the “total” variable we display a message.

Super simple, right? All we need is a ++ and a == and we’re basically done.

But where should all the variables live?

Probably the best choice would be to make them global. That way not only could the collectables reference them but we could also use them to print the players progress onto the screen (collectables: 2/5).

But since this is a semi-educational blog let’s take avoid the obvious solution and instead take this opportunity to learn about a nifty but somewhat obscure programming technique: closures.

What is a closure? Well, the technical explanation can get awfully confusing but the core idea is pretty simple. A closure is a trick that takes a temporary variable and makes it permanent by placing it, or “enclosing” it, inside of another piece of longer lived code. As long as that wrapper code is still alive the temporary variable will stick around even if it’s way past it’s expiration date. Admittedly this only works in languages with automatic memory management but that’s pretty much everything except C and C++ these days.

This means we could create totalCollectibles and collectablesCollected variables directly inside of our createCollectiblesList function, insert them into the action code that runs when a collectable is collected and then rest assured that those two variables would hang around until the end of our game even though normal Javascript logic suggests they should have been deleted as soon as createcollectiblesList finished running.

function createCollectiblesList(number, grid){

   var collectables = [];

   var width = grid[0].length;
   var height = grid.length;

   var totalCollectibles = number;
   var collectablesCollected = 0;

   for(var i=0; i < number; i++){
      var x;
      var y;
      var unique = false;

      while(!unique){
         x = Math.floor(Math.random()*width);
         y = Math.floor(Math.random()*height);
         unique = true;
         collectables.forEach(function(collectable){
            if(collectable.x == x && collectable.y == y){
               unique = false;
            }
         });
      }

      collectables.push({
         x:x, 
         y:y, 
         action:function(){
            collectablesCollected++;
            alert("You have picked up "+collectablesCollected+" out of "+totalCollectibles+" collectables");
            if(collectablesCollected == totalCollectibles){
               alert("Congratulations! You won the game! Refresh the page to play again.");
            }
         }
      });
   }

   return collectables;
}

Give it a shot. Picking up collectables should now properly reflect your running total as well as the actualy total of collectables. And we didn’t need to use a global variable or object oriented anything to do it.

Like I said earlier, this probably wasn’t the best way to solve this problem. Turning our collectable account into a closure variable makes it invisible to everything except the function inside each collectable objects. So if it ever turns out we need that data for something else we’d be plain out of luck and have to rewrite the closure to use something more traditional like global data or object references.

But closures are cool and, used properly, can achieve a lot of the same results as Object Oriented Programming. Just without the objects, which might be exactly what you need. And even if you personally never need closures it’s still useful to recognize how they work in case you have to maintain code from somebody else who used them.

What Next?

I’m happy with where we’ve ended up here. We have some basic 3D graphics, a nice grid based movement system and dungeon that randomly rebuilds itself every time the game is run. I still need to clean the code up a little and post the finished product for everyone to look at but aside from that I’m done.

But maybe you still want more? Understandable. Here’s some ideas:

1) Improve the graphics. We’ve been using nothing but solid colored rectangles and cubes. Three.js can do so much more than that. Read the documentation and see if you can add some sort of brick or stone texture to the wall. Maybe add a dirt floor or a wooden ceiling. Then see if you can replace the collectables with a more interesting 3D object, maybe even one loaded from a 3D file instead of just using built-in geometry.

2) Improve the random maze. We used literally the simplest maze building algorithm out there and it shows in the low quality of our random mazes. Why not try to improve things by researching some alternative, higher-quality, maze algorithms and using them instead?

3) Improve the game experience. Popping up alert messages to tell the player when they have won is kind of boring. Why not make it more like a real game? Show the player’s collectable count up in the corner, display an on-screen win message when they find everything and include an option to restart the game from within the game instead of forcing them to reload the page.

4) Improve the event system. Right now we have one array of collectables that all run the same code when touched. Make things more flexible by adding in new collectables with different behavior. Try to figure out an easy way to create, track and render all sorts of different objects all at the same time. Some ideas might include a teleporter that moves the player randomly or a bomb that resets the player’s collectable count to zero and re-randomizes the dropped objects.

Any one of those would be a great experience for an up and coming 3D game programmer. Finish all four and you probably understand enough about dungeon crawling programming to take a shot at building your own complete engine in whatever language you want.

Let’s Program A 3D Browser Game Part 10: Sometimes I Surprise Myself

The worst part of programming your own game is the fact that it’s hard to enjoy a game you know inside and out. It’s no fun finding the secret treasure chest on stage 4 when you’re the one who put it there in the first place.

One solution to this is to randomize your content. If the exact setup of the map changes every time you open the program then suddenly even the creator can be surprised by the outcome of his game.

Of course, in a serious game project you have to balance the replay value of a game that is always different against the high quality of a game that was crafted entirely by hand. Turns out “infinite replay value” isn’t so valuable if all your random content is boring.

But this is a programming project! We don’t care about the end user, we just want to practice writing cool stuff and a random dungeon generator would be a cool thing to add to our little mini browser maze.

It Sure Is Dark In Here…

Before we go write a program for building an entire random dungeon let’s make sure our engine can actually handle something bigger than the 2×2 closet we’ve been experimenting with so far. Update your maze generator function with the following code to make it 3×3 instead.

var mazeGrid = [Array(3), Array(3), Array(3)];

mazeGrid[0][0] = new MazeCell(true, false, false, true);
mazeGrid[0][1] = new MazeCell(true, false, false, false);
mazeGrid[0][2] = new MazeCell(true, true, false, false);
mazeGrid[1][0] = new MazeCell(false, true, false, true);
mazeGrid[1][1] = new MazeCell(false,true,true,true);
mazeGrid[1][2] = new MazeCell(false,true,false,true);
mazeGrid[2][0] = new MazeCell(false,true,true,true);
mazeGrid[2][1] = new MazeCell(true,false,true,true);
mazeGrid[2][2] = new MazeCell(false,true,true,false);

return mazeGrid;

Now load up your maze, walk around a bit and see if you can see any problems. Or more accurately if you can NOT see any problems.

That’s right, half your walls are missing!

You first instinct here is probably to double check your mazeGrid definition and see if maybe there was a problem with the code I gave you to copy paste. Maybe a few walls were accidentally left out or pointing the wrong direction? But have a little more faith in me! That maze definition is perfect.

The real problem here is lighting. Our entire maze is currently lit by a single point light that hangs out in in the middle of the <0, 0> cell. That means that only walls facing towards <0, 0> get any light*, and now that our maze is a little bigger we have a lot of walls that face away from it.

Several options here. We could replace the point light with a universal light source. Or we could add more point lights as the maze grows. But I think the best choice is just to have our one light follow along with the player to give him that sort of “Adventurer with a lantern/torch/flashlight” feeling.

This is also really easy to do. Just go to the end of your “state == MOVING_FORWARD” code and add this:

playerPointLight.position.x = camera.position.x;
playerPointLight.position.y = camera.position.y;
playerPointLight.position.z = camera.position.z;

Now the light will update it’s location at the same time the player does. No more pitch black invisible walls. That means we’re ready to randomize our maze.

Roll The Dice, Build Some Walls

There are a LOT of different ways to randomly generate a maze, each with their own strengths and weaknesses. In particular a lot of the simpler algorithms have predictable patterns that make them trivially easy to solve.

But for a first person dungeon crawler this isn’t really a big deal. A pattern that would be obvious when seeing the maze from above can still be tricky to exploit when you can only see the walls and passages right around you.

So lets get our feet wet by using one of the simplest maze generation algorithms out there.

1)Start with a maze full of closed off cells.

2) For every cell randomly open a path either to the west or to the north.

That’s it. Despite its extreme simplicity this algorithm is guaranteed to create a maze where every single cell is reachable from any other cell; no cells ever get fully blocked off. This means the player can always get to the exit from the entrance or, in our case, to the collectables from their starting point.

The weakness of this method is that it creates one long boring hallway all along the western and northern edges of the maze. This is because the cells along the west wall can’t open a path to the west without going out of bounds and so instead have to all link to the north. Similarly the cells along the north can’t open any paths to the north without going out of bounds so they all have to link to the west.

But that’s an acceptable tradeoff for an algorithm so simple we can program it in a few dozen lines of JS.

First off we need to redefine our function to accept a width and height so we can tell it how big we want our random maze to be. Our inner function/object MazeCell can stay the same:

function createMazeGrid(width, height){
   function MazeCell(northWall, eastWall, southWall, westWall){
      this.northWall = northWall;
      this.eastWall = eastWall;
      this.southWall = southWall;
      this.westWall = westWall;
   }

We can then use that width and height to build a starting maze where every single cell is completely closed off. This will replace the hand-crafted array we used to have:

var mazeGrid = Array(height);

for( var i = 0; i<height; i++){
   var row = Array(width);
   for(var j = 0; j<width; j++){
      row[j] = new MazeCell(true,true,true,true);
   }
   mazeGrid[i] = row;
}

You could even end the function right there with a return mazeGrid, although the end result would just leave you trapped in a 1 x 1 prison forever. That would make for a horrible game experience so let’s move on and start knocking down walls.

Looping through the maze and randomly opening a passage either to the west or north in every cell seems like a simple algorith, but there are a couple pitfalls to watch out for.

1) The origin shouldn’t try to open a passage

2) If a cell is on the west edge it should always open a passage to the north

3) If a cell is on the north edge it should always open a passage to the west

Also don’t forget that when opening a passage you need to modify two cells, not just one! For instance, to create a western passage from <2,1> to <1,1> it’s not enough to just remove the west wall from <2,1>, you also have to remove the east wall from <1,1>.

//Randomly open a west or north passage in every possible cell
for( var i = 0; i<height; i++){
   for(var j = 0; j<width; j++){
      if(i>0 && j>0){ //If it is not an edge cell open a passage randomly
         if(Math.random()>0.5){
            mazeGrid[i][j].northWall=false;
            mazeGrid[i-1][j].southWall=false;
         }
         else{
            mazeGrid[i][j].westWall=false;
            mazeGrid[i][j-1].eastWall=false;
         }
      }
      else if(j > 0){ //If it is along the north edge open a west passage
         mazeGrid[i][j].westWall=false;
         mazeGrid[i][j-1].eastWall=false;
      }
      else if(i > 0){ //If it is along the west edge open a north passage
         mazeGrid[i][j].northWall=false;
         mazeGrid[i-1][j].southWall=false;
      }
   }
}

This is one of those big but easy to understand functions. For every non-edge cell we choose to randomly create a west or north passage by calling Math.random(). This function returns a decimal value between 0 and 1 so by checking whether it is bigger than 0.5 we should get a mostly even mix of west and north passages.

Of course for the edge cells we don’t need any random math. We just build the only possible passage. Just be sure you know which edge you’re on! The way this code checks for things is kind of counter-intuitive. Basically we know that if (i>0 && j>00) failed that means we are on one of the two edges. We then use j > 0 to prove we are NOT on the west edge, meaning we have to be on the north edge. If that fails we use i > 0 to prove we are NOT on the north edge, so we have to be on the west edge.

And if they both fail? We must be in the corner and don’t need to open any walls at all.

You can see this all in action by updating your main function. Just replace the old createMazeGrid() call with something like: var mazeGrid = createMazeGrid(5,5);

Feel free to build even bigger mazes if you want. Our wall objects are pretty simple so you can probably place quite a few before your computer has too much trouble. A ten by ten maze with a hundred cells should be perfectly doable, for instance.
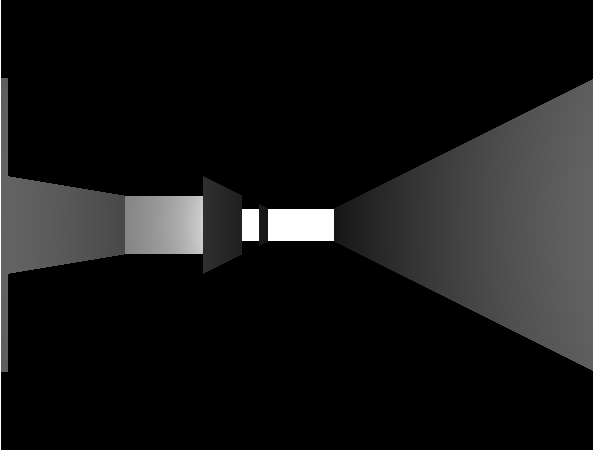
Look at all those random passages. It's aMAZEing.

Still Not Random Enough

Now that we can build a random maze there’s a handful of final touches I’d like to try and implement to make it feel more like a real game. Specifically I’d like to also randomly place the collectibles and make it so grabbing them all triggers some sort of “win” condition. That shouldn’t be very hard but this post is already getting pretty long so let’s put it off until next time.

* Interesting note: The simple point light can shine through walls. As long as a wall is pointing towards the light it doesn’t matter if other objects are in the way. This is fine for our simple maze but more complex games would probably want to have shadows along with lights. Can ThreeJS do that? Probably! Go read the docs.

Let’s Program A 3D Browser Game Part 9: Look, Shiny

Somebody Keeps Leaving Their Collectables Lying Around The Dungeon

While our game engine has basic movement it’s honestly still pretty boring, mostly because it’s pointless. You walk around a little maze, look at the walls and then eventually give up and close the browser window. There is no goal to work towards, no way to win or to tell if you are doing good or bad.

That’s why real dungeon crawlers have monsters and treasure chests and traps and special events and also why even the most amateur of rural corn mazes makes sure to include something like an exit to look for.

Now obviously we’re not going to try and build an entire RPG framework in a single Let’s Program, but we can at least try to add one interesting feature: some collectibles that the player can hunt for while exploring the maze.

Our requirements are simple: We want floating cubes that we can place on our map. When the player enters the same square as a cube “something” should happen, like a message being displayed. The floating cube should then disappear.

Like all non-trivial programming problems there are roughly a zillion different ways to accomplish this and I almost got sucked down an infinite rabbit hole of trying to figure out the best way to build a collectible system that could later be expanded into a full on custom event system.

That was dumb. Carefully planning out code is important but at some point you have to just give things your best shot and write some code. If it isn’t perfect you can always rewrite it.

So here’s the coding plan:

– We will have an array of “collectible” objects.

– Each collectible will keep track of it’s x location, y location, and what code to run when triggered.

– While setting the maze up we will loop through the “collectible” array, add a 3D cube to the scene for each collectible and then store a reference to that object inside the collectible.

100% Hand Crafted Artisanal Collectables

Let’s get started by writing a standalone function that returns an array of collectible objects. This way we can expand or change how this works without cluttering up our main dungeon code. Since this is just our prototype we will manually build an array and then manually push two manually built anonymous collectable objects onto it:

function createCollectiblesList(){
   var collectables = [];

   collectables.push(
      {
         x:0,
         y:1,
         action:function(){alert("You picked up a collectable");},
      });

   collectables.push(
      {
         x:1,
         y:0,
         action:function(){alert("You picked up a different collectable");},
      });

   return collectables;
}

Now that we have a sample collectable array let’s write a second function that can use that array to add some collectables to the map. Collectables that will be represented as dark blue cubes 1/4th as wide as our 1 unit maze cells. Only tricky part here is that because I did a horrible job of lining our 3D space up with our with our map grid our collectable’s X position will map to Z in the 3D plane and it’s Y will map to X.

function placeCollectableGraphics(scene, collectables){
   var collectableGeometry = new THREE.BoxGeometry( 0.25, 0.25, 0.25 );
   var collectableMaterial = new THREE.MeshStandardMaterial( {color: 0x000088} );

   collectables.forEach(function(collectable){
      var collectableObject = new THREE.Mesh(collectableGeometry, collectableMaterial);
      collectableObject.position.z = collectable.x;
      collectableObject.position.x = collectable.y;
      scene.add(collectableObject);
   });
}

Wow. I really need to get around to rotating 3D space so it matches grid space better. But for now let’s just give our prototype a test run by inserting these functions into the setup portion of our runMaze function.

function runMaze(){
   var mazeCanvas = document.getElementById("mazeCanvas");

   var scene = new THREE.Scene();
   var renderer = new THREE.WebGLRenderer({ canvas: mazeCanvas });
   var camera = new THREE.PerspectiveCamera( 75, mazeCanvas.width/mazeCanvas.height, 0.1, 1000 );

   var mazeGrid = createMazeGrid();
   placeWallGraphics(scene, mazeGrid); 
   
   //New lines
   var collectables = createCollectiblesList();
   placeCollectableGraphics(scene, collectables);

   //Rest of function as normal

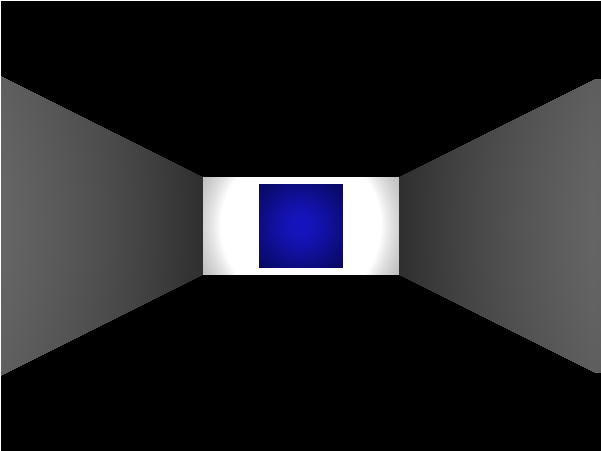
Look around the maze now and you should see a blue box to the east and south of the starting location.

Looks a bit flat but it really was made with 3D graphics. Honest!

Hmm.. that’s a little bit boring. Let’s spice things up by making them spin. All we have to do is add a bit of code near the end of our constantly repeating render function. Put this right after all the switch statements based on player state but before the recursive call to render:

//Make our collectables spin
collectables.forEach(function(collectable){
   var collectableObject = collectable.objectRef;
   collectableObject.rotation.x += 2 * deltaTime/1000;
   collectableObject.rotation.y += 2 * deltaTime/1000;
});

まわる まわる

Now for our last bit of functionality: When the user enters a block with a collectable the collectable’s function should trigger.

To implement this we are going to modify the code that runs when the player is MOVING_FORWARD. When this code detects the player has fully entered the new square it should cross reference the collectables list and look for matches before returning the player to the WAITING loop, which we can do with something like this:

if(state == MOVING_FORWARD)
{
   walkingDistance += 1 * deltaTime/1000;

   if(walkingDistance >= 1){
      walkingDistance = 1;
      state = WAITING;
      processCollectableCollisions(player.gridX, player.gridY,collectables,scene);
   }

   //Rest of the function stays as is

Pretty easy, mostly because we tossed all the hard work onto the processCollectableCollisions function. All we have to do is tell it what X and Y location the player is looking at along with what list of collectables and scene it should reference and it does all the hard work for us! Or at least it will after we write it.

Fortunately it’s not that hard to write. We just loop through the provided collectables and see if any match the provided player location. If we find a match we trigger the code linked to that collectable and then remove the collectable from both the 3D scene and from the list of collectables. Don’t want the player picking the same object up twice!

function processCollectableCollisions(x, y,collectables,scene){
   collectables.forEach(function(collectable,index){
      if(collectable.x == x && collectable.y == y){
         collectable.action(); //Run the object's event
         scene.remove(collectable.objectRef); //Remove graphics from scene
         collectables.splice(index,1); //Remove collectable from list
      }
   });
}

A little bit messy and the functional programmer in me hates the way the function deletes items from the array given to it… but it works! More or less. I think the way we’re using splice might break down if we ever have two collectables with the same X and Y location but for a rough draft prototype this will get the job done.

Beyond Collectables

Our only goal was to program a couple of collectables but we actually managed to prototype a pretty powerful event system. This is because we can put literally any JavaScript we want inside of collectable.action. Right now it just triggers an alert but there’s no reason we couldn’t have it increment a score or teleport the player across the map or add an item to their inventory or trigger a cutscene.

OK, we don’t have an inventory to add to or any cutscenes to trigger but if we took the time to program those sorts of things we could link them to our collectables pretty easily.

And what if instead of making all the collectables cubes we made it possible to assign them each different symbols? Treasure chests and warning signs and keys and silhouettes. Maybe even an invisible option for when we want something to happen on a certain square without the player seeing it ahead of time.

Now you have a flexible system for making any sort of location based event you can imagine. And while that’s not quite enough for building a complete dungeon crawler it would be a pretty good start.

Let’s Program A 3D Browser Game Part 8: Dungeon Maintanence

So our little dungeon crawling engine has all the basics down now including: walls, moving, and walls that prevent you from moving. Cool. Less cool is the fact that 95% of our code exists inside of one giant function: runMaze. Not really a problem for just playing with code but it does hurt readability and could make things harder to change and experiment with as we go on.

So let’s clean things up a little by moving as many variables and functions as we can out of our mega runMaze function and into the global top level of code.

Now at this point quite a few of your are probably pointing out that having a bunch of global functions and variables isn’t much better. Real modern game code should use object oriented design and name spaces and so on.

That’s all technically true. But also true is the fact that this isn’t a serious game engine. So our only real goal here is to do the bare minimum of clean up required to make the last experiments of this Let’s Program possible. Turning that end result into a full fledged professional grade game engine will be left as an exercise to the most ambitious among you.

First off let’s move our maze creation code outside of our mega-function. Instead we’ll put it in it’s own function like so:

function createMazeGrid(){
   function MazeCell(northWall, eastWall, southWall, westWall){
      this.northWall = northWall;
      this.eastWall = eastWall;
      this.southWall = southWall;
      this.westWall = westWall;
   }

   var mazeGrid = [Array(2), Array(2)];

   mazeGrid[0][0] = new MazeCell(true, false, false, true);
   mazeGrid[0][1] = new MazeCell(true, true, true, false);
   mazeGrid[1][0] = new MazeCell(false, true, true, true);
   mazeGrid[1][1] = new MazeCell(false,false,false,false);

   return mazeGrid;
}

We can also move the code we use for setting up the wall graphics into it’s own function like so:

function placeWallGraphics(scene, mazeGrid){
   var wallGeometry = new THREE.PlaneGeometry( 1, 0.5 );
   var wallMaterial = new THREE.MeshStandardMaterial( );

   mazeGrid.forEach(function(mazeRow, rowCount){
      mazeRow.forEach(function(mazeCell, colCount){
         if(mazeCell.northWall)
           placeWall(colCount, rowCount, 'n');
         if(mazeCell.eastWall)
           placeWall(colCount, rowCount, 'e');
         if(mazeCell.southWall)
            placeWall(colCount, rowCount, 's');
         if(mazeCell.westWall)
            placeWall(colCount, rowCount, 'w');
      });
   });

   function placeWall(x,y,direction){
      var wall = new THREE.Mesh( wallGeometry, wallMaterial );
      wall.position.z = y*1;
      wall.position.x = x*1;
      if(direction == 'n'){
         wall.position.z -= 0.5;
      }
      else if(direction == 'e'){
         wall.position.x += 0.5;
         wall.rotation.y = -Math.PI/2;
      }
      else if(direction == 's'){
         wall.position.z += 0.5;
         wall.rotation.y = Math.PI;
      }
      else if(direction == 'w'){
         wall.position.x -= 0.5;
         wall.rotation.y = Math.PI/2;
      }
      else{
         return false;
      }

      scene.add(wall);
   }
}

We still have a function nested inside a function here but that’s fine for now. At least the whole thing fits on a single screen. Barely. Depending on your screen and font size.

HOWEVER! This new function has changed our work flow a little bit. When the code for adding walls to the scene was inside of runMaze it had direct access to the local scene object. Now that it’s inside its own function it doesn’t have anywhere to actually put walls.

The easy solution to this is to make scene a required argument to the function. When we call placeWallGraphics the first thing we will do is show it what scene we want to add the walls to.

After pulling out those two big chunks of code our runMaze function starts like this now:

function runMaze(){
   var mazeCanvas = document.getElementById("mazeCanvas");

   var scene = new THREE.Scene();
   var renderer = new THREE.WebGLRenderer({ canvas: mazeCanvas });
   var camera = new THREE.PerspectiveCamera( 75, mazeCanvas.width/mazeCanvas.height, 0.1, 1000 );

   //Big chunk of code replaced with two clean function calls
   var mazeGrid = createMazeGrid();
   placeWallGraphics(scene, mazeGrid);

   //Code as usual from here on out

That really helps simplify our mega function and makes it obvious what these two chunks of code doing: They help set up the game by making the maze and then building graphics for it. Also be sure to note the placeWallGraphics function call. See how we’re passing it the scene so it knows where to put all the 3D objects it creates?

Give And Take

This is actually an interesting little demonstration of the fact that breaking one big function into multiple smaller functions isn’t always “free”. On the one hand we did indeed make our individual functions easier to read, understand and maintain. On the other hand we cut them off from local variables meaning we now have to explicitly pass them variables that they used to just have direct access to.

This is a general trend in programming. Big functions are hard to understand but let you use the same variables again and again and again. Smaller functions are easier to work with but require you to do a lot more variable passing and reference juggling. This is especially obvious in 3D programming where it’s not unusual for a function to require half a dozen references to things like image buffers and translation matrices and cameras and so on.

Now on the whole the benefit you get from splitting a thousand line mega-function into a dozen sub-hundred line helpers is bigger than the small cost you incur in the form of having to pass more variables. But it’s still valuable to be consciously aware that you are making a trade off and that in rare instances keeping a chunk of code local might be easier to understand than creating a long chain of functions that call functions, passing variables all along the way.

Still A Little Cleaning To Do

Anyways, with those two big chunks of code the only mega problem left with our mega function is the fact that we defined the entire validMove function right inside of it. Nesting functions like this is not only messy and kind of weird, it limits our ability to use that function elsewhere. For example, we might have an AI that also needs to know what are and aren’t valid moves and it can’t do that if this logic is locked up inside of runMaze. Let’s pull it out in the name of readability and reuse.

There is a tiny complication. validMove depends both on our constant definitions of NORTH, EAST, SOUTH, and WEST as well as on having access to the mazeGrid. So get this to work we’ll need to

1) Pull the constants out to global scope so that both the main function and our new helpers can access them

2) Pass mazeGrid as an argument to the new stand alone validMove function

So first thing to do is grab those constants and put them somewhere convenient, like all the way up at the top of our script:

var playerInput = new Object();

const NORTH = 100;
const EAST = 101;
const WEST = 102;
const SOUTH = 103;

Then we can pull the validMove function up to the top level, making sure to add a new argument for passing the local mazeGrid object to it now that it doesn’t live in the same scope as the maze.

function validMove(mazeGrid, x, y, direction){
   if(direction == NORTH)
   {
      return !mazeGrid[x][y].northWall;
   }
   else if(direction == EAST)
   {
      return !mazeGrid[x][y].eastWall;
   }
   else if(direction == SOUTH)
   {
      return !mazeGrid[x][y].southWall;
   }
   else if(direction == WEST)
   {
      return !mazeGrid[x][y].westWall;
   }
   return false;
}

And finally we go to the one line that depends on validMove and update it with by adding the mazeGrid to the call. Basically instead of just asking “Can the player move forward?” like we used to we’re now saying “Here’s what our maze looks like. Based on that, can the player move forward?”

else if(playerInput.up && validMove(mazeGrid, player.gridX, player.gridY, player.direction)){
   walkingDistance = 0;
   startX = camera.position.x;
   //etc...

Another possible advantage to splitting things out like this is that we can now use the same function on multiple mazes. That’s pretty useless to us since we only have one maze and one player… but imagine a more complex game with multiple floors and players and maybe even wandering monsters. You might wind up needing to ask simultaneously: “Can Bob move forward on Map A?”, “Can Sally move forward on Map C?”, “Can the monster move forward on Map G?”.

To be perfectly honest I’m still not very happy with this code. A lot of our functions are still poorly organized and overly long. But at least we’ve isolated the map creation code, which was my main objective here because that will really pave the way for the last two features I want to add to this little test game: Collectibles and Random Maps.

Let’s Program A 3D Browser Game Part 7: You Shall Not Pass

Looks Nice But Doesn’t Do Much

If we’re being perfectly honest at this point we haven’t programmed a dungeon crawler so much as a dungeon viewer. We can walk around and look at our walls but there’s no actual game logic preventing us from walking right off the border of the map and wandering off towards infinity (which is a lot more boring than it sounds).

So let’s start fixing things by making walls a bit more solid.

Traditionally video game walls act like walls thanks to collision detection. Basically once every frame you check whether the player’s geometry is mathematically overlapping with any wall geometry and then move/stop/kill the player as appropriate.

But for us that would be too overkill.

Because our maze is a grid we don’t have to worry about actual collisions. Instead we can just look up which square the player is standing in and see if it has a wall in the direction the player wants to move. If there is no wall we run the move logic like normal. If there is a wall no movement happens (although we could shake the screen a bit to give the player some feedback on their key press if we were feeling fancy). This is nice because it’s a much easier problem to solve than full object collision and is also a lot less demanding on the processor.

Where Am I?

At the moment we keep track of the player’s location entirely in terms of where the camera is. Unfortunately the camera exists in 3D graphic land and doesn’t help us a lot when it comes to figuring out where we are in 2D map land. That means we’re going to need to expand our code to also keep track of the player’s location in terms of his X and Y location in the grid.

Warning: Keeping track of these two bits of data separately introduces the risk of the player’s grid location getting out of sync with his camera location leading to all sorts of weirdness. Preventing this from happening will be one of our primary goals today.

Anyways, to help keep track of new variables let’s create a player object to hold player related game data.

var player = {};
player.gridX = 0;
player.gridY = 0;
player.direction = NORTH;

By default the player is in grid square [0, 0] and facing NORTH. This matches where our camera starts. If you ever decide to change the starting location or direction make sure to update it in both locations. In the future we could avoid this by setting the camera’s start position based on the player’s logical start location (or the other way around) but for our current experiment we can just personally promise ourselves to make sure they always match up.

Next step in making sure the player and the camera match up is to make sure they always point in the same direction. Fortunately we already have code that determines what direction the camera should point after each turn so all we have to do is update that code to also keep the player up to date.

if(playerInput.left){
   state = TURNING_LEFT;
   switch(direction){
      case NORTH:
         direction = WEST;
         break;
      case EAST:
         direction = NORTH;
         break;
      case SOUTH:
         direction = EAST;
         break;
      case WEST:
         direction = SOUTH;
         break;
   }
   player.direction = direction; //Sync player and camera
}

See that new line near the end where we update the player’s direction? Make that same change in the playerInput.right block.

Next up is making sure the player’s grid location properly updates on forward movement.

else if(playerInput.up){
   walkingDistance = 0;
   startX = camera.position.x;
   startZ = camera.position.z;
   state = MOVING_FORWARD;
   switch(direction){
      case NORTH:
         player.gridX--;
         break;
      case EAST:
         player.gridY++;
         break;
      case SOUTH:
         player.gridX++;
         break;
      case WEST:
         player.gridY--;
         break;
   }
 }

The only tricky part here is making sure you match X and Y up properly with NORTH-SOUTH and EAST-WEST. Which pairing is right depends on how we define the axis of our map array. If having X represent NORTH and SOUTH feels weird to you then try playing with the code that defines how the original maze was constructed.

Now that we feel confident our player’s position on the map matches up with the camera’s position in the 3D maze we can pretty easily check for valid vs invalid moves. We’re going to write a helper function to figure this out, so don’t just dump it in the render function like everything else. Instead maybe include it after all the wall placing functions in the first half of the script.

function validMove(x, y, direction){
   if(direction == NORTH){
      return !mazeGrid[x][y].northWall;
   }
   else if(direction == EAST){
      return !mazeGrid[x][y].eastWall;
   }
   else if(direction == SOUTH){
      return !mazeGrid[x][y].southWall;
   }
   else if(direction == WEST){
      return !mazeGrid[x][y].westWall;
   }
   return false;
}

Super simple, right? We pick which cell in the maze we want to look at and what direciton we want to move. We then see if there is NOT a wall there. No wall means we can move. Yes wall means we can’t.

With that handy function all set up we can now finally prevent the player from ghosting through walls. It’s as simple as updating our if(playerInput.up) code to also keep track of whether or not the player can move forward.

else if(playerInput.up && validMove(player.gridX, player.gridY, player.direction))

And that’s it! Load up your code now and you’ll be properly stuck in our little 3 cell “maze”. Exciting, if a little claustrophobic.

That’s really it as far as core dungeon crawling code goes. We move in nice predictable compass directional steps and we can tell when we hit a wall. Everything else is just icing.

But before you go off and start modding this code with traps and doors and keys and whatnot let’s spend a little time cleaning up our experimental code to make it a little more professional, understandable and extendable.

Let’s Program A 3D Browser Game Part 6: Forward To Tomorrow!

Last time we improved our engine to let us make nice clean 90 degree turns, a definite requirement of any proper dungeon crawler. The next logical step is to let us also move forward in whatever direction we happen to be facing so that we can actually explore our 3D maze instead of just admiring it from one spot.

The logic for moving forward is very similar for the logic of making a 90 degree turn.

  1. Wait for the user to press the up key
  2. Enter a “moving” state that blocks new player input
  3. For every frame spent moving move the player a small distance in the direction they are facing
  4. Once the user has moved an entire dungeon square distance reset their state and wait for the next key press

The only tricky bit here is keeping track of which direction the player needs to move in. With turning we could always just add (or subtract) 90 degrees from our current position and trust things would work out fine. But with movement sometimes we will need to add to the player’s x position and sometimes to their z position.

Obviously we need some way to keep track of which axis the player should move along when they press the move key. While we could technically calculate this information based off of the player’s current degree of rotation I think it makes for easier and cleaner code to just explicitly keep track of whether the player is facing north, east, south or west. And of course that means we’re going to need new constants and a new player variable.

const NORTH = 100;
const EAST = 101;
const WEST = 102;
const SOUTH = 103;

var direction = NORTH;

And then to keep track of our actual movement we’re going to need a few more:

const MOVING_FORWARD = 4;

var walkDistance = 0;
var startX = 0;
var startZ = 0;

Now let’s put those to work, first by updating our turning code to also properly update the direction the player is facing. Because the player is locked into a full turn as soon as they press the key we might as well do things the easy way and update their direction as soon as they press left or right; no need to wait until the end of the turn. So find the if statements inside of the waiting state and add to them like so:

if(playerInput.left){
   state = TURNING_LEFT;
   switch(direction){
      case NORTH:
         direction = WEST;
         break;
      case EAST:
         direction = NORTH;
         break;
      case SOUTH:
         direction = EAST;
         break;
      case WEST:
         direction = SOUTH;
         break;
   }
}
else if(playerInput.right){
   state = TURNING_RIGHT;
   switch(direction){
      case NORTH:
         direction = EAST;
         break;
      case EAST:
         direction = SOUTH;
         break;
      case SOUTH:
         direction = WEST;
         break;
      case WEST:
         direction = NORTH;
         break;
   }
 }

Now that we know what direction the player is facing we can safely move them forward. To start let’s add some detection code for the up key inside of our waiting state block. This else if should go immediately after the playerInput.right else if we just updated:

else if(playerInput.up){
   walkingDistance = 0;
   startX = camera.position.x;
   startZ = camera.position.z;
   state = MOVING_FORWARD;
}

Pretty simple. If the player presses the up button we put them in the MOVING_FORWARD state and initialize the data we need to make the move succeed. In particular we need to mark down where the player is currently standing in startX and startZ. We also reset the walkingDistance variable to 0 since we’re going to need to use that data to figure out when we should stop moving.

Of course, being in the MOVING_FORWARD state doesn’t do us any good unless there is code for it. So make some space at the end of your render function, right before the recursive call to render, and add this:

if(state == MOVING_FORWARD)
{
   walkingDistance += 1 /30;

   if(walkingDistance >= 1){
      walkingDistance = 1;
      state = WAITING;
   }

   switch(direction){
      case NORTH:
         camera.position.z = startZ - walkingDistance;
         break;
      case EAST:
         camera.position.x = startX + walkingDistance;
         break;
      case SOUTH:
         camera.position.z = startZ + walkingDistance;
         break;
      case WEST:
         camera.position.x = startX - walkingDistance;
         break;
   }
}

This logic should look familiar since it’s just our 90 degree turn code straightened into a line.

Basically for every frame we spend MOVING_FORWARD we extend our walking distance by a fraction of a square length (which for us is 1). We then look at our current direction to figure out which way we need to move and update the camera to a new position based off our starting location and the distance we have moved so far. As walkingDistance increases the camera gets moved farther and farther from where it started.

When walking distance exceeds 1 whole unit we force it back to a perfect 1 and reset our state to waiting for input. By not including a return statement we also get to have one final round of camera updates based off of the perfect 1 which should properly place the camera at the desired end point, ready for any future turns or moves. This is important because missing our target by even a tiny fraction can add up over the course of several hundred moves and leave the camera in the completely wrong place.

If everything went well you can now load your code and walk around our tiny three square maze. Of course, the lack of any sort of collision detection also means you can ghost through the walls and walk right out of the maze but solving that is a problem for another day.

Still, we have a little bit of time left over so let’s make a quick improvement to the code.

At the moment our turn and move code both move the player a set amount per frame. This is an OK approach, especially since the requestAnimationFrame function we’re using does its best to maintain a constant 60 or so frames per second.

But that frame rate is not guaranteed! If your game is really complicated or the user has too many tabs open that frame rate can start to drop and a quick turn that was supposed to take a single second can drag on and on and on.

Alternatively changes in computer technology might lead to a much higher frame rate and suddenly that carefully planned one second turn flashes by in half that time.

Even pro games have issues like this. For example, Dark Souls 2 originally ran at 30 frames per second and calculated weapon durability based on that fact. When it got ported to a new generation of faster machines they boosted the frame rate to 60 and suddenly all the weapons were breaking half twice as fast. Woops.

The solution to these problems is to, whenever possible, base game calculations not off of frames but off of actual time passed. That way you can program game events to take exactly one second regardless of whether that second lasts for thirty frames or three frames or three hundred frames.

First off we’re going to need a variable to keep track of what time it is. Let’s toss it up by the rest of our contsants and global variables:

var last_update = Date.now();

It’s default value is whatever time it is when the program gets initialized.

Now near the top of our render function we can add:

var now = Date.now();

var deltaTime = now - last_update;
last_update = now;

These three lines get the current time and compare it to our last stored time in order to figure out how long our last frame lasted. We then reset our update time so we can start counting our next frame.

Now if we want to turn once per second we can:

turningArc += Math.PI/2 * deltaTime/1000;

And if we want to walk forward one square in one second:

walkingDistance += 1 * deltaTime/1000;

We are now frame-rate independent!

Let’s Program A 3D Browser Game Part 5: Before You Can Learn To Walk You Must Learn To Dungeon Crawl

If we want to actually control our dungeon experience of just spinning around in automated circles the first thing we’re going to need is a way to get user input. Fortunately we already know how to do that in javascript.

For those of you who don’t feel like reading the linked article we basically create a global javascript object that stores what buttons are currently being pushed. We then create a pair of functions, one designed to keep track of keys being pushed and one to keep track of keys being released. Finally we link those two functions to the webpages natural keyDown and keyUp events.

In other words, put this somewhere convenient, like at the top of your script before the runMaze function:

var playerInput = new Object();

function doKeyDown(event){
   var keynum;

   if(window.event){ //Browser is IE
      keynum = event.keyCode;
   }
   else{
      keynum = event.which;
   }

   if(keynum == 37){
      playerInput.left = 1;
   }
   else if(keynum == 38){
      playerInput.up = 1;
   }
   else if(keynum == 39){
      playerInput.right = 1;
   }
   else if(keynum == 40){
      playerInput.down = 1;
   }
}

function doKeyUp(event){
   var keynum;
   
   if(window.event){ //Browser is IE
      keynum = event.keyCode;
   }
   else{
      keynum = event.which;
   }

   if(keynum == 37){
      playerInput.left = 0;
   }
   else if(keynum == 38){
      playerInput.up = 0;
   }
   else if(keynum == 39){
      playerInput.right = 0;
   }
   else if(keynum == 40){
      playerInput.down = 0;
   }
}

Then be sure to update your body definition like so:

<body onload="runMaze();" onkeydown="doKeyDown(event);" onkeyup="doKeyUp(event);">

And voila! We can now track the arrow keys. Let’s see if we can do anything cool with that.

For instance, what if we were to wrap our automatic camera rotation code inside of an if statement?

var render = function () {
   requestAnimationFrame( render );

   if(playerInput.left){
      camera.rotation.y += 0.01;
   }
   else if(playerInput.right){
      camera.rotation.y -= 0.01;
   }

   renderer.render(scene, camera);
};

And now we can spin the camera IN BOTH DIRECTIONS by holding down the left and right arrows.

Wrong Genre?

Of course, if you’ve played a dungeon crawler before you might notice that something here doesn’t feel quite right. Specifically, we shouldn’t be able to turn just a few degrees at a time. It’s much more traditional to lock the player to the four cardinal directions and force them to slowly rotate through a full 90 degrees on each keypress.

Ironically limiting the player’s control like this is actually going to be harder than just letting them do whatever they want. No more directly reacting to button presses on each frame. Instead we need a multi-step workflow like this:

1) Put the player into a TURNING state that blocks new input

2) While TURNING rotate the player a few degrees per frame

3) When the player has turned a full 90 degrees remove the TURNING state and wait for more input

That means we’re going to need some constants (which Javascript finally sort-of supports) to list out our possible states and a variable for keeping track of which state the player is currently in.

const WAITING = 1;
const TURNING_RIGHT = 2;
const TURNING_LEFT = 3;

var state = WAITING;

We’re also going to want to keep track of which way the camera is currently pointing as well as how far the player has already turned.

var currentDirection = 0;
var turningArc = 0;

With all that we can now setup our loop to start managing state for us by putting this in our render function.

if(state == WAITING){
   if(playerInput.left){
      state = TURNING_LEFT;
   }
   else if(playerInput.right){
      state = TURNING_RIGHT;
   }
}

And now we can use that state to slowly (over the course of 60 frames) move the player through a 90 degree (half PI radian) arc by getting rid of our old turning code and replacing it with something like this:

if(state == TURNING_LEFT){
   turningArc += Math.PI/2 / 60;
   if(turningArc >= Math.PI/2){
      turningArc = Math.PI/2;
      currentDirection = currentDirection + turningArc;
      turningArc = 0;
      state = WAITING;
   }
   
   camera.rotation.y = currentDirection + turningArc;
}

if(state == TURNING_RIGHT){
   turningArc += Math.PI/2 / 60;
   if(turningArc >= Math.PI/2){
      turningArc = Math.PI/2;
      currentDirection = currentDirection - turningArc;
      turningArc = 0;
      state = WAITING;
   }

   camera.rotation.y = currentDirection - turningArc;
}

Now when we are TURNING_LEFT (or RIGHT) we start each frame by adding one 60th of a turn to our turningArc. We then adjust the camera by setting its y rotation to the combination of our turningArc to our currentDirection. So if the player is facing north (0 radians) and has turned 30 degrees the camera will point North-North East.

We also check whether or not we’ve turned a full 90 degrees. When we have that means the turn is finished and several things happen:

1) We set our turningArc to exactly 90 degrees to avoid overshooting out goal. We don’t want the player accidentally turning 91 degrees or eventually they’ll be pointing in the completely wrong direction.

2) We update our currentDirection to reflect the completed turn.

3) We reset the turningArc so it’s ready for our next turn

4) We change the state to waiting so the game will accept input again

Really the only strange thing here is the fact that we have to ADD turning angles when turning left and SUBTRACT them when turning right, which seems backwards. This is just because of the orientation of the default y axis of our engine. If you really cared I’m sure you can swap it around by turning the game’s main camera completely upside down before moving the player or building any walls but I’m just going to live with it.

Time To Move On

We have a nice basic framework for turning around now, but it’s hard to call this a dungeon crawler while the player is stuck in just one place. The next obvious step is to add some actual movement through some code pretty similar to what we just wrote. Sadly there’s no quite enough room to include that all right here so I guess I’ll see you next time!

Let’s Program A 3D Browser Game Part 4: A Different Kind Of Software Architect

We’ve seen how to use three.js to manually create and position walls within our labyrinth. But building a full size maze by hand would be be boring, easy to mess up and hard to maintain.

Let’s not do that.

Instead let’s write a bunch of helper code to do the heavy lifting for us.

For starters I’d like a function to help put walls in the right place, a function that would let us forget about doing math and instead just say something like “I want a north wall at maze location <3, 5>”.

Not a particularly hard thing to write either. First we calculate the center point of the maze location we want to put the wall at. Since all of our walls are a convenient 1 unit wide that’s as simple as directly assigning our maze coordinates to our wall coordinates. The only trick here is that by default in 3D space the y axis points straight up so what we call the “y coordinate” in 2D space is actually the  “z coordinate” in 3D space. (Well… unless you want to rotate the camera around a bunch but let’s not bother with that).

Once we have the x and z coordinates of the center of our maze location we next have to check whether the wall is supposed to be to the north, east, south or west. We then rotate the wall and push it half a unit away from the center. Be sure to double check this step; it’s pretty easy to accidentally mix things up so that east walls wind up getting pushed to the west or get rotated backwards and basically disappear (since walls are one-sided).

function placeWall(x,y,direction){
   var wall = new THREE.Mesh( wallGeometry, wallMaterial );
   wall.position.z = y;
   wall.position.x = x;

   if(direction == 'n'){
      wall.position.z -= 0.5;
   }
   else if(direction == 'e'){
      wall.position.x += 0.5;
      wall.rotation.y = -Math.PI/2;
   }
   else if(direction == 's'){
      wall.position.z += 0.5;
      wall.rotation.y = Math.PI;
   }
   else if(direction == 'w'){
      wall.position.x -= 0.5;
      wall.rotation.y = Math.PI/2;
   }
   else{
      return false;
   }

   scene.add(wall);
}

Now we can replace all of our wall positioning code with:

placeWall(0,0,'n');
placeWall(0,0,'e');
placeWall(0,0,'w');
placeWall(0,0,'s');

And everything looks the same as before.

Which is boring. Replace that with this:

placeWall(0,0,'n');
placeWall(0,0,'w');
placeWall(0,0,'s');
placeWall(1,0,'n');
placeWall(1,0,'e');
placeWall(1,0,'s');

And now we get a hallway that’s twice as wide as our original square room.

If only remodeling in real life was so easy…

I Thought You Had The Map…

Our new helper function makes it almost impossible to mess up when placing a wall. But there’s still a couple problems:

1) It’s kind of hard to remember where we have and haven’t placed walls

2) For an interactive maze it’s not enough to just place the walls, we need to keep track of where they are for later navigation.

So what we really need is a way to describe our entire maze all at once and all in one place. We can then use that maze data to build the 3D graphics and then also use it later on for keeping track of where the player is in the maze and how they can and can’t move.

So what is the most convenient way to define our high level maze data?

Well… a maze is fundamentally just a grid of connected cells that may or may not have walls between them. So we can think of a maze as a two dimensional array of cell objects and we can define a cell object as a set of four wall values that are either “true” (there is a wall) or “false” (there is no wall).

Now since a cell has 4 walls it basically contains 4 bits of information. This means we could define each cell as a single 4-bit super-short integer and then use bitwise logic to calculate…

JUST KIDDING!

Modern computers have billions of bytes of memory. Since our program is unlikely to ever have more than a few hundred cells there is absolutely no need to obsess about jamming as much information into as few bits as possible. Instead we can write our code in a way that’s easy for us humans to understand and work with.

Something like this:

function MazeCell(northWall, eastWall, southWall, westWall){
   this.northWall = northWall;
   this.eastWall = eastWall;
   this.southWall = southWall;
   this.westWall = westWall;
}

Then we can define new cells in our labyrinth as easily as:

var cell = new MazeCell(true, true, false, true);

Of course, we don’t want our cells just hanging out in random variables. We want them to be part of a nice big grid array, something more like this:

var mazeGrid = [Array(2), Array(2)];
mazeGrid[0][0] = new MazeCell(true, false, false, true);
mazeGrid[0][1] = new MazeCell(true, true, true, false);
mazeGrid[1][0] = new MazeCell(false, true, true, true);
mazeGrid[1][1] = new MazeCell(false,false,false,false);

Which works out to be a simple ‘L” shaped room. (That’s why the last room has no walls, it’s completely blocked off from the rest of the maze and doesn’t really matter because it can’t be seen.)

Bringing It All Together

Now we have some maze data AND a function that can accurately drop walls down wherever we want. Mix them together and we can build an entire maze!

All we need is a nested foreach loop. The first loop will grab the rows from the maze. Then for each row we’ll have a second loop that grabs each individual cell and builds whatever walls it needs.

mazeGrid.forEach(function(mazeRow, rowCount){
   mazeRow.forEach(function(mazeCell, colCount){
      if(mazeCell.northWall)
         placeWall(colCount, rowCount, 'n');
      if(mazeCell.eastWall)
         placeWall(colCount, rowCount, 'e');
      if(mazeCell.southWall)
         placeWall(colCount, rowCount, 's');
      if(mazeCell.westWall)
         placeWall(colCount, rowCount, 'w');
   });
});

And now we can use our automatically rotating camera to see the shape of our little “L” shaped room.

OK… but where are we going to find a carpet that shape?

Of course there’s a limit to how much use we can get out of an automatically rotating camera. If the maze gets even a little bit bigger we wont be able to see the whole thing from our starting point at <0, 0>. If only we could control the camera, maybe walk around the maze like an actual dungeon crawler.

Hey! I’ve got a great idea for the next update!

Let’s Program A 3D Browser Game Part 3: Feeling Boxed In

Last time we started our adventure into building a 3D labyrinth by putting up a single wall, and while that was pretty neat the truth is it barely qualifies as a road block, much less a maze.

So let’s pop up another three walls and at least make ourselves a room.

Since all of our walls are the exact same shape and color (for now, at least) we can save on both code and memory by reusing the same geometry and material again and again. (Note: pro games do this too. If there are 100 identical orcs on the screen odds are good they’re all being drawn based off a single in-memory model).

While all of our walls will be sharing the same 3D data they will still have their own unique position data, which should make sense since we want all all the walls to be in difference places.

For example, let’s put a wall to the left of our camera (which lives at position <0,0,0>). To put a wall to the left of of the camera’s position we need to leave the z and y coordinates alone but set the x position to -0.5. We will then also need to twist the wall 90 degrees so that it sits at a right angle with our other wall. Well, I say 90 degrees but three.js uses radians so make that half a Pi instead. Translated into code:

var wall2 = new THREE.Mesh( wallGeometry, wallMaterial)
 wall2.position.x = -0.5;
 wall2.rotation.y = Math.PI/2;
 scene.add( wall2 );

The only trick here is making sure you twist the wall in the right direction. Since we are using a one sided material twisting the wall in the other direction would leave us looking at the wrong direction and make it invisible.

Load the page now and you should notice that the tiny bit of black you used to be able to see to the empty left of our wall has disappeared. That’s because there is now a left wall attached to it.

Now let’s add another wall to the right and one right behind the camera.

var wall3 = new THREE.Mesh( wallGeometry, wallMaterial)
 wall3.position.x = 0.5;
 wall3.rotation.y = -Math.PI/2;
 scene.add( wall3 );
 
 var wall4 = new THREE.Mesh( wallGeometry, wallMaterial)
 wall4.position.z = 0.5;
 wall4.rotation.y = Math.PI;
 scene.add( wall4 );

Now the white rectangle should go all the way from the left side of the screen to the right. But how do we make sure that the wall behind the camera was properly placed?

Easiest way is to add a little code to the render loop to make the camera spin so we can see all four walls of the room.

var render = function () {
   requestAnimationFrame( render );

   camera.rotation.y += 0.01;

   renderer.render(scene, camera);
};

Run the code now and you should look like you’re lazily spinning around in an office chair stuck in the middle of a room with pure white walls.

Although to be honest since the walls are pure white you might find that the whole thing looks more like one big white rectangle that keeps bulging and shrinking. There’s no strong sense of depth so it’s pretty easy to see the scene as a 2D animation instead of a 3D one.

Let’s fix this by adding some lighting. Lights and shadows will give the scene a strong sense of 3D.

But first we need to upgrade our material. The BasicMaterial we were using ignores lights and always looks the same no matter how bright or dark the scene is. So go find the line where we defined our material and change it to this:

var wallMaterial = new THREE.MeshStandardMaterial( );

This new wall material actually has a lighting system, which you can check this by reloading the code. Notice how the whole screen is suddenly pitch black? That’s because we don’t have any lights yet and standard materials can’t be seen without them.

So let’s give ourselves a light. Specifically we’ll be setting up a point light in the center of the room. A point light is basically a glowing point the shines equally in all directions, making it a great way to simulate light bulbs, torches and lanterns.

We can create a basic point light up by adding this code after our walls but before our rendering code:

var playerPointLight = new THREE.PointLight();
playerPointLight.position.set( 0, 0, 0 );
scene.add( playerPointLight );

Now run your code again. The point lighting should make the distant corners of the room much darker than the nearby centers of each wall, helping to improve the illusion that viewer is looking at a 3D space.

Monochromatic games are artsy and profound, right?

Cool! Technically we now know enough to build an entire maze. But let’s be honest, manually creating and positioning dozens or hundreds of walls sounds uper boring. So next time we’ll be building some utility code that will simplify maze building.