Gengo Girls #19: Be Prepared

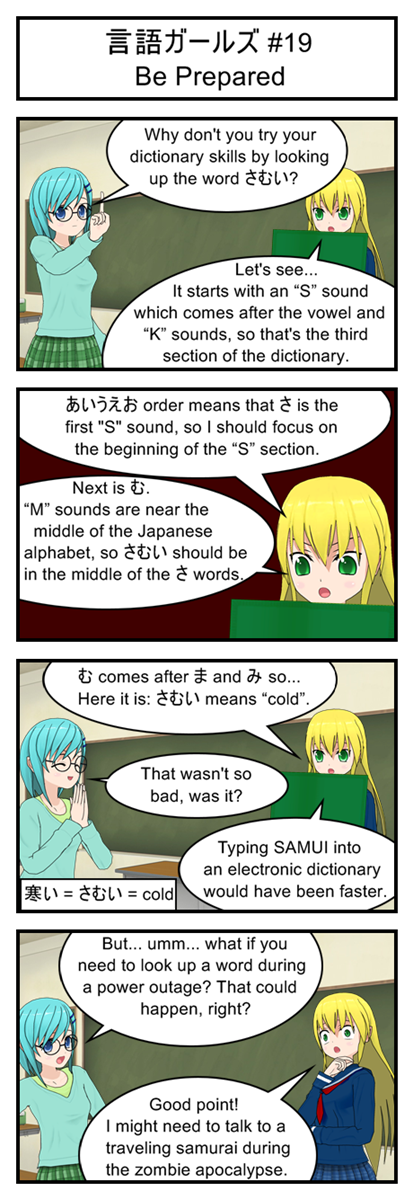
Gengo Girls #19: Be Prepared

I won’t lie; Electronic dictionaries are incredibly useful. I personally use jisho.org for 99% of my Japanese needs and only break out my physical dictionary on those rare days when I’m tired of staring at a computer screen and need to give my eyes a break.

Still, knowing how to alphabetize words is a useful skill. You never know when you’ll need to do something low-tech like find a book in an alphabetized shelf or look someone up in a company registry.

Vocabulary

寒い = さむい= cold

Transcript

言語ガールズ #19

Be Prepared

Blue: Why don’t you try your dictionary skills by looking up the word さむい?

Yellow: Let’s see… It starts with an “S” sound which comes after the vowel and “K” sounds, so that’s the third section of the dictionary.

Yellow: あいうえおorder means that is the first S sound, so I should focus on the beginning of the “S” section.

Yellow: Next is. “M” sounds are near the middle of the Japanese alphabet, so さむいshould be in the middle of the words.

Yellow: comes after and so… Here it is: さむい means “cold”.

Blue: That wasn’t so bad, was it?

Yellow: Typing SAMUI into an electronic dictionary would have been faster.

Blue: But… umm… what if you need to look up a word during a power outage? That coul happen, right?

Yellow: Good point! I might need to talk to with a samurai during the zombie apocalypse.

Gengo Girls #18: Method Acting

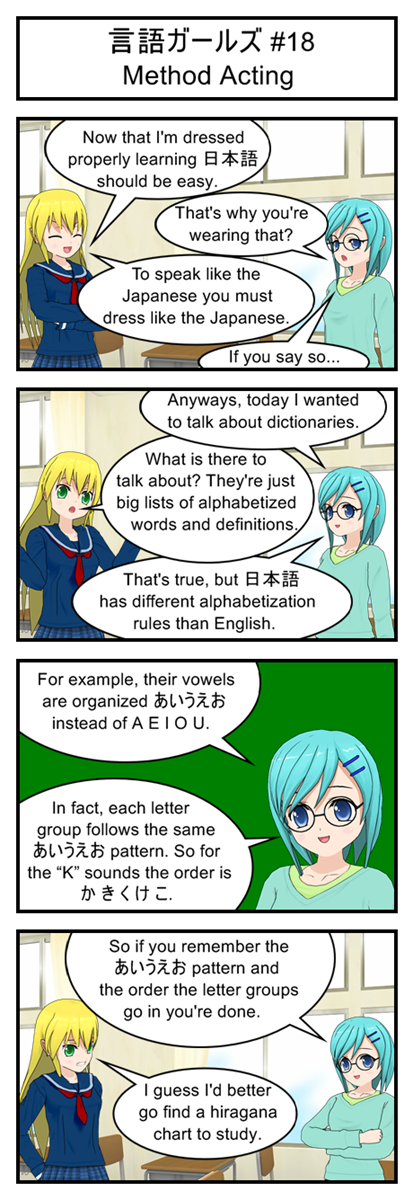
Gengo Girls #18: Method Acting

For anyone too lazy to look it up on their own, the order of the hiragana groups is: Vowels, K, S, T, N, H, M, Y, R, W. Congratulations, you can now alphabetize in Japanese.

A lot of Japanese-to-English dictionaries actually spell the Japanese words with the Latin alphabet and Latin alphabetization. So you would look up “neko = cat” under “N” instead of looking up “ねこ = cat” under .

As a beginner a Latin alphabet dictionary will probably seem easier to use, but I strongly suggest getting a hiragana based Japanese-to-English dictionary instead. Forcing yourself to use Japanese characters is tough at first but will help you master the hiragana. It will also prevent you from accidentally mixing up English and Japanese pronunciation rules. It’s just too easy to see a word like “are” and immediately think of how you would read it in English instead of how it should sound in Japanese. That’s also why this comic has been using hiragana since the very start. In the long run it really pays off.

Transcript

言語ガールズ #18

Method Acting

Yellow: Now that I’m dressed properly learning 日本語 should be easy.

Blue: That’s why you’re wearing that?

Yellow: To speak like the Japanese you must dress like the Japanese.

Blue: If you say so…

Blue: Anyways, today I wanted to talk about dictionaries.

Yellow: What is there to talk about? They’re just big lists of alphabetized words and definition.

Blue: That’s true, but 日本語 has different alphabetization rules than English.

Blue: For example, their vowels are organized あいうえお instead of A E I O U.

Blue: In fact, each letter group follows the sameあいうえお pattern. So for the “K” sounds the order isかきく け こ.

Blue: So if you remember the あいうえお pattern and the order the letter groups go in you’re done.

Yellow: I guess I’d better go find a hiragana chart to study.

Let’s Program A JavaScript Game 6: When Worlds Collide

Mom! He’s Touching Me!


Now that I think about it, none of my childhood family vacations ever involved the classic game of “How much can you invade your sibling’s personal space before they try to get you in trouble with Mom”. I feel deprived.


Anyways, this week’s topic is collision detection: the art of figuring out when two virtual objects are touching each other or overlapping. This is a very important element of game programming and really comes in handing when you need to know things like:

  1. Is the player standing on solid ground?
  2. Did the player just run into an enemy?
  3. Did the player just touch a power up?
  4. Is the player trying to walk through a wall?
  5. Did the player jump high enough to hit the ceiling?
  6. Did the player’s bullets hit an enemy?


Without collision detection a videogame would just be an interactive piece of art where you float around a world without physics watching things happen more or less at random. Which actually sounds kind of cool now that I think about it but that’s not what we’re aiming for right now.


Simple Collision Detection


We can’t detect if two objects are touching each other without two objects to touch. And no object is easier to work with than a rectangle which can be represented as a single x and y coordinate (representing the upper-left corner of the rectangle) along with a width and height.


//Sample Rectangle Code: Don't Put In Your Game
var testRect = new Object();
testRect.x = 5;
testRect.y = 20;
testRect.width = 10;
testRect.height = 30;


Now if we build two objects like this we can test if they are touching or not with this neat little math function, which is logically equal to this function from Wikipedia.


//Test if two rectangles intersect
//Arguments are two objects which much have x, y, width and height variables
function intersectRect(r1, r2) {
   return !(r2.x > r1.x+r1.width ||
            r2.x+r2.width < r1.x ||
            r2.y > r1.y+r1.height ||
            r2.y+r2.height < r1.y);
}


This function runs four quick tests that can each prove that the two rectangles ARE NOT touching each other. The first line tests if the second rectangle is too far right to touch the first rectangle. The second line tests if the second rectangle is too far left to touch the first rectangle. The third line tests if the second rectangle is too low to be touching the first rectangle and finally the fouth line tests if the first rectangle is too high up to be touching the first rectangle.


If all the tests fail then the second rectangle must be touching the first rectangle and the function overall returns true. Come up with a few samples and run the logic by hand if you like. It’s not like this articles going anywhere.


How Many Hitboxes Does One Character Need?


With that function we have everything we need to tell when rectangles collide. Now all we have to do is wrap all of our game graphics inside of invisible rectangles and it’ll be easy to tell when the player is running into enemies or crashing into platforms.


These invisible rectangles are called “hitboxes” and they are a vital game 2D* programming trick.


But there are certain problems with having your entire character represented by just one big hitbox.


For example: Imagine You detect that your one-hitbox character has run into a one-hitbox floating block. What happens next should depend on what direction the character hit the block from.


If they collided with the block from above they should land on the block and treat it like ground.


If they collided with the block from below they should stop moving upwards and instead start falling down.


If they collided with the block from the side they should stop moving and then slide downwards.


But since the character has just one big hit-box it’s really hard to figure out what kind of collision just happened. All you know is that the character and the block are touching; you don’t know where they are touching or what part of the character hit the block first.


There is also the big issue that giving a character one big hitbox usually creates a hitbox that is larger than the character’s graphics. This can lead to frustrating scenarios where the player winds up dead because an attack hit the blank space near his character’s head. It looks like it shouldn’t count as a hit but it’s inside of the invisible hitbox so it counts.
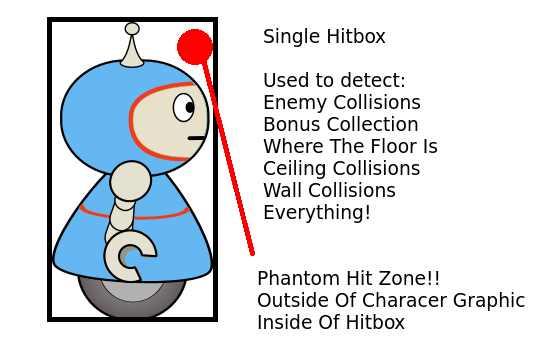
A Diagram Of A Robot With One Hitbox

One Hitbox Per Character: Simple But Flawed

So one big hitbox makes it hard to tell exactly what is going on with your character and can lead to frustrating collisions for the player. This is a problem!


The simple solution is to give each character multiple hitboxes for different logic.


Some common hitbox types include:


Death box: A small, central hitbox for checking whether attacks hit the player or not. By making it smaller than the character graphics we give the player a little wiggle room and avoid the “phantom hits” we would get if the hitbox covered whitespace.


Bonus Box: A large hitbox that is used for detecting whether the player has touched bonus items or not. Slightly larger than the player so that they can grab coins and power ups just by getting really close without having to worry about exact pixels.


Feet Box: A short but wide hitbox used for detecting whether the player is touching the ground. We put it in the bottom center of the sprite.


Head Box: A short but wide hit box used for detecting whether the player has just bumped his head against the ceiling. We put it at the top center of the sprite.


Side Boxes: Two tall but thing hit boxes used for detecting whether the player has run into a solid obstacle. We put them on the left and right sides of the player.
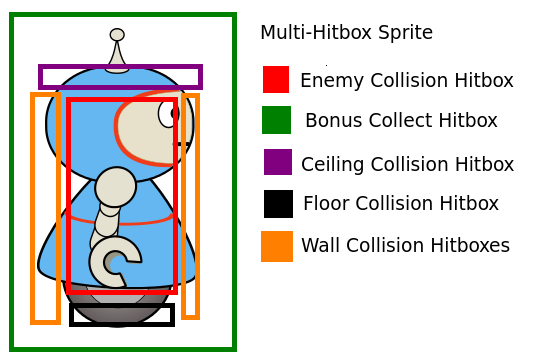
A Diagram Of A Robot With Multiple Hitboxes

Multiple Hitboxes: Much More Elegant

Hitboxes For Defrag Cycle


So how many of those common hitbox types doe we need for our game? Let’s see…


We need to be able to jump from platform to platform, so we’re going to need some sort of “foot hitbox” running along the bottom of the motorcycle.


We need to keep track of when the player runs into a virus and loses, so we’re going to need a small “death hitbox” in the center of the motorcycle.


We want to give players bonus points for grazing viruses, so we’re going to need a large “bonus hitbox” that’s actually a little bit bigger than the motorcyle. When a virus is inside this box but outside the “death hitbox” is when we give graze points.


We want players to be able to jump through platforms from below to land on top, so we DON’T need any sort of “head hitbox”.


The game has no walls, so we don’t need any “side hitboxes”.


So our final hitbox model for debug cycle has three hitboxes and will look something like this:
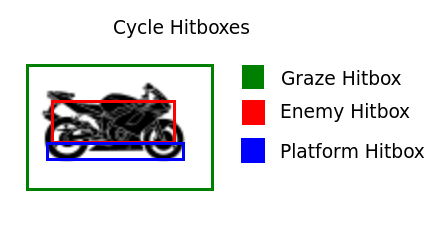
 

Hitbox Diagram For A Motorcycle

I think this should work


From Theory To Practice


Not a lot of code today, but that’s OK because we’ve laid down the groundwork we need to actually do some collision detection next time. Maybe throw is some gravity and get the player’s motorcycle to actually jump between platforms if I have the time.


* 3D games have a similar collision technique based around wrapping things with invisible cubes, cylinders and spheres.
Gengo Girls #17: Scholastic Stereotype

Gengo Girls #17: Scholastic Stereotype

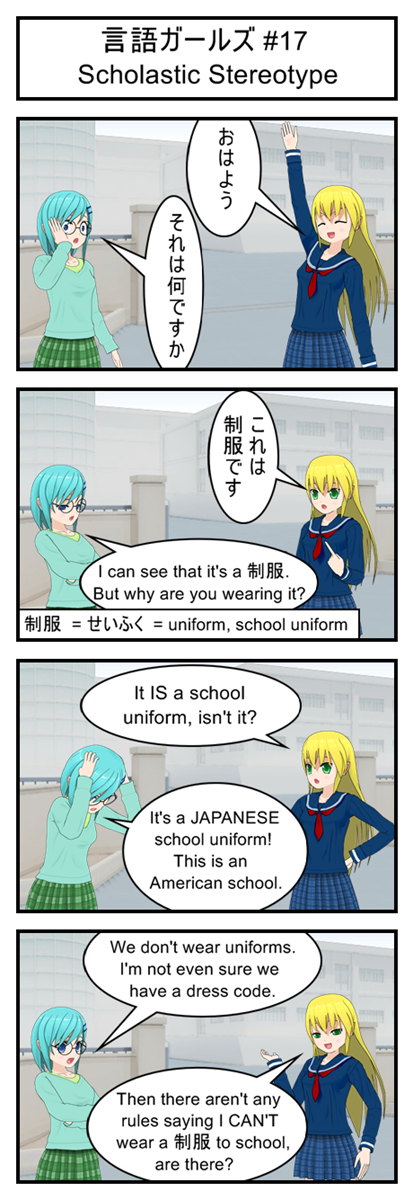
Remember that 何です is pronounced “nan des” instead of “nani desu”, probably due to a phenomenon I have dubbed “The Efficiency Slur”.

My guess is that most people hate using more syllables than they have to, especially for very common words and phrases. So they drop a few letters, slur a few sounds together and suddenly everyone is going around saying “It’s” instead of “It is” and “nan des” instead of “nani desu”.

So here’s a fun project for any really bored linguists out there: Calculate how many syllables the average person “saves” by using contracted words. I’m betting the savings from “It’s” alone will be enough to add an entire day to my lifespan that would have otherwise been wasted on two syllable “It is”.

Vocabulary

制服 = せいふく = uniform, usually a school uniform

Transcript

言語ガールズ #17

Scholastic Stereotype

Yellow: おはよう

Blue: それは何ですか

Yellow: これは制服です

Blue: I can see that it’s a 制服. But why are you wearing it?

Yellow: It IS a school uniform, isn’t it?

Blue: It’s a JAPANESE school uniform! This is an American school.

Blue: We don’t wear uniforms. I’m not even sure we have a dress code.

Yellow: Then there aren’t any rules saying I can’t wear a 制服 to school, are there?

Gengo Girls #16: Curiosity Killed The Cat

Gengo Girls #16: Curiosity Killed The Cat

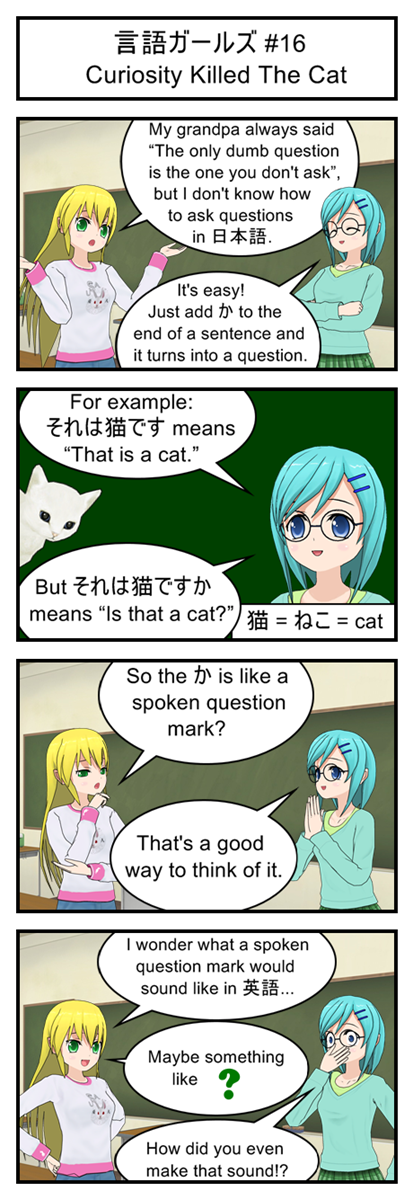
Don’t you love it when a foreign language has easy grammar? Just add one syllable to the end of a sentence and it’s a question. No messy conjugations or word rearranging. Of course, not all Japanese grammar is this simple so enjoy it while you can.

Although to be honest I wouldn’t call any part of Japanese grammar genuinely “hard”. It’s mostly just “different”, which can make it seem harder than English related languages like Spanish or German.

Vocabulary

= ねこ = cat

Transcript

言語ガールズ #16

Curiosity Killed The Cat

Yellow: My grandpa always said “The only dumb question is the one you don’t ask”, but I don’t know how to ask questions in 日本語.

Blue: It’s easy! Just add to the end of a sentence and it turns into a question.

Blue: For example: それは猫です means “That is a cat.”

Blue: But それは猫ですか means “Is that a cat?”

Yellow: So the is like a spoken question mark?

Blue: That’s a good way to think of it.

Yellow: I wonder what a spoken question mark would sound like in 英語

Yellow: Maybe something like “?”

Blue: How did you even make that sound!?

Gengo Girls #15: Who’s On First?


Gengo Girls #15: Who's On First?

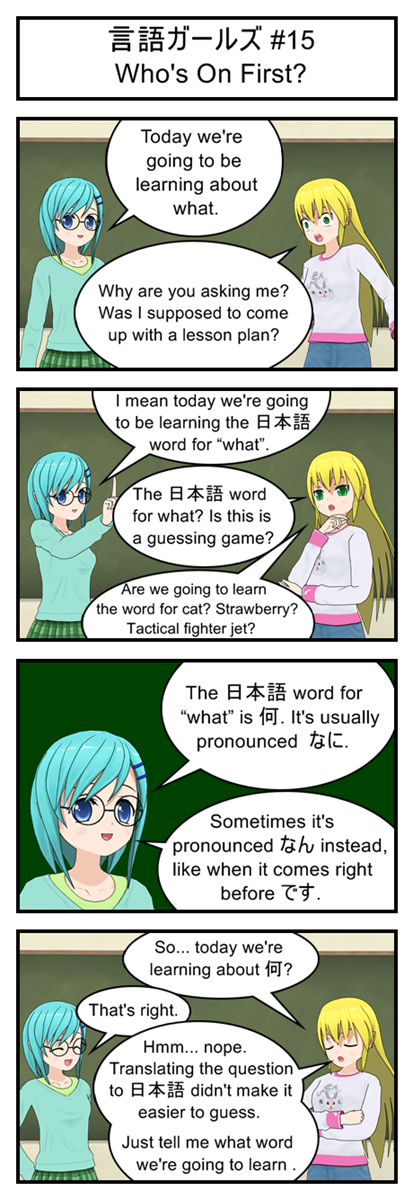
In my opinion , or “what”, is one of the most useful Japanese words to know. It shows up a ton in normal conversation and is an important part in asking questions. You can even use it all on its own as an interjection if something has left you really surprised and confused.

It’s also an easy word to pick out when watching Japanese shows and movies since it usually comes near the end of sentences. It’s even easier to notice when someone gets surprised and just yells out “なに!?” at the top of their lungs.

Vocabulary

= なに = what

Transcript

言語ガールズ #15

Who’s On First?

Blue: Today we’re going to be learning about what.

Yellow: Why are you asking me? Was I supposed to come up with a lesson plan?

Blue: I mean today we’re going to be learning the 日本語 word for “what”.

Yellow: The 日本語 word for what? Is this is a guessing game?

Yellow: Are going to learn the word for cat? Strawberry? Tactical fighter jet?

Blue: The 日本語 word for “what” is . It’s usually pronounced なに.

Blue: Sometimes it’s pronounced なん instead, like when it comes right before です.

Yellow: So… today we’re learning about ?

Blue: That’s right.

Yellow: Hmm… nope. Translating the question to 日本語 didn’t make it easier to guess. Just tell me what word we’re going to learn.

Let’s Program A JavaScript Game 5: Press Start To Play

Play A Game Or Watch A Movie?


Pop Quiz: What’s the main difference between a movie and a videogame?


If you answered “Player Input”: Congratulations, you’re exactly right! The main component that makes a game a game is the fact that the player has some control over what happens next. The player isn’t just watching some hero fight a monster, he’s pressing the buttons that make the hero fight.


If you answered anything else: You’re probably still right but that wasn’t the answer I was looking for so it doesn’t count. Try to do a better job of reading my mind next time I ask a semi-rhetorical question.


Anyways, my main point here is that player’s input is important and that’s what I’m going to be programming today.


Getting Input With JavaScript A.K.A. Whoops I Lied To You


Remember how we prototyped a getInput function and put it at the start of our gameLoop? Turns out that doesn’t work so great with JavaScript. Throw away that function and all references to it, we’re going to be doing something completely different.


Don’t look at me like that. This is a Let’s Program, I’m writing these articles at the same time as the code and I don’t always catch my mistakes early enough to fix them before hitting “post”.


Anyways, here is how it should work:


Instead of checking for input during the loop we will ask the browser to run a short piece of code every time a key is pressed. Of course, we may not be ready for player input at that exact moment so we will just have the code store the input for future use. That way if a player presses a key between game loops the input will still be there the next time we update.


As for the potential issue of the player pressing a key during a game loop… it’s not really a problem. Modern browsers can run multiple pieces of JavaScript at once so we don’t have to worry about the game lagging because it is trying to update the game and process input at the same time.


There is still the slight issue of what happens if player input changes halfway through a loop. Maybe the loop starts with the “right” key being pressed and then halfway through the key is released. This could lead to a strange state where we do 50% right key logic and 50% default logic. To prevent this we’ll just have to be sure that we only access player input once per loop so that it doesn’t have time to change on us, maybe by storing a local copy of player input at the start of every loop so that the global input can change without influencing the current frame.


Time For The Code


First off we have to let the browser know that we want the input. One easy way to do this is by adding onkeyup and onkeydown traits to the body tag in your HTML. Just change your code from this:


<body>


to this:


<body onkeydown="doKeyDown(event);" onkeyup="doKeyUp(event);">


Now everytime the user presses a key the browser will automatically run the doKeyDown function we’re about to write. And when they release a key it will automatically run the doKeyUp event that we are also about to code.


One warning: This will capture ALL keyboard input for that page, which is OK for a full page game but can be a bad idea if your game is just one part of a much larger page where people might want to use their keys for scrolling.


Capturing input doesn’t do us any good if we don’t have a place to store it, so let’s start by adding a new object declaration to the top of our script:


var playerInput = new Object()


Now we can write the doKeyDown and doKeyUp functions. They’re both pretty simple functions, with the only trick being that we have to double check whether the user is using Internet Explorer or not because certain code only works on certain browsers. Other than that we just check the numeric code of whatever button the user just pressed, see if the code matches any of the arrow keys and then record it in our playerInput variable.


function doKeyDown(event){
   var keynum;

   if(window.event){ //Browser is IE
      keynum = event.keyCode;
   }
   else{
      keynum = event.which;
   }

   if(keynum == 37){
      playerInput.left = 1;
   }
   else if(keynum == 38){
      playerInput.up = 1;
   }
   else if(keynum == 39){
      playerInput.right = 1;
   }
   else if(keynum == 40){
      playerInput.down = 1;
   }
}

function doKeyUp(event){
   var keynum;

   if(window.event){ //Browser is IE
      keynum = event.keyCode;
   }
   else{
      keynum = event.which;
   }

   if(keynum == 37){
      playerInput.left = 0;
   }
   else if(keynum == 38){
      playerInput.up = 0;
   }
   else if(keynum == 39){
      playerInput.right = 0;
   }
   else if(keynum == 40){
      playerInput.down = 0;
   }
}


Of course, if you are building a game that uses buttons other than the arrow keys you will need more else if statements for whatever buttons you are interested in. For example, maybe you want your running game to let the user use the spacebar to jump. To do so you’d just have to lookup the keycode for “space” and then keep track of a playerInput.space variable.


Introducing The Protagonist Square


We now have code for getting player input, but that’s no good without some way to test it. And while I suppose we could just print some logging text to the console that says “Player has pushed right arrow key” it would be much more fun to have some actual graphics moving around the screen.


So to start go up to the start of your script to where you declared the playerInput variable and add two new variables for xPos (x position) and yPos (y position). Let’s have them default to 100.


var xPos = 100;
var yPos = 100;


And now let’s use those variables to draw a red square on our screen by updating our screen drawing function like this:


//Draw the screen
function drawScreen(){
   var canvas = document.getElementById('gameCanvas');
   var context = canvas.getContext('2d');

   //Draw background
   context.fillStyle = '#dcdcdc';
   context.fillRect(0,0,600,400);

   //Draw black text
   context.fillStyle = '#000000';
   context.fillText("Loop Count: "+loopCount, 20, 20);

   //Draw a red square the player can control
   context.fillStyle = '#FF0000';
   context.fillRect(xPos, yPos, 50, 50);
}


And now we have a little red square that we can move around just by changing xPos and yPos. The logical next step is to use player input to change xPos and yPos, which we can do by rewriting updateGame like this:


function updateGame(){
   loopCount++;
   
   if(playerInput.right){
      xPos+=5;
   }

   if(playerInput.left){
      xPos-=5;
   }

   if(playerInput.up){
      yPos-=5;
   }

   if(playerInput.down){
      yPos+=5;
   }
}


Give It A Try


Save your changes, reload your game page and hit the “Canvas Test” button. You should see a red square appear on the screen, and the red square should move around when you press the arrow keys. If not you have some debugging to do. Make sure you copied the most recent functions correctly and that the playerInput, xPos and yPos variables are all properly declared inside the script tags but before you declare any functions.


And with that we’re done for this week. Next week I’ll probably talk about collision detection. Or maybe gravity. But since gravity isn’t really that useful without a ground to collide with I’m thinking it will probably be collision detection.

Gengo Girls #14: Disclaimer

Gengo Girls #14: Disclaimer

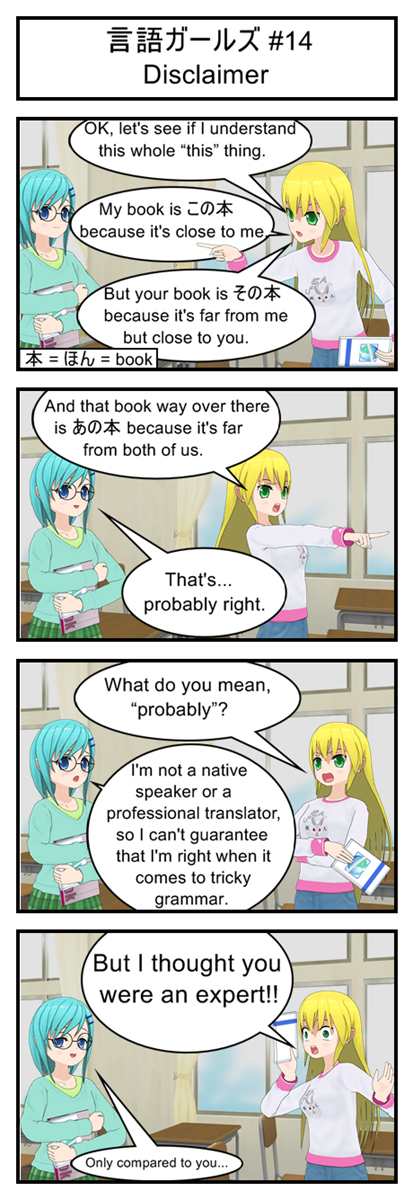
Everybody here is aware that I’m only a Japanese hobbyist, right? I know more than enough to teach you grammar and a ton of vocabulary but I’m out of my league when it comes to complex questions like “Which of these very similar words would a native speaker use in this particular scenario?”

So if you ever catch me making a mistake, please let me know in either the comments or by email.

Vocabulary

= ほん = book

Transcript

言語ガールズ #14

Disclaimer

Yellow: OK, let’s see if I understand this whole “this” thing.

Yellow: My book is この本because it’s close to me.

Yellow: But your book is その本because it’s far from me but close to you.

Yellow: And that book way over there is あの本because it’s far from both of us.

Blue: That’s… probably right.

Yellow: What do you mean, “probably”?

Blue: I’m not a native speaker or a professional translator, so I can’t guarantee that I’m right when it comes to tricky grammar.

Yellow: But I thought you were an expert!!

Blue: Only compared to you…

Gengo Girls #13: Go Long

Gengo Girls #13: Go Long

<< Previous Comic

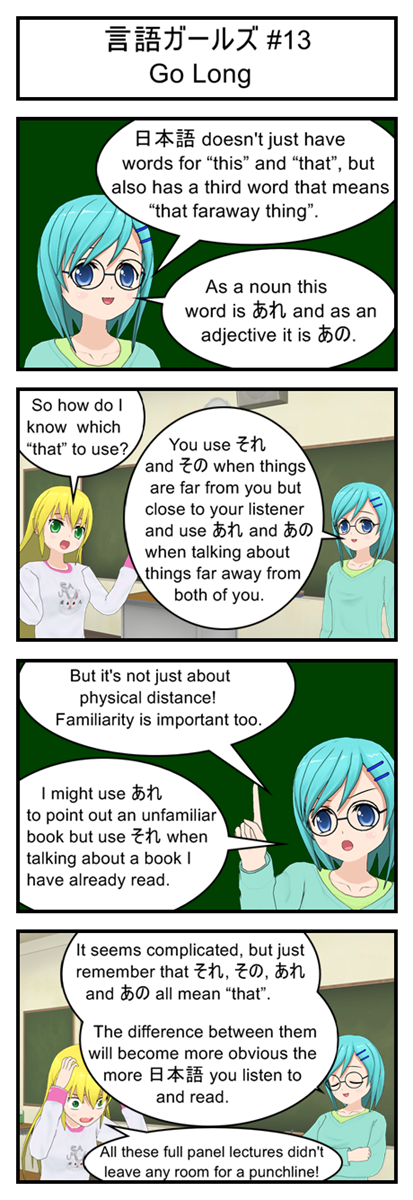
In my experience the shortest words in a language are almost always the most complicated. For some English examples, consider the crazy conjugations of “to be” (am, are, is, was, were) or the many different meanings of common words like run (run away, run a business, run a program, a run of bad luck) or set (set down, set up, set a date, matching set). On the other hand big words like “defenestrate” are usually easy to conjugate and only have one or two specific meanings.

Vocabulary

あれ = faraway that (noun)

あの = faraway that (adjective)

Transcript

言語ガールズ #13

Go Long

Blue: 日本語doesn’t just have words for “this” and “that”, but also has a third word that means “that faraway thing”.

Blue: As a noun this word is あれ and as an adjective it is あの.

Yellow: So how do I know which “that” to use?

Blue: You use それ and そのwhen things are far from you but close to your listener and use あれ and あの when talking about things far away from both of you.

Blue: But it’s not just about physical distance! Familiarity is important too.

Blue: I might use あれto point out an unfamiliar book but use それwhen talking about a book I have already read.

Blue: It seems complicated, but just remember that それ, その, あれ and あの all mean “that”. The difference between them will become more obvious the more 日本語 you listen to and read.

Yellow: All these full panel lectures didn’t leave any room for a punchline!

Gengo Girls #12: How Much Is That Doggy In The Window?

Gengo Girls #12: How Much Is That Doggy In The Window?

Next Comic >>

<< Previous Comic

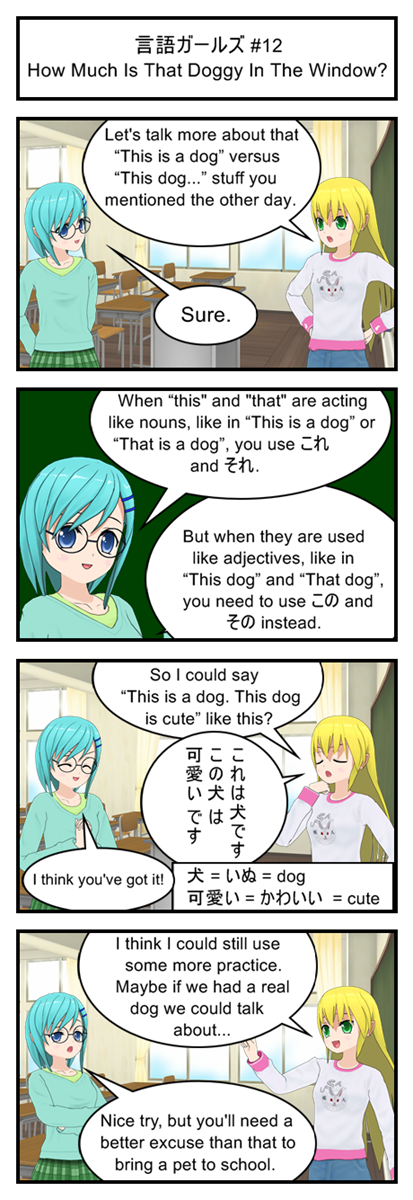
これ vsこの and それ vs そのis the sort of thing that seems hard to remember at first but becomes instinctive after listening to enough Japanese.

Vocabulary

この = this (adjective)

その = that (adjective)

= いぬ = dog

可愛い = かわいい = cute

Transcript

言語ガールズ #12

How Much Is That Doggy In The Window?

Yellow: Let’s talk more about that “This is a dog” versus “This dog…” stuff you mentioned the other day.

Blue: Sure.

Blue: When “this” and “that” acting like nouns, like in “This is a dog” or “That is a dog”, you use これ and それ.

Blue: But when they are used like adjectives, like in “This dog” and “That dog”, you need to use この and その instead.

Yellow: So I could say “This is a dog. This dog is cute” like this?

Yellow: これは犬です

Yellow: この犬 は可愛い です

Blue: I think you’ve got it.

Yellow: I think I could still use some more practice. Maybe if we had a real dog we could talk about…

Blue: Nice try, but you’ll need a better excuse than that to bring a pet to school.