Let’s Program A 3D Browser Game Part 4: A Different Kind Of Software Architect

We’ve seen how to use three.js to manually create and position walls within our labyrinth. But building a full size maze by hand would be be boring, easy to mess up and hard to maintain.

Let’s not do that.

Instead let’s write a bunch of helper code to do the heavy lifting for us.

For starters I’d like a function to help put walls in the right place, a function that would let us forget about doing math and instead just say something like “I want a north wall at maze location <3, 5>”.

Not a particularly hard thing to write either. First we calculate the center point of the maze location we want to put the wall at. Since all of our walls are a convenient 1 unit wide that’s as simple as directly assigning our maze coordinates to our wall coordinates. The only trick here is that by default in 3D space the y axis points straight up so what we call the “y coordinate” in 2D space is actually the  “z coordinate” in 3D space. (Well… unless you want to rotate the camera around a bunch but let’s not bother with that).

Once we have the x and z coordinates of the center of our maze location we next have to check whether the wall is supposed to be to the north, east, south or west. We then rotate the wall and push it half a unit away from the center. Be sure to double check this step; it’s pretty easy to accidentally mix things up so that east walls wind up getting pushed to the west or get rotated backwards and basically disappear (since walls are one-sided).

function placeWall(x,y,direction){
   var wall = new THREE.Mesh( wallGeometry, wallMaterial );
   wall.position.z = y;
   wall.position.x = x;

   if(direction == 'n'){
      wall.position.z -= 0.5;
   }
   else if(direction == 'e'){
      wall.position.x += 0.5;
      wall.rotation.y = -Math.PI/2;
   }
   else if(direction == 's'){
      wall.position.z += 0.5;
      wall.rotation.y = Math.PI;
   }
   else if(direction == 'w'){
      wall.position.x -= 0.5;
      wall.rotation.y = Math.PI/2;
   }
   else{
      return false;
   }

   scene.add(wall);
}

Now we can replace all of our wall positioning code with:

placeWall(0,0,'n');
placeWall(0,0,'e');
placeWall(0,0,'w');
placeWall(0,0,'s');

And everything looks the same as before.

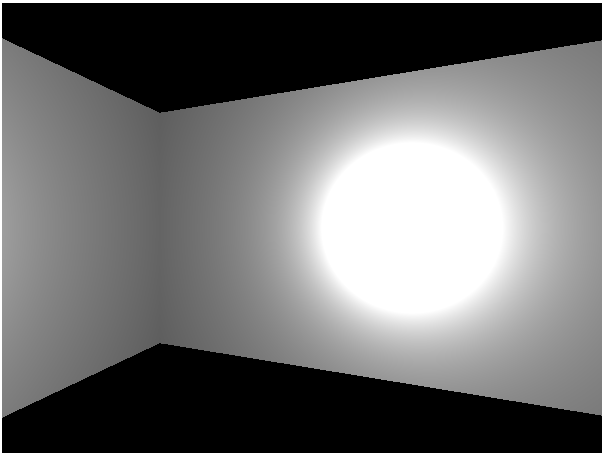
Which is boring. Replace that with this:

placeWall(0,0,'n');
placeWall(0,0,'w');
placeWall(0,0,'s');
placeWall(1,0,'n');
placeWall(1,0,'e');
placeWall(1,0,'s');

And now we get a hallway that’s twice as wide as our original square room.

If only remodeling in real life was so easy…

I Thought You Had The Map…

Our new helper function makes it almost impossible to mess up when placing a wall. But there’s still a couple problems:

1) It’s kind of hard to remember where we have and haven’t placed walls

2) For an interactive maze it’s not enough to just place the walls, we need to keep track of where they are for later navigation.

So what we really need is a way to describe our entire maze all at once and all in one place. We can then use that maze data to build the 3D graphics and then also use it later on for keeping track of where the player is in the maze and how they can and can’t move.

So what is the most convenient way to define our high level maze data?

Well… a maze is fundamentally just a grid of connected cells that may or may not have walls between them. So we can think of a maze as a two dimensional array of cell objects and we can define a cell object as a set of four wall values that are either “true” (there is a wall) or “false” (there is no wall).

Now since a cell has 4 walls it basically contains 4 bits of information. This means we could define each cell as a single 4-bit super-short integer and then use bitwise logic to calculate…

JUST KIDDING!

Modern computers have billions of bytes of memory. Since our program is unlikely to ever have more than a few hundred cells there is absolutely no need to obsess about jamming as much information into as few bits as possible. Instead we can write our code in a way that’s easy for us humans to understand and work with.

Something like this:

function MazeCell(northWall, eastWall, southWall, westWall){
   this.northWall = northWall;
   this.eastWall = eastWall;
   this.southWall = southWall;
   this.westWall = westWall;
}

Then we can define new cells in our labyrinth as easily as:

var cell = new MazeCell(true, true, false, true);

Of course, we don’t want our cells just hanging out in random variables. We want them to be part of a nice big grid array, something more like this:

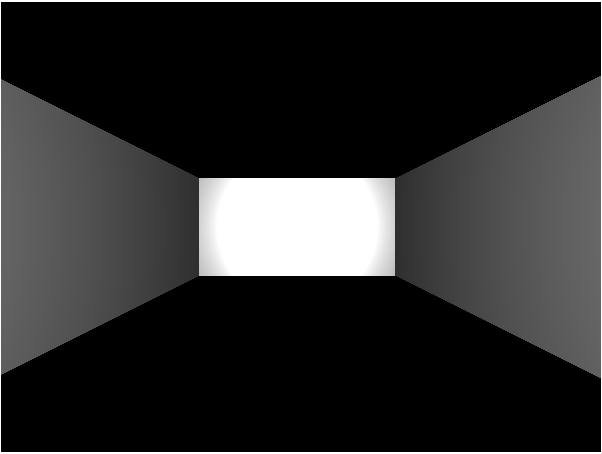
var mazeGrid = [Array(2), Array(2)];
mazeGrid[0][0] = new MazeCell(true, false, false, true);
mazeGrid[0][1] = new MazeCell(true, true, true, false);
mazeGrid[1][0] = new MazeCell(false, true, true, true);
mazeGrid[1][1] = new MazeCell(false,false,false,false);

Which works out to be a simple ‘L” shaped room. (That’s why the last room has no walls, it’s completely blocked off from the rest of the maze and doesn’t really matter because it can’t be seen.)

Bringing It All Together

Now we have some maze data AND a function that can accurately drop walls down wherever we want. Mix them together and we can build an entire maze!

All we need is a nested foreach loop. The first loop will grab the rows from the maze. Then for each row we’ll have a second loop that grabs each individual cell and builds whatever walls it needs.

mazeGrid.forEach(function(mazeRow, rowCount){
   mazeRow.forEach(function(mazeCell, colCount){
      if(mazeCell.northWall)
         placeWall(colCount, rowCount, 'n');
      if(mazeCell.eastWall)
         placeWall(colCount, rowCount, 'e');
      if(mazeCell.southWall)
         placeWall(colCount, rowCount, 's');
      if(mazeCell.westWall)
         placeWall(colCount, rowCount, 'w');
   });
});

And now we can use our automatically rotating camera to see the shape of our little “L” shaped room.

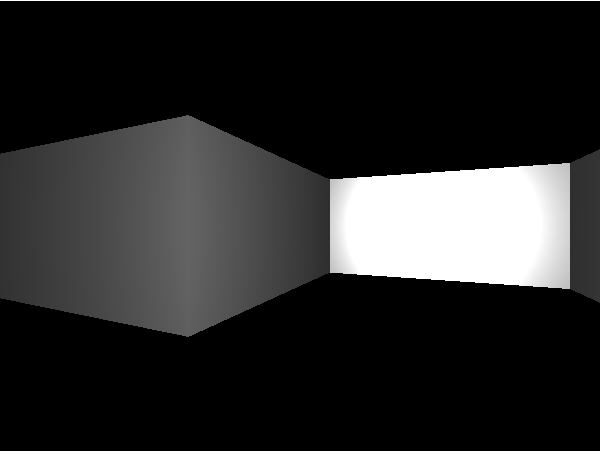
OK… but where are we going to find a carpet that shape?

Of course there’s a limit to how much use we can get out of an automatically rotating camera. If the maze gets even a little bit bigger we wont be able to see the whole thing from our starting point at <0, 0>. If only we could control the camera, maybe walk around the maze like an actual dungeon crawler.

Hey! I’ve got a great idea for the next update!

Let’s Program A 3D Browser Game Part 3: Feeling Boxed In

Last time we started our adventure into building a 3D labyrinth by putting up a single wall, and while that was pretty neat the truth is it barely qualifies as a road block, much less a maze.

So let’s pop up another three walls and at least make ourselves a room.

Since all of our walls are the exact same shape and color (for now, at least) we can save on both code and memory by reusing the same geometry and material again and again. (Note: pro games do this too. If there are 100 identical orcs on the screen odds are good they’re all being drawn based off a single in-memory model).

While all of our walls will be sharing the same 3D data they will still have their own unique position data, which should make sense since we want all all the walls to be in difference places.

For example, let’s put a wall to the left of our camera (which lives at position <0,0,0>). To put a wall to the left of of the camera’s position we need to leave the z and y coordinates alone but set the x position to -0.5. We will then also need to twist the wall 90 degrees so that it sits at a right angle with our other wall. Well, I say 90 degrees but three.js uses radians so make that half a Pi instead. Translated into code:

var wall2 = new THREE.Mesh( wallGeometry, wallMaterial)
 wall2.position.x = -0.5;
 wall2.rotation.y = Math.PI/2;
 scene.add( wall2 );

The only trick here is making sure you twist the wall in the right direction. Since we are using a one sided material twisting the wall in the other direction would leave us looking at the wrong direction and make it invisible.

Load the page now and you should notice that the tiny bit of black you used to be able to see to the empty left of our wall has disappeared. That’s because there is now a left wall attached to it.

Now let’s add another wall to the right and one right behind the camera.

var wall3 = new THREE.Mesh( wallGeometry, wallMaterial)
 wall3.position.x = 0.5;
 wall3.rotation.y = -Math.PI/2;
 scene.add( wall3 );
 
 var wall4 = new THREE.Mesh( wallGeometry, wallMaterial)
 wall4.position.z = 0.5;
 wall4.rotation.y = Math.PI;
 scene.add( wall4 );

Now the white rectangle should go all the way from the left side of the screen to the right. But how do we make sure that the wall behind the camera was properly placed?

Easiest way is to add a little code to the render loop to make the camera spin so we can see all four walls of the room.

var render = function () {
   requestAnimationFrame( render );

   camera.rotation.y += 0.01;

   renderer.render(scene, camera);
};

Run the code now and you should look like you’re lazily spinning around in an office chair stuck in the middle of a room with pure white walls.

Although to be honest since the walls are pure white you might find that the whole thing looks more like one big white rectangle that keeps bulging and shrinking. There’s no strong sense of depth so it’s pretty easy to see the scene as a 2D animation instead of a 3D one.

Let’s fix this by adding some lighting. Lights and shadows will give the scene a strong sense of 3D.

But first we need to upgrade our material. The BasicMaterial we were using ignores lights and always looks the same no matter how bright or dark the scene is. So go find the line where we defined our material and change it to this:

var wallMaterial = new THREE.MeshStandardMaterial( );

This new wall material actually has a lighting system, which you can check this by reloading the code. Notice how the whole screen is suddenly pitch black? That’s because we don’t have any lights yet and standard materials can’t be seen without them.

So let’s give ourselves a light. Specifically we’ll be setting up a point light in the center of the room. A point light is basically a glowing point the shines equally in all directions, making it a great way to simulate light bulbs, torches and lanterns.

We can create a basic point light up by adding this code after our walls but before our rendering code:

var playerPointLight = new THREE.PointLight();
playerPointLight.position.set( 0, 0, 0 );
scene.add( playerPointLight );

Now run your code again. The point lighting should make the distant corners of the room much darker than the nearby centers of each wall, helping to improve the illusion that viewer is looking at a 3D space.

Monochromatic games are artsy and profound, right?

Cool! Technically we now know enough to build an entire maze. But let’s be honest, manually creating and positioning dozens or hundreds of walls sounds uper boring. So next time we’ll be building some utility code that will simplify maze building.

Let’s Program A 3D Browser Game Part 1: You Can Do That?!

A while back we saw how recent improvements in HTML5 standards and modern browser technology make it possible to program classic 2D games using nothing but Javascript. But that’s not all that modern browsers can do!

They can do full 3D.

This is exciting because it used to be that the only way to share 3D content with your users was to ask them to download and run a a suspicious standalone exe file. But now you can share your 3D ideas directly through the browser they already trust.

Of course, there are limits. The browser may already know how to render 3D graphics but you still have to send the user a copy of all your models and texture and users aren’t going to wait around for hours while you send them ten gigs of data. So you’re unlikely to be hosting full triple A games on your blog.

But there’s still a lot of cool stuff you can do with a mere dozen megabytes of 3D data. Games, simulations, interactive presentations and so on. It’s not going to be replacing the fast and reliable text based Internet we know and love anytime soon (or ever) but it can certainly enhance an existing website.

Always Turn Right

So what shall we do to practice our browser based 3D skills?

Well, lately I’ve been playing an unreasonable amount of dungeon crawlers. There’s just something about exploring a labyrinth in first person that’s more exciting than doing it from a third person eagle eye view. Probably the suspense of not being able to see what’s around each corner combined with the sense of scale you get from actually being in the dungeon.

So let’s build ourselves a first person, grid based maze. Just a maze, mind you. No combat system or treasure chests or anything. Just the maze exploration system.

Now before we start talking about our code let’s go over what our project needs to actually do:

  • Draw textured squares to represent walls, floors and ceilings
  • Accept user movement input
  • Force the user to move in a grid pattern
  • Keep track of the shape of the maze
  • Prevent the user from walking through walls

Pretty easy and straightforward as long as you have a reliable way to draw 3D graphics. And thanks to the smart people in charge of browser design we do.

So next time we can start experimenting with actual graphics code.

Let’s Program A Compression Algorithm Part 8: Further Musings On Speeding Up Slow Code

Last time we drastically sped up our program by changing how we put lists together. This time we’re going to speed things up again by changing how we take them apart.

Speed Reading A List

The part of our code that creates compressed bit lists now runs super fast but our program as a whole is still very slow. That suggests we’ve got a problem in the part of the compression function that actually writes to output. If you look at the code you’ll notice that we write to output eight bits at a time by using a series of subsequence copies and assignments. This was nice because it perfectly matched the idea in our heads (read 8 bits from the front of the list and then throw them away).

The problem here is that subseq can get pretty expensive, especially when used to grab really big subsequences from really big lists. In particular the way that we delete used bits from our bitlist is pretty horrible since we aren’t actually deleting them; instead we basically ask subseq to make a brand new copy of everything in the list except the first eight items. We then replace our original list with this slightly shorter list. This obviously does work but all that copying is reaaaalllly slow. Is there any way we can get the same effect but avoid all that work?

Well, when you think about it as long as we only read each bit once it doesn’t really matter whether we delete them after we use them or if we just leave them alone but ignore them. Kind of like a book. You don’t rip out pages after you finish reading them, you just use a bookmark to keep track of which pages you have and haven’t read.

Is it possible that we can do the same thing with our data and write some code that reads through our list eight bits at a time without deleting any of the old stuff?

Of course we can! It’s not even terribly hard. The mighty Lisp loop macro can actually be configured to read multiple values at a time and then skip forward multiple values to get its next input.

(defun white-rabbit-compress-file (input-filename output-filename)
    (let ((bitlist (compress-terminate-and-pad-file input-filename))
            (out (open output-filename :direction :output :element-type '(unsigned-byte 8))))
            (when out
                (loop for (b1 b2 b3 b4 b5 b6 b7 b8) on bitlist 
                    by (lambda (x) (cddddr (cddddr x))) 
                    do (write-byte (8-bit-list-to-byte (list b1 b2 b3 b4 b5 b6 b7 b8)) out)))
            (close out)))

As you can see we’re asking the loop for eight variables at once instead of just one and we’re telling it to skip forward multiple spaces at once by using a local lambda function that uses some weird syntax to basically look for the fourth neighbor of the fourth neighbor of our current list item. So now we read eight bits from our list, jump forward eight spaces and then repeat till we’re done.

What does that do for our runtime?

[100]> (time (white-rabbit-compress-file “chapter1.txt” “bettertimedoutput3”))

Real time: 0.44549 sec.

Run time: 0.436 sec.

Space: 3931184 Bytes

GC: 3, GC time: 0.036 sec.

T

Look at that! Half a second processing time and only 4 megabytes of memory usage now that we aren’t wasting all our time and RAM making copies of copies of copies of subsequences of copies of our copied data copies.

In fact, at this speed we can finally achieve our goal of compressing the entirety of Alice in Wonderland!

[102]> (time (white-rabbit-compress-file “aliceASCII.txt” “tinyalice”))

Real time: 5.921212 sec.

Run time: 5.872 sec.

Space: 52589912 Bytes

GC: 16, GC time: 0.86 sec.

T

For anyone who cares we managed to shrink it from 147.8 kilobytes to 113.3, which is roughly 25% smaller just like we hoped for. Go us!

Making More Functions Fast

As long as we’re in our groove it might be nice to also speed up our decompression function, especially since I’m getting pretty tired of having to wait five minutes every time I want to test whether or not a change to compression logic actually worked.

Like compression our decompression is a two step process. The white-rabbit-decompress-file function starts by calling the file-to-bitlist function to get a compressed file full of bits and then it goes on to decompress those bits and write them to our output file.

These two functions have the same efficiency flaws that compression functions did. file-to-bitlist relies too much on append and white-rabbit-decompress-file abuses subsequences.

Cutting the appends out of file-to-bitlist isn’t any different than it was for our compression function. Replace the appends with pushes to efficiently create a backwards list and then flip it around.

(defun file-to-bitlist (filename)
    (let ((bitlist '())
            (in (open filename :element-type '(unsigned-byte 8))))
        (when in
            (loop for testbyte = (read-byte in nil)
                while testbyte do (let ((bits (byte-to-8-bit-list testbyte)))
                                                    (loop for i in bits do (push i bitlist))))
        (close in))
        (nreverse bitlist)))

Fixing up the way we write to output is going to be a little bit harder. Since we’re working with a compressed file we can no longer safely say that all of our letters are eight bits long. Some letters will actually only be four bits long and others will be nine bits long. So we can’t just write a loop that always jumps n items forward between writes. Instead we’re going to have to write our own looping logic that’s smart enough to decide when to jump forward four spaces and when to jump forward nine.

The basic idea is that we will start with a variable pointing at the start of our list. We will then use subseq to check whether the list starts with a 0 or 1 (a short subsequence at the start of a list is pretty cheap). Like usual we will use this information to decide how to decompress our data. We will then manually change our variable to point either four neighbors further or nine neighbors further as needed. This will make that new spot look like the start of the list and we can just loop until we hit the termination sequence.

(defun white-rabbit-decompress-file (input-filename output-filename)
    (let ((bitlist (file-to-bitlist input-filename))
            (decompressing 1)
            (out (open output-filename :direction :output :element-type '(unsigned-byte 8))))
            (when out
                (loop while decompressing do                                             
                        (if (= 0 (first bitlist))
                            (progn (write-byte (gethash (subseq bitlist 0 4) *list-to-byte-compression-hash*) out)
                                    (setf bitlist (cddddr bitlist)))
                            (if (equal (subseq bitlist 0 9) '(1 0 0 0 0 0 0 0 0))
                                    (setf decompressing nil)                                    
                                    (progn (write-byte (8-bit-list-to-byte (subseq bitlist 1 9)) out)
                                    (setf bitlist (cdr (cddddr (cddddr bitlist)))))))))
            (close out)))


Once again we use a chain of cdr and it’s subtypes to jump through our list. Since this is the second time we’ve used them we might as well explain them.

Remember how I said every item in a Lisp list is made of two halves? The first usually* holds a piece of data and the second usually holds a link to the next item in the list. Together these two halves make up a “cons cell” and you can individually access each half using the historically named car function to grab the first half and cdr to grab the second half. Since the second is usually a link to the next item in the list cdr

You can walk through lisp lists by chaining these together. If you want the data at the third spot of the list you need to cdr to get to the second item then cdr again to the third item and the car to get the data, or in other words (car (cdr (crd list-with-cool-data))).

On the other hand if you want a new sublist that starts at the third part of the list you would just use two cdrs to get the link to the third item without using car to then specifically grab only the data.

Nesting these calls can get annoying though so Lisp has several build in functions that condense several chains into single function such as caddr or cddr. Unfortunately these only go up to four calls in a row which is why in order to jump the start of our list forward nine spaces we still have to chain multiple calls together.

Now that you understand how the code works let’s see how well it works:

[2]> (time (white-rabbit-decompress-file “tinyalice” “fastexpandtest.txt”))

Real time: 5.585598 sec.

Run time: 5.268 sec.

Space: 51634168 Bytes

GC: 20, GC time: 0.608 sec.

T

We can now decompress files just as fast as we compress them. It’s not exactly a great program but for an educational toy I think it turned our pretty well. And hopefully you learned at least a little about Lisp’s inner guts and what to look for when things seem slow.


* Sometimes the first and the second halves of a cons cell will both hold links to other cons cells, allowing for nested lists and interesting tree data structures.

Let’s Program A Compression Algorithm Part 7: Considerations On Speeding Up Slow Code

Welcome fellow Lisp enthusiasts*! Now that our proof of concept code works it’s time to talk about the elephant in the room: Our code is really slow and considering that modern Lisp is supposed to be FAST that means we’re probably doing something dumb.

But exactly how dumb? Well let’s take a scientific approach and run a test:

[7]> (time (white-rabbit-compress-file “chapter1.txt” “timedoutput”))

Real time: 251.23251 sec.

Run time: 250.732 sec.

Space: 10816791720 Bytes

GC: 9324, GC time: 159.104 sec.

T

Looks like compressing a small text file on my (admittedly old) Linux laptop took over four minutes and, more surprisingly, consumed something like 10 gigabytes of memory. That’s a freakishly huge amount of memory for working with a file that’s only 11.4kB long. And using up so much memory was a real strain on the garbage collector, which spent over two minutes just cleaning up all the data our program threw away.

How Are We Going To Fix This?

Code optimization is the reason why it’s important to not only understand WHAT your programming language can do but also HOW it does it.

Sure, most programmers can easily spot the warning signs when they personally write inefficient code: Too many nested loops, recursive functions on complex data and so on.

But what about when you load up someone else’s library and call the doSomethingCool function they wrote? Is it fast? Slow? Does it loop? Without some research you have no way of telling.

Moral of the story: Do your research!

Doing Some Research!

For example, let’s take a look at Lisp’s handy append function. Its job is simple: take two lists, glue them together and then return the combined list. Our prototype uses this function everywhere. To build bit lists. To build compressed output files. To build decompressed output files. It is no exaggeration to say most of what our program does is appending lists to other lists.

So…. How does append append lists anyways?

For that matter, what is a Lisp list?

A list in Lisp is a pretty simple thing. Each individual item in the list contains two pieces of information: The data stored there and directions on where to find the next item in the list. The final item in the list has a blank in the “next” spot. That’s how you know it’s the end of the list.

Now the easiest and fastest way to connect two lists together is to take the empty “next” from the end of the first list and point it at the start of the second list.

But append comes with a bonus guarantee that complicates things: It is guaranteed to NOT change either of its inputs. That means changing the last item in the first list is a no go.

Instead append creates a complete copy of the first list and then links that new list to the second list. (This doesn’t change the second list because Lisp lists only move forward and don’t care if anyone links to them, just who they link to).

Did we find the problem?

So append makes a copy of its first argument. That sounds like it could be a bit slow. Maybe we should double check how we us it. Let’s start with a look at our file-to-compressed-bitlist function. You might notice this little gem:

(append bit-list (compress-byte testbyte))

That’s the line of our code where we say “Take our current bit list and add the next set of compressed bits to the end”. This happens inside of a loop that runs once for every byte in the input file. So our eleven kilobyte test file is going to trigger this line some 11,000** times. And every single time is going to involve making a complete copy of our compressed bit list so far.

That will add up fast. How fast? Hmmm….

Let’s assume that between our 4 bit short codes and our 9 bit long codes the average compressed-byte comes out at 6 bits (that matches the 25% compression rate we were aiming for). Working with that average our loop probably looks sort of like this.

Step one: Append first 6 bits to empty list. No copying.

Step two: Copy existing 6 bits and link to next 6 bits. Total of 6 bits copied.

Step three: Copy existing 12 bits and link to next 6 bits. Total of 18 bits copied.

Step three: Copy existing 18 bits and link to next 6 bits. Total of 36 bits copied.

Step four: Copy existing 24 bits and link to next 6 bits. Total of 60 bits copied.

Step five: Copy existing 30 bits and link to next 6 bits. Total of 90 bits copied.

Step six: Copy existing 36 bits and link to next 6 bits. Total of 126 bits copied.

So we’re only six bytes into our 11,000+ byte file and we’ve already had to make copies of 126 list items. And while I’ve been calling them bits remember that they’re we’re actually using full 32 bit (4 byte) integers to keep track of our 0s and 1s. So that means we’ve had to copy 126 * 4 = 504 bytes just to compress six letters of input.

And it only gets worse. By the time we make it to the end of our elven kilobyte file we will have made copies equal to several thousand times the size of our original input! The bigger the input gets the worse that multiplier becomes and suddenly it’s not so mysterious why our code takes multiple minutes to run and consumes gigabytes of memory.

Functional Programming: What that be?

Before we start talking about how to “fix” append I want to take a minute and talk about why it’s not actually “broken”. Sure, using append the way we do is horribly inefficient but that’s not because append was poorly designed. In fact, append was very carefully designed to be very safe. Because it copies its inputs instead of changing them you can use it anywhere you want without having to worry about accidentally mutilating some bit of data you might need to use again later.

This is the core of what’s known as “functional programming”.

Basically programmers noticed that a lot of their worst and hardest to solve bugs were caused when different bits of code accidentally changed each other’s variables. Example: If three functions all depend on the same global variable and something else changes that variable suddenly all three functions might break down. Or if you pass the same variable as input to multiple functions and it gets changed halfway through your later functions might not work like you expected.

The traditional solution to this problem is to just work really really hard to remember which functions share which global variables and how every function changes their input. The problem here is that the bigger your program gets the harder it is to keep track of all that stuff.

This lead some people to come up with a clever idea: What if we avoid writing code with shared variables and just don’t let functions change their inputs? That should get rid of all those weird bugs and accidental data corruption issues.

When you write your code according to these rules it’s “functional”, named after math functions. After all, the quadratic equation won’t ever break down just because you used the Pythagorean Theorem wrong and and four is always four no matter how many equations you pass it through.

The obvious cost here is that functional code tends to “waste” a lot of time and memory copying inputs so they can safely work with the copies and leave the original data alone. So it’s up to you as the programmer to decide what each part of your program needs most: Functional code that’s easy to maintain and experiment with or efficient code that’s harder to work with but runs much faster.

In our case since we’re dealing with the interior of a massive loop it’s probably time to say goodbye to our safe functional prototype code and focus on speed.

Appending Faster Than Append

So we need a list building loop that doesn’t waste time or memory space. Turns out one of the more popular ways to do this in Lisp is to actually build your list backwards and then reverse it. This takes advantage of the fact that adding something to the front of Lisp list is both fast and simple.

Interesting trivia: We actually already did this in our current byte-to-8-bit-list function.

Now let’s rewrite our file-to-compressed-bitlist to use the same technique.

Basically in our new version when we compress a byte we won’t append the compressed bit pattern directly to our output. Instead we will load the compressed bits into a temporary variable and then push them one by one onto the front of our bit list.

After all the bytes are read we’ll then load our termination sequence into a variable and push that one bit at time too. This will give us a complete mirror image of the bit list we actually want, so we finish off with a call to nreverse which reverses the list. The “n” indicates this is a “unsafe” function that works very fast but will destroy the original data. Since we won’t ever need that backwards list that’s fine.

(defun file-to-compressed-bitlist (filename)
    (let ((bit-list '())
            (in (open filename :element-type '(unsigned-byte 8))))
        (when in
            (loop for testbyte = (read-byte in nil)
                while testbyte do (let ((compressed-bits (compress-byte testbyte)))
                                                    (loop for i in compressed-bits do (push i bit-list))))
        (close in))
        (let ((termination-symbol '(1 0 0 0 0 0 0 0 0)))
            (loop for i in termination-symbol do (push i bit-list)))
        (nreverse bit-lists)))

Interestingly enough this function is actually fairly functional since it avoids global variables. The only data it changes or destroys is private data so as far as the rest of the world is concerned nothing important has been changed.

Now that we’ve tuned up on of our major functions let’s give things another whirl and see what happens:

[41]> (time (white-rabbit-compress-file “chapter1.txt” “bettertimedoutput”))

Real time: 120.46666 sec.

Run time: 120.376 sec.

Space: 4636093800 Bytes

GC: 2925, GC time: 47.0 sec.

T

Not bad. Twice as fast, used up only half as much memory and not nearly as hard on the garbage collector. But even after that sort of major improvement it’s still pretty slow and memory hungry so our works not done quite yet. We’ll see what remaining inefficiencies we can trim out next time.


* Reminder: I’m not particularly good at Lisp. I just like the language.

** Yes, yes, I know. A kilobyte is actually 1024 bytes not an even 1000 but multiplying by powers of ten in your head is so much easier than powers of two and is close enough for general discussion.

Let’s Program A Compression Algorithm Part 6: In Which We Consider How Professional Compression Algorithms Function

Now that we’ve got a working little ASCII compressor it’s time to talk about how “real” compression algorithms work.

Now honestly I should probably just drop a couple wiki links to Huffman_Coding and DEFLATE but presumably you’re here on my blog because you specifically want to hear me talk about computer science so here we go!

Let’s start by refreshing our memories on how we approached the problem of compression.

We started by discovering that normal ASCII text assigns a full 8-bits to every possible letter. We then did some research and found that some ASCII letters are much more common than others. That let us invent a new standard that squished common letters into 4-bits while expanding less common letters into 9-bits. This overall resulted in files that were 20-30% smaller than their plan ASCII equivalents.

So how would a professional approach the same problem?

Believe it or not they would do more or less the same thing. Professional tools achieve their impressive 80%+ compression standards using the same basic approach we did: Find unusually common data patterns and then replace them with much smaller compressed place holders. The professional tools are just much much smarter about how they find and compress these patterns than we were.

How much smarter? Let’s find out by comparing and contrasting what we did against what better compression tools do.


Our OK Idea: We designed our compression patterns based around our knowledge of average letter frequencies in the English language. While this worked OK there was the problem that not every text file follows the average English pattern. A report about zigzagging zebras is going to have a ton of z’s and g’s while a C++ code file is going to have lots of brackets and semi-colons. Our average English compression strategy won’t work very well on files like that.

Their Better Idea: Professional tools don’t use a single universal encoding scheme but instead create a unique encoding for every file based on their individual symbol frequency. So if a particular text file has a ton of “z”s or parenthesis or brackets it will get its own custom code that compresses those letters. This lack of a universal standard does mean that each compressed file has to start with a dictionary explaining the specific compression pattern used for that file but the space saved by using an optimized compression pattern for each file more than makes up for the space taken up by the dictionary.


Our OK Idea: We not only used the same compression codes for every single file, we used the same compression codes throughout every file. This was easy to program but could be sub-optimal on longer files. If a book starts out talking about zigzagging zebras but later focuses on electric eels then one half of the book might compress better than the other.

Their Better Idea: Many compressional algorithms split files into multiple segments and then compress them individually before gluing them together into an output file. This way each segment can have its own optimized compression pattern. So if one half of a file had a lot of “z”s but no “l”s it could get a compression pattern focused on “z”s. If the second half of the file switched things around and had lots of “l”s but almost no “z”s the algorithm could then switch to a new compression pattern that shrunk down the “l”s and did nothing with “z”s. Of course this means each compressed file has to have multiple dictionaries explaining the specific compression pattern and length of each file segment but once again the space you save in better compression outweighs the space you lose from the extra dictionaries.


Our OK Idea: Our compression code focused only on ASCII text files. This made it easy to design and test our project but also severely limits it’s utility.

Their Better Idea: Admittedly some professional tools also only focus on one file type. For example, PNG only compresses image files. But many other professional compression tools work by looking for repeated bit patterns of any sort and length. This lets them compress any file made of bits which is, well, all of them. Sure, not every file compresses particularly well but at least there are no files you plain can’t run the algorithm on.


Our OK Idea: Our compression code worked by replacing common 8-bit letter patterns with smaller 4-bit patterns. This means that even in a best case scenario (a file containing only our eight compressible common letters) we could only shrink a file down to 50%.

Their Better Idea: Professional tools don’t restrict themselves to only looking for common 8-bit patterns but can instead find repeated patterns of any length. This can lead to massive compression by finding things like commonly used 256-bit patterns that can be replaced with two or three bit placeholders for 99% compression. Of course not every file is going to have conveniently repeated large bit sequences but being able to recognize these opportunities when they do happen opens up a lot of possibilities.


So there you have it. The main difference between professional compression algorithms and our toy is that professional programs spend a lot more time upfront analyzing their target files in order to figure out an ideal compression strategy for that specific file. This obviously is going to lead to better results than our naive “one size fits all” approach.

But figuring out the ideal compression strategy for a specific file or type of file is often easier said than done! To go much deeper into that we’d have to start seriously digging into information theory and various bits of complex math and that’s way beyond the scope of this blog. But if this little project piqued your interest I’d definitely encourage you to take some time and study up on it a bit yourself.


BONUS PROJECT FOR ENTERPRISING PROGRAMMERS

Hopefully this article has given you a few ideas on how our little toy compressor could be improved. And while you probably don’t want to try anything as drastic as implementing a full Huffman style algorithm I think there are a lot of relatively simple improvements you could experiment with.

For example, what if you got rid the hard coded set of “English’s eight most common symbols” and instead had your algorithm begin compression by doing a simple ASCII letter count to figure out the eight most common symbols for your specific target file? You could then have your algorithm assign compression short codes to those eight symbols which should probably lead to results at least a few percentage points smaller than our one size fits all prototypes

Of course, in order to decompress these files you’ll have to start your file with a list of which short codes map to which letters. You could do this with some sort of pair syntax (ex: {0000:z,0001:l,0010:p}) or maybe just have the first eight bytes in a compressed file always be the eight symbols from your compression map.

And with that we’re pretty much done talking about compression, but speaking of improvements reminds me that my Lisp code is still slow as cold tar. So if you have any interest in Lisp at all I’d like to encourage you to tune in again next week as we analyze and speed up our code and maybe even talk a little about that “functional programming”.

Let’s Program A Compression Algorithm Part 5: In Which Compressed Files Are Decompressed And The Project Completed

A program that can only compress data is like a packing company that insists on hot gluing your boxes shut: Everything may look nice and neat and tidy but you’re going to be in a real pickle when you want to actually start using your stuff again.

Fortunately writing a decompression function will be pretty easy; after all it’s mostly just the function we already wrote but backwards.

What we want to accomplish boils down to:

1) Read our compressed file and turn it into a list of bits

2) See if the file starts with a 0 or a 1

3) If it starts with a 0 look up a byte value in our short-list table. Add this to output.

4) If it starts with a 1 discard the 1 and turn the next 8 bits into a byte. Add this to output.

5) Discard the bits we just used and then repeat our steps until we see our termination sequence

Step one needs almost no work at all. Our previously written file-to-compressed-bitlist can already read a file bit by bit and then output a bitlist. The only problem is that it creates that bitlist by translating raw bytes into compressing bit sequences. Since we are now reading compressed data we just want the raw bits and bytes which we can get by replacing the call to compress-byte with a call to byte-to-8-bit-list.

I suppose we’ll also have to chop off the final bit of code where we append our termination sequence to the file too. Instead we’ll just return the list we make.

This leads to our new file-to-bitlist function:

(defun file-to-bitlist (filename)
    (let ((bitlist '())
            (in (open filename :element-type '(unsigned-byte 8))))
        (when in
            (loop for testbyte = (read-byte in nil)
                while testbyte do (setf bitlist (append bitlist (byte-to-8-bit-list testbyte))))
        (close in))
        bitlist))

Now that we have our file in an easy to read and manipulate bit format we can assemble our function for decompressing it.

Our decompression function needs to scan through the bit list and identify our special compressed codes. There are three types of codes we need to look for: Our 4 -bit short codes (that always start with 0), our 9-bit expanded codes (that always start with 1) and our termination code (which starts with a 1 and then has eight 0s).

We can take care of that easily enough with two nested if statements. Have some pseudo-code

if (bitlist starts with 0)
{
   do 4-bit shortcode logic
}
else{ //If bit list does not start with 0 it must start with 1
   if(bitlist starts with termination code)
   {
      finish up and close file
   }
   else //If it starts with 1 and is not the termination code it’s an expanded ASCII letter
   {
      do 9-bit expanded code logic.
   }
}

Simple enough. First we check if the next bit is a zero, which means we have a 4-bit shortcode we need to decompress. If the next bit isn’t zero it has to be a 1, which means it’s either a long code or our termination signal. We test for the termination signal first (otherwise we could never stop) and if we don’t find it we know we have a 9-bit expanded code that needs to be made normal.

To do this in Lisp we have to remember that every if statement has a sort of built in else.

(if (true/false)
   (do when true)
   (do when false))

So we can translate our pseudo-code into pseudo-lisp to get this:

(if (= 0 (first bitlist))
    (do short code logic here)
    (if (equals (subsequence bitlist 0 9) ‘(1 0 0 0 0 0 0 0 0))
        (finish things up here)
        (do expanded code logic here)))

Now we just need to wrap that up in a loop and fill in the logic bits and we’re home free.

Let’s look at the logic bits first. Our short code logic requires a few steps:

1) Look up the normal byte value of our 4-bit short code in our handy *list-to-byte-compression-hash*

2) Write that byte to output

3) Remove the 4-bits we just read from the bitlist so we don’t accidentally process them again

(progn (write-byte 
           (gethash (subseq bitlist 0 4) 
           *list-to-byte-compression-hash*) 
            out)
       (setf bitlist (subseq bitlist 4)))

The logic for our expanded code is very similar

1) Ignore the leading 1 and turn the next 8-bits into a byte

2) Write that byte to output

3) Remove the 9-bits we just read from the bitlist so we don’t accidentally process them again

(progn (write-byte (8-bit-list-to-byte (subseq bitlist 1 9)) out)
       (setf bitlist (subseq bitlist 9)))

For the termination sequence logic all we have to do is break out of our loop so we can close the file. To do that first we’re going to need to design our loop. Easiest approach is probably to have a loop that just runs as long as some variable, let’s name it “decompressing” is true. We can then just set that variable to false (nil in Lisp) when we see our termination sequence.

(loop while decompressing do stuff)
(setf decompressing nil)

Toss it all together along with some basic file input and output and we get this handy decompression function:

(defun white-rabbit-decompress-file (input-filename output-filename)
    (let ((bitlist (file-to-bitlist input-filename))
            (decompressing 1)
            (out (open output-filename :direction :output :element-type '(unsigned-byte 8))))
            (when out
                (loop while decompressing do                                             
                        (if (= 0 (first bitlist))
                            (progn (write-byte (gethash (subseq bitlist 0 4) *list-to-byte-compression-hash*) out)
                                    (setf bitlist (subseq bitlist 4)))
                            (if (equal (subseq bitlist 0 9) '(1 0 0 0 0 0 0 0 0))
                                    (setf decompressing nil)                                    
                                    (progn (write-byte (8-bit-list-to-byte (subseq bitlist 1 9)) out)
                                    (setf bitlist (subseq bitlist 9)))))))
            (close out)))

Like most Lips code this is extremely information dense and seems to have way too many nested parenthesis but since we built the individual parts separately it shouldn’t be too hard to follow along with what’s happening here.

Now we can load up our code and run things like:

[87]> (white-rabbit-decompress-file “compresseddrinkme” “decompresseddrinkme.txt”)

T

[88]> (white-rabbit-decompress-file “compressed1stparagraph” “decompressedfirstparagraph.txt”)

T

You should get decompressed files that match the original file you compressed. Nifty!

Whelp… that’s that. An ASCII based compression, decompression program in only a little more than a hundred lines of lisp. Of course, for a professional tool you’d want to add another few hundred lines of error checking and handling and UI and whatnot but the core here works.

So where do we go from here?

Well, first I’d like to spend at least one post talking about how “real” compression algorithms work. After that we can spend a week or two geeking out about how to make to improve our Lisp and make this application faster. I mean, it would be nice if we could handle at least handle the entirety of Alice in Wonderland within a few minutes rather the small eternity it would take with our prototype code as it exists.

Let’s Program A Compression Algorithm Part 4: In Which Byte Compression Code Is Applied To An Entire File

Now that we have a working compression function all that’s left is to grab a file, read it byte by byte, compress the bytes and then output them into a new file. Easy peasy!

Let’s start with reading a file byte by byte. This is one particular topic that depends heavily on your language, so if you’re not using Lisp you’re on your own for this step. What you’re looking for is a way to read a file one byte at a time, which might be tricky since by default most languages try to read text files one line at a time. In general you need to use some specific function or argument to force things into byte mode.

For example, compare these two Lisp functions, both run on a file called “drinkme.txt” which contains nothing but the words “drink me”:

(defun normal-read-test (filename)
    (let ((in (open filename)))
        (when in
            (loop for line = (read-line in nil)
                while line do (print line))
        (close in))))

(defun byte-read-test (filename)
    (let ((in (open filename :element-type '(unsigned-byte 8))))
        (when in
            (loop for testbyte = (read-byte in nil)
                while testbyte do (print testbyte))
        (close in))))


[2]> (normal-read-test “drinkme.txt”)

“drink me”

T

[3]> (byte-read-test “drinkme.txt”)

100

114

105

110

107

32

109

101

10

T

Notice that in order to get actual bytes we not only had to use “read-byte” instead of “read-line”, we also had to open the file with the :element type ‘(unsinged-byte) modifier. Your language probably has similar options.

Hopefully, one way or another, you now know how to grab all the bytes in the file you want to compress. With that in place we can use the compress-byte function we wrote last time to change a file into a series of compressed bit lists.

(defun file-to-compressed-bit-lists (filename)
    (let ((bit-lists '())
            (in (open filename :element-type '(unsigned-byte 8))))
        (when in
            (loop for testbyte = (read-byte in nil)
                while testbyte do (setf bit-lists (append bit-lists (list (compress-byte testbyte)))))
        (close in))
        bit-lists))

[35]> (file-to-compressed-bit-lists “drinkme.txt”)

((1 0 1 1 0 0 1 0 0) (1 0 1 1 1 0 0 1 0) (0 1 0 1) (0 1 1 0)

(1 0 1 1 0 1 0 1 1) (0 0 0 0) (1 0 1 1 0 1 1 0 1) (0 0 0 1)

(1 0 0 0 0 1 0 1 0) )

Well whaddaya know, that’s the exact same compression we calculated by hand in part 2. Good sign our code probably did things right!

Lisp trivia: append adds the items of one list to another list. So to add a single list to a list of lists you actually have to wrap that list inside another list, making it a one item list whose item happens to be a list. Otherwise we’d get something like ((0 0 1 1) (1 0 1 0) 1 0 0 1) instead of ((0 0 1 1) (1 0 1 0) (1 0 0 1)).

Trivia aside, now all that’s left is to write our new compressed data back to file.

Unfortunately our compressed data is the wrong “shape” for normal file output code.

Modern computer software is more or less designed around the idea that the smallest unit of data any sane person would ever want to work with is an entire 8-bit byte. This is almost always the correct assumption for something like 99% of computer programs and is the reason programming language come shipped with libraries for reading and writing bytes.

But sometimes you need to work outside of byte land. We certainly do. Our short letters are 4-bits long and our expanded letters are 9-bits long. Neither of those will work with standard byte-based file IO.

Still makes more sense than the tax code

So our data is the wrong shape. Whatever shall we do?

The obvious solution is to make it the right shape and the easiest way to do this is to take our compressed sequence of 4-bit and 9-bit letters, glue them together and then split them apart at new 8-bit boundaries. As long as the end result has the same string of 0s and 1s it doesn’t really matter how they’re grouped.

So a compressed letter list like this

0001 0011 111110100 0000 101101101 0001

Becomes a bit list like this

0001001111111010000001011011010001

Which we can then turn into

00010011 11111010 00000101 10110100 01

Now we have four easy to read and write bytes plus two dangling bits. Let’s fix that by adding in some extra 0s for padding.

00010011 11111010 00000101 10110100 01000000

Looking good. Well, mostly. Those padded zeros might be a problem when we try to decompress the file. The program is going to look at those and think there’s an extra 4-bit letter there at the end.

A quick fix for this would be to have every compressed file end with a specific bit sequence. Then when the decompresser sees that sequence it knows it can stop because everything after that point is just padding.

But what symbol should we use? It can’t be one of our 4-bit codes because we need those for making the compression work. How about a really uncommon ASCII character instead? For instance, 00000000 is “null” and shouldn’t ever appear in a normal text file. That means we can use the 9-bit 100000000 code to mean “end of the compressed text” without worrying about accidentally conflicting with a real 100000000 from the text.

So our new terminated compressed message looks like:

0001 0011 111110100 0000 101101101 0001 100000000

And when cut into bytes and padded out it looks like this (termination sequence underlined and padding comes after the |)

00010011 11111010 00000101 10110100 01100000 000|00000

Some of you probably noticed that between the termination sequence and the padding our supposedly compressed message is now just as long as it would have been had we just saved it as six normal byte characters. This is because our example was so short. Adding an extra byte to the end of a five byte message is obviously a huge change, but when we start working with actual multi-kilobyte text files the impact of padding and termination will be negligible.

Negligible is kind of a funny word when your write it down. I think it’s the two “g”s. gligib. egligibl. Weird, right?

Back to the subject at hand, let’s write some code for doing an actual compression.

Now my first idea was to take the bit lists from our function, strip them out of their lists and then dump them all into a new list. But as I mentioned in the trivia section I actually had to go to quite a bit of work to get the function to create a list of lists instead of one big list of bits. So I can actually just remove a few list calls from our existing function and create a new one that naturally returns one big list of bits. A final append to add our (1 0 0 0 0 0 0 0 0) termination symbol and it’s done!

(defun file-to-compressed-bitlist (filename)
    (let ((bit-lists '())
            (in (open filename :element-type '(unsigned-byte 8))))
        (when in
            (loop for testbyte = (read-byte in nil)
                while testbyte do (setf bit-lists (append bit-lists (compress-byte testbyte))))
        (close in))
        (append bit-lists '(1 0 0 0 0 0 0 0 0))))

[39]> (file-to-bitlist “drinkme.txt”)

(1 0 1 1 0 0 1 0 0 1 0 1 1 1 0 0 1 0 0 1 0 1 0 1 1 0 1 0 1 1 0 1 0 1 1 0 0 0 0

1 0 1 1 0 1 1 0 1 0 0 0 1 1 0 0 0 0 1 0 1 0 1 0 0 0 0 0 0 0 0)

Now to pad it out and make sure it’s evenly divisible into 8-bit bytes.

We can figure out how many dangling bits there are like this:

[49]> (mod (length (file-to-bitlist “drinkme.txt”)) 8)

6

If there are 6 extra bits then we need 8 – 6 = 2 bits of padding to fill it out to an even byte length. We can generate this padding like this:

[58]> (loop repeat 2 collect 0)

(0 0)

So if we mix that all into one big function:

(defun compress-terminate-and-pad-file (filename)
    (let* ((bitlist (file-to-compressed-bitlist filename))
             (padding (loop repeat (- 8 (mod (length bitlist) 8)) collect 0)))
                (append bitlist padding)))

[70]> (compress-terminate-and-pad-file “drinkme.txt”)

(1 0 1 1 0 0 1 0 0 1 0 1 1 1 0 0 1 0 0 1 0 1 0 1 1 0 1 0 1 1 0 1 0 1 1 0 0 0 0

1 0 1 1 0 1 1 0 1 0 0 0 1 1 0 0 0 0 1 0 1 0 1 0 0 0 0 0 0 0 0 0 0)

[71]> (length (compress-terminate-and-pad-file “drinkme.txt”))

72

For the finishing touch we pop open a byte output file, read through our fully prepared list 8-bits at a time and VOILA we have file compression.

(defun white-rabbit-compress-file (input-filename output-filename)
    (let ((bitlist (compress-terminate-and-pad-file input-filename))
            (out (open output-filename :direction :output :element-type '(unsigned-byte 8))))
            (when out
                (loop while (> (length bitlist) 0) do                     
                    (write-byte (8-bit-list-to-byte (subseq bitlist 0 8)) out)
                    (setf bitlist (subseq bitlist 8))))
            (close out)))

Nothing strange here. As long as there are bits left in the bitlist we take the first eight bits, convert them into a byte, write that byte to file and then drop those bits from the list (by setting the list equal to a subsequence starting at place 8 and continuing to the end of the list). Loop and repeat until the entire file is done.

Now let’s give it a whirl. Run a command like (white-rabbit-compress-file “drinkme.txt” “compresseddrinkme.txt”) and then look at the compressed file with some sort of hex editor. You will find, once again, the exact same sequence of ones and zeros we calculated by hand.

But turning a 9 byte file into a different 9 byte file isn’t much of a compression, so instead let’s grab the entire first paragraph from “Alice in Wonderland” and save it to a file called “1stparagraph.txt”.

Alice was beginning to get very tired of sitting by her sister on the bank, and of having nothing to do: once or twice she had peeped into the book her sister was reading, but it had no pictures or conversations in it, ‘and what is the use of a book,’ thought Alice ‘without pictures or conversations?’

Run that through our compression and then look at the file sizes of the original versus the compressed. For me the original text file was 303 bytes, but the compressed version was only 216.

Compression achieved.

One word of warning though: This is a horribly slow and inefficient Lisp program that will crawl to a halt on any file more than a few kilobytes in length. There are several easy ways to speed it up but I’m not going to talk about those until the end of this LP because 1) Speed doesn’t matter during proof of concept 2) Optimizing Lisp code isn’t the main focus of this project so let’s leave it until last for the handful of people who care.

So now that we have all happily agreed to not mention how horrible this particular implementation is we can move on to part two of the project: Decompressing the files we just compressed. After all, if you can’t decompress your files you might as well just delete them and achieve 100% compression.

Let’s Program A Compression Algorithm Part 3: In Which A General Compression Algorithm Becomes Working Lisp Code

Last time we invented and tested a super-simple compression algorithm that revolves around replacing the eight most common symbols in the English language with tiny 4-bit codes instead of their normal 8-bit representations (at the cost of replacing everything else with bigger 9-bit versions). We even did some examples by hand.

But this is a coding blog, so it’s time to write some actual code. When it comes to language choice our only real requirement is that the language be capable or working directly with bits and bytes and files and since pretty much every language ever has no problem doing that we’re open to choose whatever we want.

I’m personally going to choose Lisp and be keeping all my code in a file named “wrc.lisp” for “White Rabbit Compression”. You, of course, can follow along in whatever language you want. In fact, that would probably be the most educational approach to this series.

Anyways, like we talked about in the design phase, this project will mostly focus on processing lists of bits in batches of 8, 4 and 9. That means we’re going to need a convenient data structure for holding these lists.

Fortunately Lisp is built entirely around list processing and has some very powerful built in tools for creating and managing lists of numbers, so I will be representing our binary fragments as a plain old list of integers which will just so happen to always be either a 0 or a 1.

For those of you not in Lisp I bet your language has it’s own list structures. Could be a vector, a queue, a linked list, whatever. Anything that lets you add new stuff to the end and pull old stuff off the front will be fine.

Now the efficiency buffs in the audience might have noticed that we’re wasting space by using entire integers to keep track of mere bits. Shouldn’t we be using something else, like a bit vector?

Probably! But this is just the proof of concept first pass so doing things the easy way is more important than doing things the best way. If it turns out the program is too slow or memory hungry then we’ll revisit this decision.

With that in mind our first attempt at letter bit lists is going to look something like this:

; An 8-bit ASCII letter
(list 0 1 0 0 0 0 0 1)

;One of our 4 bit compressed letters
(list 0 0 1 1)

;One of our 9 bit labeled ASCII letters
(list 1 0 1 0 0 0 0 0 1)

Next up let’s write some helper functions that can turn real 8-bit bytes into our custom bit lists or turn our bit lists back into bytes.

(defun 8-bit-list-to-byte (bitlist)
    (+     (* 128 (first bitlist))
        (* 64 (second bitlist))
        (* 32 (third bitlist))
        (* 16 (fourth bitlist))
        (* 8 (fifth bitlist))
        (* 4 (sixth bitlist))
        (* 2 (seventh bitlist))
        (* 1 (eighth bitlist))))
        
(defun byte-to-8-bit-list (byte)
    (let ((bitlist nil))
        (if (>= byte 128)
            (progn
                (push 1 bitlist)
                (setf byte (- byte 128)))
            (push 0 bitlist))
        (if (>= byte 64)
            (progn
                (push 1 bitlist)
                (setf byte (- byte 64)))
            (push 0 bitlist))
        (if (>= byte 32)
            (progn
                (push 1 bitlist)
                (setf byte (- byte 32)))
            (push 0 bitlist))
        (if (>= byte 16)
            (progn
                (push 1 bitlist)
                (setf byte (- byte 16)))
            (push 0 bitlist))
        (if (>= byte 8)
            (progn
                (push 1 bitlist)
                (setf byte (- byte 8)))
            (push 0 bitlist))
        (if (>= byte 4)
            (progn
                (push 1 bitlist)
                (setf byte (- byte 4)))
            (push 0 bitlist))
        (if (>= byte 2)
            (progn
                (push 1 bitlist)
                (setf byte (- byte 2)))
            (push 0 bitlist))
        (if (>= byte 1)
            (progn
                (push 1 bitlist)
                (setf byte (- byte 1)))
            (push 0 bitlist))
        (nreverse bitlist)))


The logic here is pretty simple although the Lisp syntax can be a bit weird. I think 8-bit-list-to-byte is self-explanatory but byte-to-8-bit-list might need some explaining. The basic idea is that every bit in a byte has a specific value: 128, 64, 32, 16, 8, 4, 2 or 1. Because of how binary works any number greater than 128 must have the first bit set, any number smaller than 128 but larger than 64 must have the second bit set and so on.

So we can turn a byte into a list by first checking if the number is bigger than 128. If not we put a 0 into our list and move on. But if it is we put a 1 into our list and then subtract 128 before working with the remainder of the number. Then the next if statement checks if the numbe ris bigger than 64 and so on. The only Lispy trick here is that Lisp if statements by default can only contain two lines of logic: the first for when the if is true and the second when the if is false. Since we want to run two lines of logic when things are true we wrap them in a progn, which just lumps multiple lines of code into one unit.

Clear as mud? Let’s move on then.

With those generic helpers out of the way let’s move on to writing the core of our compressor: A function that can accept a byte and then transform it into either a 4-bit short code or a 9-bit extended code.

The first thing we’ll want is a single place in the code where we can keep the “official” list of which letters translate to which short codes. It’s important we have only one copy of this list because later on we might find out we need to change it and updating one list is a lot easier than hunting through our code for half a dozen different lists.

(defparameter *compression-map*
   '((160 (0 0 0 0)) 
     (101 (0 0 0 1))
     (116 (0 0 1 0))
     (97  (0 0 1 1))
     (111 (0 1 0 0))
     (105 (0 1 0 1))
     (110 (0 1 1 0))
     (115 (0 1 1 1))))

Here I’m using the ‘ shortcut to create a list of lists since (list (list 160 (list 0 0 0 0))…) would get really tiring to type really fast. Syntax aside the first item in each of the eight items in our list is the ASCII code for the letter we want to compress and the second item is the bit list we want it to compress to.

Now that we’ve gor our compression map in whatever format you prefer all we need is an easy way to get the data we need out of that map. During compression we want to be able to take a byte and find out it’s short code and during decompression we want to take a short-code and find out which byte it used to be.

Off the top of my head there are a few ways to do this. One would be to just loop through the entire list every time we want to do a lookup, stopping when we find an item that starts with the byte we want or ends with the list we want (or returning false if we don’t find anything). The whole list is only eight items long so this isn’t as wasteful as it might sound.

An easier solution (depending on your language) might be to use our master list to create a pair of hash tables or dictionaries. As you probably know these are one way lookup structures that link “keys” to “values”. Give the hash a key and it will very efficiently tell you whether or not it has stored a value for it and what that value is; perfect for our needs. The only trick is that since they are only one way and we want to both compress and decompress our data we’ll actually need two hashes that mirror each other. One would use the bytes as keys and reference the bit-lists. The other would use the bit-lists as keys and reference the bytes.

I think I’ll go with the hash approach since they are a more universal language feature than Lisp’s particular approach to list parsing.

Hash tables seem pretty weird until you understand how they work internally.

To translate my universal compression mapping into a pair of usable hash tables I’m going to first create the hash tables as global variables and then I’m going to use a simple Lisp loop to step through every pair in the compression map. During each step of the loop we will insert the data from one pair into each hash.

(defparameter *byte-to-list-compression-hash* (make-hash-table))
(defparameter *list-to-byte-compression-hash* (make-hash-table :test 'equal))

(loop
    for compression-pair in *compression-map*
    do    (setf 
            (gethash (car compression-pair) *byte-to-list-compression-hash*) 
            (cadr compression-pair))
        (setf 
            (gethash (cadr compression-pair) *list-to-byte-compression-hash*) 
            (car compression-pair)))


A little Lisp trivia here for anybody following along in my language of choice:

1) The :test keyword lets you tell a hash how to compare keys. The default value works great with bytes but not so great with lists so I use :test ‘equal to give the *list-to-byte-compression-hash* a more list friendly compartor.

2) To pull data out of or put data into a hash you use the gethash function. The fist argument is a key value, the second argument is the hash you want to use. I tend to get this backwards a lot :-(

3) “car” and “cdr” and combinitions like “cadar” are all old fashioned keywords for grabbing different parts of lists. I could have just as easily used chains of “first” and “second” but what’s the fun in that?

Lisp aside, we now have an official compression map and two easy to search hashes for doing compression lookups and decompression reverse lookups. Let’s put them to good use by actually writing a compression function!

The compression function should take an ASCII byte and check if it’s in the compression map. If it is it will return the proper 4-bit short code. If it isn’t in the map it should transform it to an 8-bit list, glue on a leading 1 and then return the new 9-bit list.

(defun compress-byte (byte-to-compress)
    (let ((short-code (gethash byte-to-compress *byte-to-list-compression-hash*)))
        (if short-code 
            short-code 
            (append '(1) (byte-to-8-bit-list byte-to-compress)))))

Nothing all that clever here. We take the byte-to-compress and lookup whatever value it has in the *byte-to-list-compression-hash*. We then use let to store that result in a local short-code variable. We then us a simple if statment to see whether short-code has an actual value (meaning we found a compression) or if it is empty (meaning that byte doesn’t compress). If it has a compressed value we just return it. Otherwise we take the original byte-to-compress, turn it into a bit list, glue a 1 to the front and return it.

Let’s see it all in action:

[1]> (load “wrc.lisp”)

;; Loading file wrc.lisp …

;; Loaded file wrc.lisp

T

[2]> (compress-byte 111)

(0 1 0 0)

[3]> (compress-byte 82)

(1 0 1 0 1 0 0 1 0)

Cool. It successfully found 111 (“o”) in our compression map and shrunk it from eight bytes down to four. It also noticed that 82 (“R”) was not in our map and so returned the full 8-bits with a ninth “1” marker glued to the front.

Next time we’ll start looking into how to use this function to compress and save an actual file.

Let’s Program A Compression Algorithm Part 2: In Which A General Idea Becomes A Specific Algorithm

Last time we talked about Alice in Wonderland and the deep cruelty of stores that play the same handful of movie trailers on endless loop.

More importantly we also talked about how computers use compression to shrink files down for easier storage and faster transfer. Without good compression algorithms the Internet would crawl to a halt and half the electronics you use on a daily basis wouldn’t exist. For instance, without compression a 2 hour HD movie would be over 300 GB; good luck fitting that all on one disc!

To better understand this vital computer science breakthrough we’re going to be writing our own ASCII text compression program.

Disclaimer: It’s not going to be a very good compression program. Like all of my let’s programs the goal here is education and not the creation of usable code. We’re going to be skipping out on all the security and error checking issues a professional compressor would include and our end goal is a modest 20% reduction in file size compared to the 75%+ reduction well known tools like Zip can pull off.

Now that your expectations have been properly lowered let’s talk about the structure of text files. After all, we can’t compress them if we don’t know what they’re supposed to look like or how they work.

The ASCII text standard is a set of 256 symbols that includes all 26 letters of the English language in both upper and lower case as well as all standard punctuation, some useful computer symbols (like newline) and a bunch of random symbols and proto-emoticons that seem like they were included mostly to fill up space.

The fact that there are 256 symbols is very important because 256 is exactly how high you can count using a single 8-bit computer byte. That means you can store one letter in one byte by simply using binary counting to mark down where the letter is in the ASCII chart.

For example, the capital letter “A” is in spot 65 of the ASCII chart. 65 in binary is 01000001. So to store the letter “A” in our computer we would grab a byte worth of space on our hard drive and fill it with the electronic pattern 01000001.

An ASCII text file is just a bunch of these 8-bit character bytes all in a row. If you want to save a 120 character long text you need a 120-byte long ASCII file. If you want to save a 5,000 character short story you need a roughly 5 kilobyte ASCII file.

Ok, cool. Now we know what an ASCII file’s guts look like. Time to start looking for patterns we can use for compression.

Patterns… patterns… here’s one!

The ASCII files we’ll be working with are all based on the English alphabet, and in English not all letters are used evenly. Things like “s”, “e”, and “a” get used all the time while poor little letters like “x” and “z” hardly ever see the light of day. And don’t forget “ ”! You might not think of the blank space as a letter but just imagine tryingtowritewithoutit.

So some letters are much more common than others but ASCII stores them all in identical 8-bit bytes anyways. What if we were to change that? What if we stored the most common letters in smaller spaces, like 4-bit nibbles*?

The biggest challenge here is figuring out a way to let the computer know when it should expect a nibble instead of a byte. In normal ASCII every letter is eight bits long which makes it easy for the computer to figure out where one letter ends and the next begins.

But since we’re going to have letters of different lengths we need some way to point out to the computer what to expect. A sort of virtual name-tag to say “I’m a 4-bit letter” or “I’m a normal 8-bit letter”.

Here’s a simple idea: Our short 4-bit letters will always start with a 0, on the other hand our 8-bit ASCII letters will always start with a 1.

This solution does have some drawbacks. If the first bit of our 4-bit letters is always 0 that means we only have three bits left for encoding the actual letter. Three bits is only enough to count up to eight so that means we will only be able to compress eight letters.

A bigger problem comes from the 8-bit ASCII letters. They need their full 8-bits to work properly so the only way to mark them with a leading 1 is by gluing it to the front and turning them into 9-bit letters. So while our common letters had their size cut in half our uncommon letters are actually getting bigger. Hopefully we’ll still come out ahead but it might be close.

It’s amazing how many problems are caused by people trying to apply averages to things that ought not be averaged

Anyways, it sounds like we’re going to have eight different shortcut codes to work with. What letters should we use them for? Well, according to Wikipedia the eight most common letters in the English language are, in order: E, T, A, O, I, N, S, H. So that’s probably a good bet if we want as much compression as possible.

But Wikipedia doesn’t count the blank space as a letter. However because it’s so common in text it’s definitely something we want to compress. Let’s add it to the front of the list and drop “H”. That means the letters we will be compressing are “ ”, E, T, A, O, I, N, S.

Or more accurately “ ”, e, t, a, o , i, n, s. Remember that in ASCII upper and lower case letters are coded differently so we have to choose which we want. Since lowercase letters are more common than uppercase it makes sense to focus on them.

Now that we have our eight compression targets all we have to do is assign them one of our short codes, all of which are just the number 0 followed by some binary. Let’s go with this:

“ ” = 0000

“e” = 0001

“t” = 0010

“a” = 0011

“o” = 0100

“i” = 0101

“n” = 0110

“s” = 0111

Also remember that any letter not on this list will actually be expanded by putting a “1” in front of it’s binary representation.

One Makes You Smaller

Whew! That was a lot of abstract thinking but believe it or not we now have a complete compression algorithm. And just to prove it we’re going to do a compression by hand.

But what should we practice on? Well, our theme is “Wonderland” and I seem to recall that Alice was able to shrink herself by fooling around with a bottle labeled “drink me”. In ASCII that looks like this:

d r i n k m e
01100100 01110010 01101001 01101110 01101011 00100000 01101101 01100101

Eight bits times eight letter means 64 bits total. But if we replace the space, ‘i’, ‘e’, and ‘n’ with our 4-bit shortcuts while adding a 1 flag in front of the remaining 8-bit (soon to be 9-bit) letters we get

d r i n k m e
101100100 101110010 0101 0110 101101011 0000 101101101 0001

Which is 9*4 + 4*4 bits long for a total of only 52 bits. So we saved ourselves 12 bits, which is almost 20% less space than the original. Not bad.

One Makes You Grow Taller

Of course, taking text and compressing it is pretty useless unless we also know how to take compressed text and expand it back into normal readable ASCII. So please take a look at the following bit sequence and see if you can figure out what it used to say:

0001001111111010000001011011010001

I don’t want anybody accidentally looking ahead so let’s push the answer down a page or so with some another random comic.

Information theory jokes are funny, right?

So the first thing to do here is to take that big messy data stream and split it into individual letters. Remember that according to our rules the length of each letter is determined by whether it starts with a 0 or a 1. The 0s are 4-bit letters and the 1s are 9-bit letters.

So here we go. 0001001111111010000001011011010001 starts with 0 so the first letter must be four bits long: 0001

After removing those four bits we’re left with 001111111010000001011011010001, which also starts with a 0 meaning our next letter is also four bits long: 0011

Removing those four letters leaves us with 11111010000001011011010001. Since that starts with a 1 that means our next letter is 9 bits long: 111110100

By doing this again and again we finally get these six letters:

0001 0011 111110100 0000 101101101 0001

Now that we have our individual letters it’s time to turn them into, well, letters. But the kind of letters people can read.

For the four bit letters we just reference the list of short codes we made up. Scroll up in the likely event that you neglected to commit them to long term memory.

0001 0011 111110100 0000 101101101 0001
e a ? ? e

For the nine bit letters we need to remove the leading 1 and then look up the remaining eight bit code in the official ASCII chart. For instance 111110100 becomes 11110100 which is the code for “t”.

0001 0011 111110100 0000 101101101 0001
e a t m e

And there we go, the compressed binary has successfully been turned back into human readable data.

I Don’t Like Pretending To Be A Compression Algorithm

Doing these examples by hand was a great way to prove our proposed compression algorithm actually works but I don’t think any of us want to to try and compress an entire book or even an entire email by hand. It would be much better to teach the computer how to do this all for us. Which is exactly what we’re going to start working on next time.

After all, this is a Let’s Program, not a Let’s Spend A Small Eternity Doing Mathematical Busywork.

* Yes, nibble is the actual official term for half a byte. Programmers are weird like that.