Let’s Program A JavaScript Game 17: Can You Hear Me Now?

If I Wanted To Do Legal Research I Would Have Been A Lawyer

Today we’re going to be adding music and sound effects to our game.

But we need to start with a quick reminder that using copyrighted music and images in your games is illegal. It’s also pretty tacky. Nobody is impressed by the fact that your game uses the battle music from Final Fantasy 7. And don’t get me started on all those Taylor Swift* tracks you slipped into the pause menu.

One way around this problem is to pay people for the right to use their music. You can also find a lot of people on the Internet who give their music away for free. Either way there are two big questions you need to get answered:

Commercial VS Non-Commercial

Want to sell your game? Maybe have some ads so you get paid every time someone plays it for free? Then you need to make sure any art, music or code that you got from other people has been cleared for “Commercial Use”. In other words, make sure you have the original author’s permission to use their work to help you make money.

This is important because MOST of the free art and music you can find online (and even some of the paid stuff) is “Non-Commercial Use Only”. If a game uses even one piece of “Non-Commercial” media it’s now illegal to sell it or even attach advertisements to it. You might even get in trouble for just giving it away for free on a website that has it’s own ads.

Doing a school project or building a game to share with friends? Non-Commercial is fine.

But if you want the freedom to do whatever you want with your game make sure everything you use is cleared for Commercial Use.

Attribution Requirements

The other big legal aspect of using other people’s art, music or code is that they usually require you to give them credit. For a game this usually means including their name in the end credits and in any “readme” files that you might have. Some authors just want a simple mention of their name while others have entire legal phrases they want you to copy and past into your product.

Of course, some authors don’t care.

Either way before you publish your game you need to make sure you know which author’s do and don’t require attribution.

Let’s Find Some Free Stuff!

For today’s project we need two things: Some background music for our main game and a sound effect for when the player is grazing viruses.

For the background music we’re going to head to Kevin MacLeod’s website.

MacLeod releases all of his music under a “Free Commercial Use With Attribution” license. That means you can use the music from his website for whatever you want as long as you remember to give him credit in your project.

Also, he’s one of those authors who has a very specific request on how he wants his attribution to show up. So if I want to use “Ouroboros” from his electronica section (and I do) I’ll have to include this in my game:

“Ouroboros” Kevin MacLeod (incompetech.com)
Licensed under Creative Commons: By Attribution 3.0

http://creativecommons.org/licenses/by/3.0/

For sound effects we’re going to go to Wikimedia Commons, a giant database of free sounds and pictures with a wide variety of licenses.

The sound effect I chose can be found here (though I renamed the file wubwub.ogg for my game). You’ll notice that its license is “Public Domain”. That means this particular sound now belongs to everyone and can be freely used for commercial products with no need to give credit to anyone.

Public Domain is a really convenient source of video game art and music, but it can also be difficult to find because it requires an author to completely give up ownership of his work.

Public Domain is most common with works of art that have outlived their copyright. Classic music, ancient artwork, old books and so on. But just because something is several decades old doesn’t mean it’s automatically Public Domain! Laws are constantly changing and copyright now lasts longer than ever so double check the legal status of any “old” media you want to use in your game.

Quick Sound File Edits

MacLeod’s music comes in mp3 format, but for JavaScript purposes it’s better to use the “ogg” format. It has slightly more cross-browser support at the moment. (OOPS! That’s not true. See here)

Also, the sound effect from Wikimedia also has an obnoxious pause at the end of the file that makes it impossible to loop.

A couple minutes with Audacity is enough to convert the mp3 to ogg and trim off the extra space from the sound effect. You can do this yourself or wait for me to post the complete game and borrow my copy of each file.

Can We Start Programming Yet?

The boring legal stuff is out of the way now. Time to write some actual code!

This time around we’re going to be using the Audio class. This lets us build objects for loading and playing sound files.

First things first: we’re going to need two global variables to hold our music and sound effect.

var bgMusic;
var grazeSFX;

Now to put our sounds into those variables. Just like with the image files we want to make sure that the music is properly loaded before we start the actual game.

One big difference is that Audio objects don’t have an onload function that triggers when they fully load. Instead they have an oncanplaythrough function that triggers when enough of the file has loaded that it can be safely played while the rest of the file keeps loading in the background.

With that in mind we can rewrite our resource loading chain to include a new loadGrazeSFX and loadBackgroundMusic function:

function startGame(){
   loadCycleImage();
}

function loadCycleImage(){
   cycleImage = new Image();
   cycleImage.onload=function(){loadVirusImage();};
   cycleImage.src='cycle.png';
}

function loadVirusImage(){
   virusImage = new Image();
   virusImage.onload=function(){loadGrazeSFX();};
   virusImage.src='virus.png';
}

function loadGrazeSFX(){
   grazeSFX = new Audio();
   grazeSFX.oncanplaythrough = function(){ grazeSFX.oncanplaythrough=0; loadBackgroundMusic();};
   grazeSFX.src = 'wubwub.ogg';
   grazeSFX.loop=true;
}

function loadBackgroundMusic(){
   bgMusic = new Audio();
   bgMusic.oncanplaythrough = function(){bgMusic.oncanplaythrough=0;gameLoop();};
   bgMusic.src = 'Ouroboros.ogg';
   bgMusic.loop=true;
}

You probably noticed that there are a couple differences between our audio loading functions and our image loading functions.

When setting up the audio files we set the loop property to true. This means that the music and sound effect will automatically restart after they reaches the end. This is obviously useful for a game that lasts longer than the soundtrack.

Now most of the time you don’t want sound effects to repeat. One gunshot should have one “bang” noise, not a constant loop of “bangbangbangbang….”. But we want our “wubwub” to play for as long as the player is grazing a virus so it actually makes sense to let it loop.

The other big difference is that our oncanplaythrough function deletes itself as soon as it runs. This is because oncanplaythrough can actually trigger more than once. Since we use these triggers to start the game loop multiple triggers would result in multiple game loops and really mess the game up. Having the trigger clear itself after running once prevents this.

One, Two, Three, Hit It!

Now that we have a pair of audio objects we can control them using handy functions like play, pause, and fastSeek. Play and pause do exactly what you’d expect while fastSeek is used for skipping to different points in an audio file. Most importantly for us fastSeek(0) rewinds a sound clip back to it’s start. (OOPS AGAIN! Don’t use fastSeek. See here for more details).

But where should we put these functions?

I personally only want music to play during the main game and to stop as soon as the player dies. This means the most logical place to first play the music is during the transition from the start screen to the end screen:

//Check to see if the user is ready to start the game
function updateStartScreen(){
   if(playerInput.up){
      initializeGame();
      gameState = STATE_RUNNING;
      bgMusic.play();
   }
}

And to get it the music (and sound effects) to stop on a game over we want to include a pause and fastSeek(0) anytime the player dies. That means an update to some of the last few if statements in updateGame:

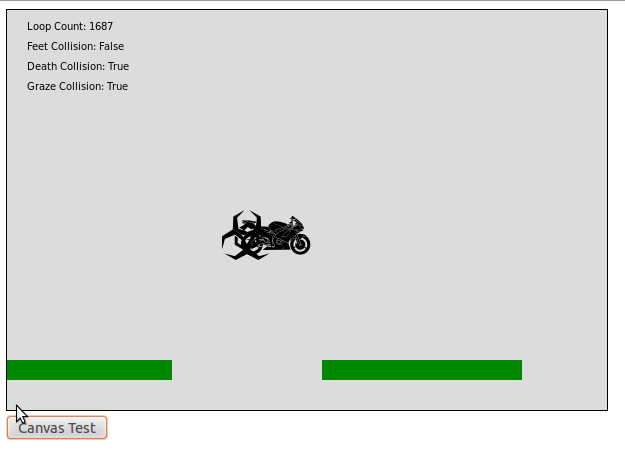
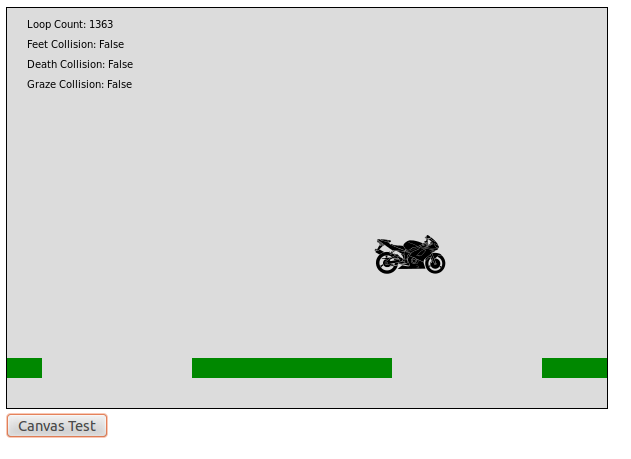
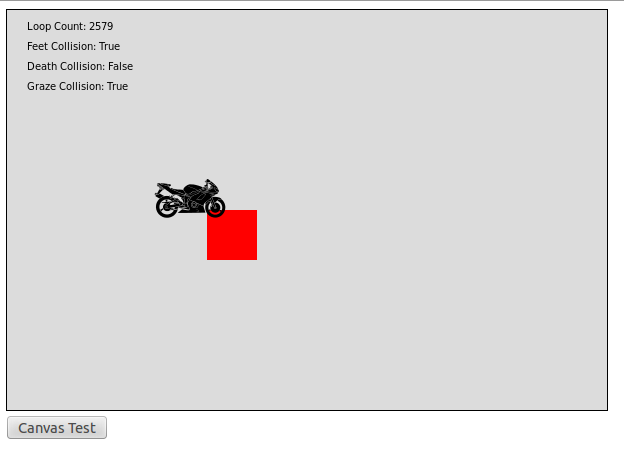
//Gameover if the player falls off the screen or has hit a virus
if(player.y > SCREEN_HEIGHT){
   bgMusic.pause();
   bgMusic.fastSeek(0);
   grazeSFX.pause();
   grazeSFX.fastSeek(0);
   gameState = STATE_GAMEOVER;
}

if(deathCollision){
   bgMusic.pause();
   bgMusic.fastSeek(0);
   grazeSFX.pause();
   grazeSFX.fastSeek(0);
   gameState = STATE_GAMEOVER;
}

Everytime the player dies the music stops and is rewound back to the start for the next run.This code also stops and rewinds our sound effects… but when did they start in the first place? I guess that’s what we should code next.

Logically we want the sound effect to play as long as the player is grazing and virus and stop as soon as he isn’t. That suggests an update to the graze logic in updateGame:
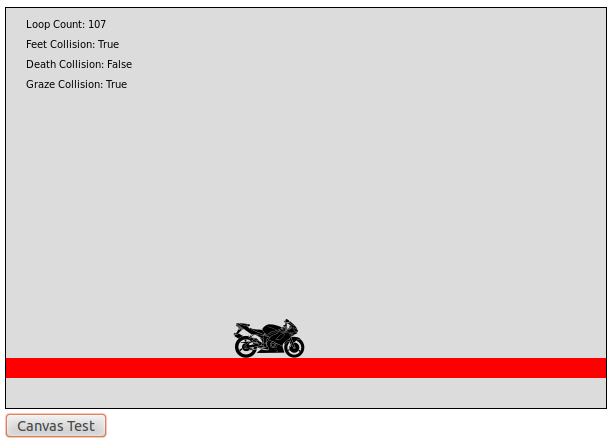
if(grazeCollision){
   if(currentFrameCount % FRAMES_PER_POINT == Math.floor(FRAMES_PER_POINT/2)){
      currentPoints++;
   }
   if(grazeSFX.paused){
      grazeSFX.play();
   }
}
else{
   if(!grazeSFX.paused){
      grazeSFX.pause();
      grazeSFX.fastSeek(0);
   }
}

And that’s it. The game now has sound and music.

It’s Almost Like A Real Game

It’s amazing how much difference a good soundtrack makes to a game. To be honest the rest of the game actually feels pretty lame compared to MacLeod’s work. But hey, it’s an educational demo. What did you really expect.

Anyways, with that complete all that’s really left are a few more game tweaks and some special effects. Stay tuned!

* A singer that was recently famous for being… good? Bad? Easy to parody? I wasn’t really paying attention but I saw her name on the Internet once.

Let’s Program A JavaScript Game 16: Do You Believe In Magic?

Black Magic

In computer programming a “Magic Number” is a number that has been hard coded into your program. Something like “myresults = 42 * myinput”.

This is a bad thing.

When your program needs a specific hard coded number (like the speed of light or the boiling point of water) you should put that number into a well named variable or constant and then use that name throughout your program.

Now let’s take a look at some common magic number problems, why they are bad and how to solve them with named variables.

First magic number problem: They can be hard to understand. Just looking at a number isn’t enough to tell you what it’s for, which can make reading code very hard.

//These magic numbers make it impossible to tell what this program is doing
function estimateFinalPrice(originalPrice){
   return originalPrice * 0.9 * 1.25 + 5.25;
}

//Switching the magic numbers to well named variables makes the function
//easy to understand
function estimateFinalPrice(originalPrice){
   var DISCOUNT = 0.1;
   var TAX = 0.25;
   var SHIPPING = 5.25;
   return originalPrice * (1 – DISCOUNT) * (1 + TAX) + SHIPPING;
}

Second magic number problem: they can be hard to tell apart. Imagine having to update a program with the same number hard coded in multiple places. Do all the numbers represent the same thing, or are they different things that just happen to have the same value? Should you update all the numbers, or only some of them?

//This function has three identical magic numbers... but are they all 
//the same thing?
function getVacationPrice(guests){
   var meals = getMealCost(3*guests);
   var parkPass = getParkCost(3*guests);
   var room = getRoomCost(3*guests);
   return meals + parkPass + room;
}

//Using well named variables make it obvious we are dealing with two different
//numbers that just happen to be the same... for now.
function getVacationPrice(guests){
   var VACATION_DAYS=3;
   var NUMBER_OF_PARKS=3;
   var meals = getMealCost(VACATION_DAYS * guests);
   var parkPass = getParkCost(NUMBER_OF_PARKS * guests);
   var room = getRoomCost(VACATION_DAYS * guests);
   return meals + parkPass + room;
}

Final magic number problem: They are hard to maintain. If one of your magic numbers needs to be updated you have to track down every place it appears in code, make sure it really is the number you think it is and then change it. That’s a lot of work for just doing something like changing tax rates.

Sure, you might think you could just use a find and replace but that’s a really bad idea. Try to replace “7” with “10” and you’ve also accidentally turned “17” into “110”. Or maybe you have two different magic number 7s and you only want to change one of them. Can’t do that with a simple find and replace.

//Good luck maintaining this thing! Forget to update one number and your
//program is broken
function tooMuchMagic(){
   var a = 7 * 7 * 24;
   var b = 7 – 24 * 7;
   return a * b / 7 +24;
}

//This is much better. You can just change one variable definition and 
//everything automatically updates
// Note, this is not real physics (as far as I know)
function noMagic(){
   var WAVELENGTH = 7;
   var FREQUENCY = 24;
   var a = WAVELENGTH * WAVELENGTH * FREQUENCY;
   var b = WAVELENGTH – FREQUENCY * WAVELENGTH;
   return a * b / WAVELENGTH – FREQUENCY;
}

Some Numbers Aren’t Magic

Before you go off and start adding constants to all your code we should admit that there are a couple circumstances where hard coding a number into your program is OK.

The basic rule of thumb is: If the number is small, unlikely to change and it’s obvious what it’s for then hard coding it is OK.

One big example is iterators. You start with a number and then add 1 to it until you reach some final goal like the end of an array. This is a pattern that everybody is familiar with so hard coding values is fine.

// Using a named variable for an iterator is overkill and ugly
var ITERATION_STEP = 1;
var ITERATION_START = 0;
var GOAL = 10;
var iterator = ITERATION_START;
while(iterator < GOAL){
   iterator = iterator + ITERATION_STEP;
}

//We all know how iterators work. Hard coding numbers is just fine
var GOAL = 10;
var iterator = 0;
while (iterator < GOAL){
   iterator = iterator + 1;
}

Other places that hard coded numbers are usually okay:

  • Simple array offsets, like getting position 0 from an array or using -1 to look at the last item.
  • Extremely well known facts like 1000 milliseconds in a second
  • Simple math, like doubling a number or raising something to the second power.
  • Inside math functions. Things like the quadratic equation are well known and don’t change, so hard coding them is fine. You can just type in “4”, no need to come up with a “QUADRATIC_EQUATION_CONSTANT_2” variable.

Time For A Witch Hunt

Now that we’re all up to speed on why magic numbers are bad it’s time to clean up Defrag Cycle. During early development and testing I hard coded a ton of numbers, but now that we’re trying to fine tune the game it’d be really nice to move everything into clean global variables that can be safely tweaked.

This will also have the advantage of making the code easier to read. I’ll probably even be able to get rid of some of my comments. No need to say things like “We’re adding 400 here because that’s how tall the screen is” when we have an obvious variable like “SCREEN_HEIGHT”.

I will include a link to a fully cleaned up version of the code at the end of this article to make up for the fact that I’m not going to show every single change I make.

Let The Hunt Begin

Looking at the top of our file we’re already using well named constants for platform generation, virus generation and the number of points needed to win the game. So there’s a handful of problems we don’t have to worry about.

Scrolling down almost a hundred lines we find our first magic number at the end of the gameLoop function: we hard coded in “50” for the number of milliseconds per frame. Even worse, we hard coded it in two separate places. And worst of all we later use a hard coded “20 frames per second” (the inverse of 50 milliseconds per frame) to calculate the display timer way down in both drawScreen and drawWinScreen.

Let’s fix that by creating a “MILLISECONDS_PER_FRAME” variable and inserting it into all three functions. Now we can speed up and slow down the game by just changing one global variable.

Next problem area is updateGame, and boy is it a problem area! We’ve hard coded how often the player gets points, how fast the player moves, how fast the player jumps, how fast the viruses and platforms move and included several hard copies of things like the size of the screen and the size of the player. There’s a lot here to fix.

First off is creating a FRAMES_PER_POINT constant and using that to calculate how often the player gets points. We’ll also want to use this constant down in the graze calculation area. Remember that we want the graze points to be awarded in between normal points, so instead of checking whether or not the currentFrameCount is evenly divisible by FRAMES_PER_POINT we’re going to check to see if there is a remainder equal to the halfway point between normal frames.

//Award bonus points if the player is grazing a virus
//Offset bonus point award frame from normal award frame
//This makes the point counter update twice as fast during a graze
if(grazeCollision){
   if(currentFrameCount % FRAMES_PER_POINT == Math.floor(FRAMES_PER_POINT/2)){
   currentPoints++;
   }
}

Math.floor is important for those cases where FRAMES_PER_POINT is odd. If FRAMES_PER_POINT is something like “5” the halfway point will be “2.5”. But since currentFrameCount and FRAMES_PER_POINT are both whole numbers you will never get a “2.5” remainder. You have to round down to “2” or the bonus points would never be awarded.

Next up let’s replace all those hard references to movement speeds:

var PLAYER_SPEED = 5; //The player's horizontal movement speed
var PLAYER_JUMP_SPEED = 15; //The upwards speed of the player's jump
var GRAVITY = 1; //How much the player accelerates downward per frame
var TERMINAL_VELOCITY = 15; //The maximum speed the player can fall
var PLATFORM_SPEED = 5; //How fast platforms move to the left
var VIRUS_SPEED = 5; //How fast the enemy viruses' move to the left

Once you’re done inserting all these speed constants into your code we’ll move on to removing hard references to screen and player size:

var SCREEN_HEIGHT = 400;
var SCREEN_WIDTH = 600;
var PLAYER_HEIGHT = 48;
var PLAYER_WIDTH = 75;

We can use the screen variables for drawing the background at the beginning of every draw function, for helping to check when the player is out of boundaries and to check when the player has fallen off the screen. Now we can adjust the size of the game screen by changing two variables instead of having to individually update multiple draw functions and boundary checks.

Player size constants are even more useful and can be used for checking screen boundaries, aligning the player with platforms and calculating hit boxes. For example, our new getFeetHitbox function looks like this:

// Get a 5 pixel tall hitbox all along the bottom of the player sprite.
// Used for detecting when the player has landed on a platform
function getFeetHitbox(xPos, yPos){
   var feetHitbox = new Object();
   feetHitbox.x = xPos;
   feetHitbox.y = yPos+PLAYER_HEIGHT-5;
   feetHitbox.width = PLAYER_WIDTH;
   feetHitbox.height = 5;
   return feetHitbox
}

This function will reliably create a hitbox all along the bottom of the player even if we change the size and shape of the player. Much better than the old version which only worked for player sprites that were exactly 48×75 pixels.

Notice that we still have a hard coded “5” inside this function. We’re going to just leave that there. It is never used outside this function, so maintenance isn’t a concern. Plus the function comment makes it very obvious what the 5 is for. So this one isn’t really a bad magic number.

The other hitbox functions also have local semi-magic numbers that I’m not going to remove for the same reasons.

Moving right along it looks like I’m still hard coding the height of new platforms along with the default spawning location of viruses and platforms. So let’s toss those into constants.

Let’s see… what’s left? Player spawn location is hard coded but that only shows up in one place and is easy to understand so we’ll leave that alone. The game intro, game over and game win screens all have hard coded drawing co-ordinates but I think that’s OK because it’s obvious they’re being used to arrange a specific screen and the co-ordinates are function specific and never reused.

So I guess we’re just about… wait! There’s still one last big problem.

Derived Constants

In our new platform generating code we have a constant “100” that represents how high the player can reasonably jump. We use this to set the minimum possible y coordinate that a new platform can have (it should never be so high that the player can’t jump to it).

You might think this is an easy fix. Just throw in a “MAX_JUMP_HEIGHT=100” and call it a day.

But our calculated safe jump height of 100 only holds true when the player can jump at 15 pixels per frame and falls at one pixel per frame per frame. If jump speed or gravity changes so will the player’s jumping height.

So we can’t just assign a number to the MAX_JUMP_HEIGHT constant. Instead we’re going to need a function that can calculate a max jump height based on the player speed and gravity constants.

It’s not hard to write though. We start by dividing jump speed by gravity to find out how many frames it takes for the player to stop moving upwards. Then we plug that into a basic distance equation, multiply by 0.9 to give the player a little breathing room on his jumps and use that for our constant.

// Calculate how high the player can jump
// Uses basic distance formulate: distance = velocity * time + 1/2 acceleration * time^2
function getMaxJumpHeight(jumpSpeed, gravity){
   var framesOfMovement = jumpSpeed/gravity; //How long until gravity overpowers the jump
   var maxJumpHeight = jumpSpeed * framesOfMovement - gravity/2 * framesOfMovement *framesOfMovement;
   return Math.floor(maxJumpHeight * 0.9); //Give the player a little breathing room
}

And with that we can finally program in our MAX_JUMP_HEIGHT constant

var MAX_JUMP_HEIGHT = getMaxJumpHeight(PLAYER_JUMP_SPEED, GRAVITY);

And with that we can slay our last magic number

//Platform can't be higher a jump from the current platform or 100 pixels from top of screen
var minPossibleHeight = Math.max(platforms[platforms.length-2].y - MAX_JUMP_HEIGHT, 100);

I’ll be keeping that other 100 since the comment makes it obvious what it’s for and it’s only ever used in this line.

See All The Changes

Here’s the latest copy of the magic free code.

With that out of the way we can start working on the finishing touches for the game: Music, sound effects and special effects.

Let’s Program A JavaScript Game 15: The Computer Is Out To Get You

Game AI!!!

In computer science we use the term “AI” or “artificial intelligence” to refer to sophisticated problem solving programs that use fairly advanced algorithms to process and learn from data.

But in the gaming world we tend to use the term “AI” to mean “however the computer makes decisions whether it’s intelligent or not”. An enemy that does nothing but walk around in circles and shoot bullets obviously isn’t processing or learning from data but most people would call it an “enemy AI” anyways.

So a lot of “Game AI” isn’t actually “Computer Science AI”.

But that’s a good thing! “Computer Science AI” is designed to solve math problems. “Game AI” is designed to make games more fun. Since they have different objectives it’s no surprise that they usually have completely different code.

Sure, sometimes making a game more fun does involve inventing a “Computer Science AI” that can do things like analyze and coordinate hundreds of units moving through a changing battlefield.

But you’d be surprised how often you can make a game feel fun and smart with nothing more than a stupid random number generator and half a dozen “if” statements.

Which is a a roundabout way of me admitting that our game AI is going to be pretty stupid and random. So if you were expecting something clever, I’m sorry. You’ll just have to go back and reread the swarm intelligence series.

Requirements

So what are the goals for our game AI? Here’s what I came up with:

  1. New platforms should sometimes be higher or lower than the platform before them
  2. Platforms should never spawn lower than the bottom of the screen or higher than the top
  3. Platforms should get smaller and further apart as the game goes on
  4. Platforms need to always be reachable by a single jump. No game-breaking impossible layouts allowed.
  5. Viruses should appear at random locations instead of following a pattern

Leap Of Faith

Let’s tackle the platform problem first. As a reminder our current platform generating code is in the updateGame function and looks like this.

//Remove platforms that have scrolled off screen and create new platforms to take their place
if(platforms[0].x + platforms[0].width < 0){
   //Drop first platform by shift entire list one space left
   for( i = 0; i < platforms.length-1; i++){
      platforms[i] = platforms[i+1];
   }

   //Add new platfrom to end of list by placing it a certain distance after second to last platform
   var newPlatform = new Object();
   newPlatform.x = platforms[platforms.length-2].x + maxPlatformLength + maxPlatformGap;
   newPlatform.y = 350;
   newPlatform.width = maxPlatformLength;
   newPlatform.height = 20;
   platforms[platforms.length-1] = newPlatform;
}

First up is adding some randomness to the height of the platforms, which is actually a trickier problem than you might think. Sure, we could just use a random integer to set the “y” value of every new platform but then we run a huge risk of creating platforms the player can’t actually jump to or creating platforms that are too easy to jump to.

The issue is that when a platform is higher than the player they have less time to reach it than usual before falling to their doom, while if the platform is beneath the player they have more time than usual to make the jump.

More specifically, if you remember back to part 9 we calculated that it took thirty frames for the player to go from on the ground, to jumping to being back on the ground.

But if a platform is at the top of the player’s jump he will only have half that much time, fifteen frames, to reach it before he has started moving downwards and is now stuck below the new platform.

On the other hand if the platform is below the player’s starting position he will have the full thirty frames plus another dozen or so frames of falling before he’s gone too far.

So we can’t just use the same set horizontal distance between platforms of different heights. Platforms above the player need to be closer together. Platforms below the player need to be further apart.

To pull this off do we’re going to write a math function that can calculate how many frames it takes for the player to jump from one height to another. For this to work we need to know:

  • height difference
  • jump velocity
  • y acceleration per frame

Now if you’ll remember back to physics the equation for movement looks a lot like this:

end height = start height + velocity * time + ½ acceleration * time^2

0 = start height – end height + velocity*time + ½ acceleration * time^2

0 = change in height + velocity*time + ½ acceleration * time^2

And from there we can use the quadratic equation to solve for time. Just throw this function anywhere in your script:

// Calculate how many frames a jumping player will be in the air
// Based on the vertical distance they have to cover, their jumping vertical velocity
// and their vertical acceleration
// This is basically the physics distance formula plugged into the quadratic equation
function getFramesUntilLanding(dist, vel, acc){
   var a = (-1 * vel + Math.sqrt(vel*vel - 2 * acc * dist))/(acc);
   var b = (-1 * vel - Math.sqrt(vel*vel - 2 * acc * dist))/(acc);
   return Math.max(a, b);
}

Remember that the quadratic equation usually has two answers, which makes sense for a jump. A player will be five pixels off the ground both right after he jumps and right before he lands. We are only interested in how long it takes to land at a certain height so we take the max of the two values.

Another thing to watch out for here is that certain inputs to this function will return zero answers. Specifically, if the player is only moving fast enough to jump 150 pixels upwards and you ask how long it will take him to jump 300 pixels the answer is going to be “NaN”, the special JavaScript value for “not a number”. That’s what you get when you try to do impossible math.

To avoid this we need to know how high our player can jump so we can avoid asking for anything bigger than that. Looking at the code in updateGame we can see that starting jump velocity is 15 pixels per frame and that acceleration is 1 pixel per frame. That means that the player will keep moving upwards for 15 frames. Plugging that into our handy movement equation shows:

max jump height = 15 pixels/frame * 15 frames – ½ pixels/frame^2 * (15 frames)^2

max jump height = 112 pixels.

To give ourselves a little wiggle room we’ll round down and take 100 pixels as the max jump height. This means that a new platform should never be more than 100 pixels higher than where the player started.

As for platforms below the player, there’s really no limit as long as they’re still on the screen. Since gravity works downwards there’s no reason the player couldn’t safely jump or fall to a platform hundreds of pixels beneath them.

Prepare For Code Dump

With all that math and planning out of the way I was able to update our platform code. Just replace the platform generating code from the last section with this shiny new version:

//Remove platforms that have scrolled off screen and create new platforms to take their place
if(platforms[0].x + platforms[0].width < 0){
   //Drop first platform by shift entire list one space left
   for( i = 0; i < platforms.length-1; i++){
      platforms[i] = platforms[i+1];
   }

   // Add new platfrom to end of list
   // Platform is randomly placed somewhere within the jump range of the player
   // As the game goes on platforms get smaller and farther apart
   // Calculated max height of jump is about 100
   // Platform can't be higher than the max jump or 100 pixels from top of screen
   var minPossibleHeight = Math.max(platforms[platforms.length-2].y - 100, 100);

   //Platform can't be lower than the bottom of the screen
   var maxPossibleHeight = 380;

   //Random height between the max and min
   var newPlatformHeight = Math.random()*(maxPossibleHeight - minPossibleHeight) + minPossibleHeight;
 
   //Calculate how far the platform can be by multiplying speed of 10 by the time the player will be in the air
   var maxPossibleDistance = 10 * getFramesUntilLanding(newPlatformHeight - platforms[platforms.length-2].y, 15, -1);
   
   var newPlatform = new Object();
   //As the player earns points the platforms should get closer to being maxPossibleDistance apart
   newPlatform.x = platforms[platforms.length-2].x +
                   platforms[platforms.length-2].width +
                   maxPossibleDistance*(0.5 + 0.5 * currentPoints/TOTAL_POINTS_TO_WIN);
   newPlatform.y = newPlatformHeight;
   //As the player earns points the platforms should get smaller
   newPlatform.width = maxPlatformLength *(1 - 0.5 * currentPoints/TOTAL_POINTS_TO_WIN);
   newPlatform.height = 20;
   platforms[platforms.length-1] = newPlatform;
}

I think the code comments explain everything pretty well, so I’m just going to hit the highlights here.

Just like before we start by shifting the entire list left to make way for the new platform.

We then calculate where the next platform should go by choosing a random number between the min and max possible heights. Remember that in screen coordinates the top of the screen is y=0 and it gets bigger as you go down, which is why we find the min by taking the players location and subtracting his 100 pixel jump height and why the max is slightly smaller than the height of the screen.

Once we know how high the next platform is going to be we figure out how far away it can be by using our handy jump frame function to find out how many frames it will take to jump that high and then multiplying by ten, which is the players speed of 5 pixels per frame PLUS and extra 5 pixels per frame from the fact that the entire screen is moving backwards. This tells us exactly how far forward the player can move during his jump to the new platform.

Now that we have a height and know exactly how far the player can jump we’re ready to build a new platform. Height just gets slotted in but width and distance now get adjusted based on how close the player is to winning the game. For distance we start with gaps that are 50% the maximum jump distance and slowly increase them by another 50% as the player earns points. Platform size is the opposite, starting at 100% of max size and decreasing by up to 50% as the player moves.

Now I will admit that a lot of this is bad code. Even with the comments there are a lot of hard to understand hard-coded numbers floating around. But at this point we’re still prototyping and a certain amount of messy experimentation is OK. We’ll clean this up a little later.

Simple But Vicious Predators

After all the math involved in fixing up platform generation you’ll be happy to hear we can make the virus spawn pattern work pretty decently by changing just one line in the virus generation code:

newVirus.y = 300;

to this:

newVirus.y = player.y -50 + 100*Math.random();

This guarantees that new viruses will spawn in the general vicinity of the player with just a little bit of jitter to hide what we’re doing. And since the player should be randomly jumping all over the place this should make the viruses also appear all over the place.

Congrats! The Core Gameplay Is Done Now

We have a player that can move and jump.

We have platforms that spawn randomly and become smaller and further apart as the game progresses.

We have viruses that semi-intelligently place themselves in the heroes path.

We have a score system that lets the player win.

So we’re basically done with the actual “game” portion of this project.

So what’s left? A surprisingly large amount of stuff!

First, this prototype code badly needs to be cleaned up. And then we’ll take a few more sessions to add some special effects, music and basic animations.

Then, and only then, will we truly be done.

Let’s Program A JavaScript Game 14: A Winner Is You

Anybody Remember The Point Of This Game?

Way back in our game design segment we decided that our game is about a program (the player) defragmenting a hard drive. In order to win the player just has to stay alive long enough to rack up 1000GB of defrag points. The player can earn bonus defrag points by grazing viruses, allowing skilled players to complete the game with faster times.

Today we’re going to build that.

Keeping Score

In order to have a game about building up points until you win we obviously need to keep track of both how many points the player currently has and how many total points they need. We also want to know how long it took them to win. This is easy enough with a handful of global variables added up near the top of our script. Maybe right after all of our collision variables:

var currentFrameCount; //Keep track of how long it takes the player to
var currentPoints;
var TOTAL_POINTS_TO_WIN = 100;

Eventually we will want TOTAL_POINTS_TO_WIN to be one thousand, but for testing purposes let’s keep it low for now.

Since currentPoints and currentFrameCount get set back to zero every time the player loses we should set their value inside of the initializeGame function. I put it right after the code that resets the player’s location:

//Reset player location
player.x = 100;
player.y = 100;
player.yVel = 0;
player.onGround = false;

//Reset points and time
currentFrameCount=0;
currentPoints=0;

And finally let’s show this all to the player by updating our drawScreen function. Instead of printing out debug information about loops and collisions we’ll now print out the player’s current time and points so far by replacing this:

//Draw black text
context.fillStyle = '#000000';
context.fillText("Loop Count: "+loopCount, 20, 20);

if(feetCollision){
   context.fillText("Feet Collision: True", 20, 40);
}
else{
   context.fillText("Feet Collision: False", 20, 40);
}

if(deathCollision){
   context.fillText("Death Collision: True", 20, 60);
}
else{
   context.fillText("Death Collision: False", 20, 60);
}

if(grazeCollision){
   context.fillText("Graze Collision: True", 20, 80);
}
else{
   context.fillText("Graze Collision: False", 20, 80);
}

With this:

//Draw black text
context.fillStyle = '#000000';

//One frame should take 1/20 of a second
//For scoring purposes assume this is true even if the player is lagging
var time = currentFrameCount/20;
context.fillText("Time: "+ time.toFixed() + " seconds", 20, 20);
context.fillText("Progress: "+currentPoints+" out of "+TOTAL_POINTS_TO_WIN+" GB Defragged", 20, 40);

How Much Is A Point Worth?

Now that we have time and score variables we just have to figure out a good way to fill them up.

Time is easy enough. We just increase our frame count variable once per loop and we’re done.

function updateGame(){
   loopCount++;
   currentFrameCount++;
   // The rest of the function stays the same

Deciding how to update points is a little bit harder.

There are 20 frames per second in our game, so giving the player one point per frame would let them win the entire game in a mere 50 seconds. I think that’s a bit shorter than what we were hoping for.

So how long should the game last?

For a silly little web toy like this you can’t really expect players to concentrate for more than about three minutes.

Now if we give the player one point every 4 frames it will take them 4000 frames to collect the 1000 points they need to win. At twenty frames per second this is three and one third minutes and is a little bit longer than we want.

Or is it? Remember that players can graze to earn bonus points, which should shave half a minute or more off of the average player’s time. That cuts our three and one third minutes back down under the three minute limit.

So let’s try one point every four frames and see how that feels:

//Update the game by one step
function updateGame(){
   loopCount++;
   currentFrameCount++;
   if(currentFrameCount % 4 == 0){
      currentPoints++;
   }
   //Rest of the function doesn't change

Here we use the % “modulus” operator to find out whether or not the current frame count is evenly divisible by 4. If you’ve never used %, it just tells us what the remainder is from a piece of division. Example: 5 % 4 = 1, 7 % 4 = 3, 8 % 4 = 0, 122 % 4 = 2

Anyways, after giving the code a whirl I think that one point every four frames feels about right. The number goes up fast enough to feel satisfying but not so fast that the lowest digit is a mere blur.

Living Life On The Edge

Next goal is to implement bonus points from grazing. Exactly how many points grazing should be worth will take some experimentation but I’m going to start by having grazing be worth one point every four frames. That’s the same as our normal point rate and means that grazing will basically double your points per second.

Since we already keep track of grazing using the handy grazeCollision variable all we have to do to get graze points is copy our point code into a quick if statement somewhere near the end of updateGame. I put mine right before the code that checks if you’ve fallen off screen.

//Award bonus points if the player is grazing a virus
if(grazeCollision){
   if(currentFrameCount % 4 == 0){
      currentPoints++;
   }
}

Hmmm… this technically works but I don’t like how the score feels. It’s hard to tell at a glance that grazing makes you earn two points every four frames instead of the normal one. After all, the score is still being updated at the same old rate.

It would be much better if grazing made the player earn one point every two frames instead of two points every four frames. It’s mathematically the same but splitting the points up will make the score counter roll over faster and make it obvious the player is earning a bonus.

Making this happen is as simple as changing our bonus point code to kick in only when currentFrameCount is two frames past an even division by four. This way our normal points will kick in every fourth frame and our graze points will kick in two frames later.

//Award bonus points if the player is grazing a virus
if(grazeCollision){
   if(currentFrameCount % 4 == 2){
      currentPoints++;
   }
}

Victory

We’ve got points. We’ve got bonus points. All that’s left is popping up a victory screen when the player wins, which isn’t really all that different than the game over screen we’ve already designed.

First, we add some code to end of updateGame to check whether or not the player has enough points to win. If he does, we switch game state.

if(deathCollision){
   gameState = STATE_GAMEOVER;
}

if(currentPoints >= TOTAL_POINTS_TO_WIN){
   gameState = STATE_WIN;
}

And then we just write some quick code to handle the winning state.

//Check to see if the user is ready to restart the game
function updateWinScreen(){
   if(playerInput.up){
      gameState = STATE_START_SCREEN;
   }
}

//Show the player how long it took them to win the game
function drawWinScreen(){
   var canvas = document.getElementById('gameCanvas');
   var context = canvas.getContext('2d');

   //Draw background
   context.fillStyle = '#000000';
   context.fillRect(0,0,600,400);

   //Draw green text
   context.fillStyle = '#00CC00';
   context.font = 'bold 80px impact';
   context.fillText("YOU WIN!", 60, 100);
   
   context.font = 'bold 20px impact';
   var time = currentFrameCount/20;
   context.fillText("You defragmented the hard drive in "+ time.toFixed(1) + " seconds", 20, 200);
   context.fillText("Graze more viruses to improve your time", 20, 250);

   context.font = '30px impact';
   context.fillText("Press UP arrow to retry", 120, 350);
}

It’s up to you whether you want to keep these two functions next to each other in the code or split them up so all the “update” functions are next to each other and all the “draw” functions are next to each.

Anyways, with those two functions all that’s left is updating the main gameLoop function to properly call them when we’re in the winning state:

//The main game loop
function gameLoop(){
   var startTime = Date.now();
   
   if(gameState == STATE_START_SCREEN){
      updateStartScreen();
      drawStartScreen();
   }
   else if(gameState == STATE_RUNNING){
      updateGame();
      drawScreen();
   }
   else if(gameState == STATE_GAMEOVER){
      updateGameover();
      drawGameoverScreen();
   }
   else if(gameState == STATE_WIN){ //This is the new one!
      updateWinScreen();
      drawWinScreen();
   }
   else{ //Fix the game if we somehow end up with an invalid state
      gameState = STATE_START_SCREEN;
   }

   var elapsedTime = Date.now()-startTime;
   if(elapsedTime>=50){ //Code took too long, run again immediately
      gameLoop();
   }
   else{ //Code didn't take long enough. Wait before running it again
      setTimeout("gameLoop()",50-elapsedTime);
   }
}

And that’s that. You can test play the game and actually win now.

Kicking Things Up A Notch

It’s nice that everything works now, but the game is a little on the easy side with predictable enemies and small gaps. So next time I’ll be adding challenge by randomizing the platforms and enemies and even improving the game so that it gets more difficult the closer the player is to winning.

Let’s Program A JavaScript Game 13: Some Much Needed Polish

This Is Only The Beginning…

Our code so far makes a good proof of concept. We’ve shown that we can indeed move the player around, land on platforms, crash into enemies and switch between different game states. In other words, we can safely say that it is possible to build our game using JavaScript.

But our code also has a lot of problems, glitches and loose ends. So today we’re going to be cleaning those up and starting the transition from “Semi-functional Prototype” to “Product You Wouldn’t Be Embarrassed To Show Your Friends”.

As part of this we’re going to be rewriting a TON of code. But don’t worry, I’ll post a link to a live version of code at the end of this article so if you have trouble following my description of what I’m doing you can just grab the complete code and take a look for yourself.

Wait! I’m Not Ready Yet

Here’s an interesting little fact for you: When you use JavaScript to assign an image to a variable the code doesn’t stop and wait, it keeps running and loads the image in the background. That means that your code might accidentally try to use an image that hasn’t finished loading yet, which is bad.

Now in a simple game with just a couple small images this probably isn’t a problem. But if you have a big background image or lots and lots of tiles and enemies and animations you might end up with a game that tries to run while 90% of its graphics are still being loaded.

To avoid this problem we’re going to have to tell our code specifically to not run any actual game logic until after the images are finished loading. An easy way to do this is with the onload property of the JavaScript image object. This lets you attach a function to an image and have that function run once the image finishes loading.

Using this we can chain together our images like this:

var cycleImage = new Image();
var virusImage = new Image();

function canvasTest(){
   loadCycleImage();
}

function loadCycleImage(){
   cycleImage = new Image();
   cycleImage.onload=function(){loadVirusImage();};
   cycleImage.src='cycle.png';
}

function loadVirusImage(){
   virusImage = new Image();
   virusImage.onload=function(){gameLoop();};
   virusImage.src='virus.png';
}

Now canvasTest doesn’t immediately start the game but instead calls loadCycleImage. loadCycleImage loads cycle.png and then calls loadVirusImage, which load virus.png and then starts the game loop.

Now obviously the more images you have the longer this chain gets, which introduces two problems: First, a long chain is hard to maintain by hand. Second, a large chain leaves your game “frozen” for several minutes since nothing gets drawn to the screen until the chain has completed.

You can solve the code maintenance problem by writing a new recursive function that accepts an entire list of image objects and object URLs. It sets up the first image to loading and when it’s done it then calls itself with the rest of the lest. When the list is finally empty it calls gameLoop() instead. This lets you have one function and one loop instead of having to hand type a hundred different loading functions that chain into each other.

The “frozen” game problem is easy too. Just write some sort of drawResourceLoadingScreen screen function that displays a helpful message like “Now loading image X out of 45”. Call that method at the beginning of every step of the chain so the user knows why the game hasn’t started yet.

But since I’m only loading two images I’ll leave both of these tasks as exercises for the reader.

Initialization: One of Top Ten Most Computer Programmy Word Out There

Let’s continue with this theme of “Things we shouldn’t just leave at the top of our script” and talk about initializing game objects.

Before our games starts we obviously need to generate the player’s position, the starting platforms and the starting viruses. Currently we do that all up at the top of code.

But this means that our game only gets set up once, when the player loads the page. This is the reason why the player can get stuck inside a virus after a game over. Once the virus is in play it stays in play no matter how many times the player dies and respawns.

It would be much better if the game was reset every time the player switched from the start screen to the main game. Then instead of getting stuck inside a virus the player would get a fresh virus-free start when they died.

This is an easy problem to refactor. We just grab the setup code from the top of the script and stuff it into a function named initializeGame. Then we call initialize game right before we switch to the main game state.

The only possible trick is that it’s important to remember that global variables like players, platforms and viruses need to stay at the top of the script so our game functions can share them. We’re only moving the code that sets their values into a function, the declarations can stay put.

//Put the player in the starting location and generate the
//first platforms and enemies
function initializeGame(){
   //Reset player location
   player.x = 100;
   player.y = 100;
   player.yVel = 0;
   player.onGround = false;

   //Generate starting platforms into global array
   //Uses global variables to control platfrom generation
   for(i = 0; i < maxPlatformCount; i++){
      var newPlatform = new Object();
      newPlatform.x = i * (maxPlatformLength + maxPlatformGap);
      newPlatform.y = 350;
      newPlatform.width = maxPlatformLength;
      newPlatform.height = 20;
      platforms[i] = newPlatform;
   }

   //Generate starting viruses into global array (all off screen at first)
   //Uses global variables to control virus generation
   for(i = 0; i < maxVirusCount; i++){
      var newVirus = new Object();
      newVirus.x = virusStartingOffset + i * (virusWidth + maxVirusGap);
      newVirus.y = 200;
      newVirus.width = virusWidth;
      newVirus.height = virusHeight;
      viruses[i] = newVirus;
   }
}

And then we just have to slip a reference to this code into our startScreenUpdate function:

//Check to see if the user is ready to start the game
function updateStartScreen(){
   if(playerInput.up){
      initializeGame();
      gameState = STATE_RUNNING;
   }
}

Side note: Initializing a game can take a long time, especially if you have to load new graphics or run an expensive algorithm. In these scenarios it’s considered polite to put up a “Loading” screen so the player knows the game isn’t stuck.

Since we’re only initializing a few dozen values this function will run too fast to notice, making a loading screen pointless. But if you were making a more complex game you might want to build a simple “Initializing next stage” screen drawing function and add it right before the initialize call.

Fixing A Few Minor Issues

That’s it for our big two problems, but as long as we’re disecting code let’s fix a few tiny bugs I noticed.

First off, the player shouldn’t be allowed to move off screen. So let’s add this code somewhere inside updateGame

//Keep the 75px wide player inside the bound of the 600px screen
if(player.x<0){
   player.x=0;
}

if(player.x+75>600){
   player.x=600-75;
}

Good programmers will notice that these functions use a crazy amount of magic numbers. It would probably be a good idea to replace them by constant variables like PLAYER_WIDTH and SCREEN_WIDTH.

Another quick issue: The player can currently do an air jump by falling off a platform and then hitting up. This is because we only set “onGround” to false when the player jumps. So let’s update our code to set that to false whenever the player starts moving downwards by changing this:

player.y += player.yVel;
player.yVel +=1;
if(player.yVel>=15){
   player.yVel=15;
}

into this:

player.y += player.yVel;
player.yVel +=1;
//Assume player is no longer on groud. Platfrom collision later in loop can change this
player.onGround=false;
if(player.yVel>=15){
   player.yVel=15;
}

The positioning of this code is very important! It comes AFTER the player tries to jump but BEFORE the platform collision code that sets onGround to true.

This means that if the player was on a platform at the end of last frame he can still jump because the onGround false code hasn’t kicked in yet.

It also means that if the player stays on a platform for the entire loop the onGround false code will be immediately reversed by the platform checking code that comes after it, so the player can still jump next frame even though onGround was temporarily false.

The only way for onGround to get set to false and stay false is if the player isn’t on a platform, which is exactly what we wanted. In fact, this works so well that you can remove the onGround=false from the up key handling code if you want. It’s redundant now.

As long as we’re changing things up, let’s have all viruses spawn at y=300 instead of y=200. This puts them at about the same level as the player and makes jumping over them easier during testing.

Finally, having to click a button just to start the game doesn’t make a lot of sense now that we have an actual Start Screen. So let’s rename canvasTest to startGame and link it to the loading of the page instead of a button press.

<body onload="startGame()" onkeydown="doKeyDown(event);" onkeyup="doKeyUp(event);">
   <canvas id="gameCanvas" width=600 height=400 style="border:1px solid black;"></canvas>
</body>

The Code So Far

Here it is. Play it. Download it. Study it.

I Want To Be A Winner

With the game a little bit cleaner than before we’re all set to add in a scoring system and a win condition. Then we’ll be able to actually beat our game instead of just jumping over the same boring obstacles again and again until we get bored.

Let’s Program A JavaScript Game 12: Making A STATEment

I’m Pretty Sure This Is What That Word Means…

There are two common definitions of “Game State”. At least two that I’ve heard. Who knows whether or not the big time developers use these. But my blog, my definitions. So… Game State:

The first definition is: A complete description of exactly what is going on in the game including the value of every variable. Very useful for creating save files or debugging glitches.

The second definition is: A high level description of what the game is currently doing, such as “paused”, “saving”, “in combat” or “showing world map”.

Our big focus today is going to be on the second definition, which is going to help us add a “Start Screen” and “Game Over Screen” to our current code. Or in other words, we are going to change from a game that only has one state (running) to a game that has three states (start, game over, main game).

But it’s not enough to have different game states. You also need a plan for switching between those game states. How does the player get to the “game over” state? Once he is in the “game over” state, how can he get back into the “main game” state? That sort of stuff.

This can all be described pretty well with a quick flowchart. Here’s an example of the four game states we want for Defrag Cycle and how they are related (although we’re only building three of them today:

Everybody Loves Flowcharts!

Everybody Loves Flowcharts!

Pretty simple, right?

Of course, not all games are so straightforward. For example, here is a sample state chart for a generic RPG:

Whoops, looks like I forget to add a “game over” state, so let's just pretend this chart is for one of those games where losing a fight just sends you to the nearest hospital/temple/inn.

Whoops, looks like I forget to add a “game over” state, so let’s just pretend this chart is for one of those games where losing a fight just sends you to the nearest hospital/temple/inn.

Bonus Activity: Take your favorite game and try to draw a game state flowchart for it. Pay special attention to the transitions between states. Try to figure out which transitions go both ways (you can go from main game to pause screen and pause screen to main game) and which are one way (you can go from main game to game over, but it’s a one way trip).

Simple State Switching

First up we’re going to need a global variable for keeping tack of what state the game is in, along with some predictable values for the states themselves. So let’s just stick this somewhere near the top of our script along with the rest of our global variables and setup code:

//Game State "constants" (Javascript does not support true constants)
var STATE_RUNNING = 1;
var STATE_START_SCREEN = 2;
var STATE_GAMEOVER = 3;
var STATE_WIN = 4;

//Current Game State. Start game in "Start Screen" state
var gameState = STATE_START_SCREEN;

Now to put those states to good use. Update your gameLoop function like this:

//The main game loop
function gameLoop(){
   var startTime = Date.now();
   
   if(gameState == STATE_START_SCREEN){
      updateStartScreen();
      drawStartScreen();
   }
   else if(gameState == STATE_RUNNING){
      updateGame();
      drawScreen();
   }
   else if(gameState == STATE_GAMEOVER){
      updateGameover();
      drawGameoverScreen();
   }
   else if(gameState == STATE_WIN){
      // We'll implement this later
   }
   else{ //Fix the game if we somehow end up with an invalid state
      gameState = STATE_START_SCREEN;
   }

   var elapsedTime = Date.now()-startTime;
   
   if(elapsedTime>=50){ //Code took too long, run again immediately
      gameLoop();
   }
   else{ //Code didn't take long enough. Wait before running it again
      setTimeout("gameLoop()",50-elapsedTime);
   }
}

Can you see what we’re doing? The main gameLoop logic is the same as always. Make a note of what time it is, do some useful work, see how much time has passed and then decide when to run the next gameLoop. The big difference is that we now use the gameState variable to decide what kind of useful work we do.

When the state is STATE_RUNNING we just run the same old updateGame and drawScreen logic that we’ve already written. No need to make any changes here, unless you want to give them better function names like updateMainGame or updateRunningGame or something. I’m not going to mess with that just right now.

When the state is instead set to the start screen or the gameover screen we skip the game updates and instead run new functions specifically designed for those states. Functions that we haven’t written yet, but will in just a second.

As a side note, state switching like this can be an easy way to do pause screens. The main game update function only gets called during STATE_RUNNING, so by switching to a different state you can basically freeze the game world by preventing enemy and player position variables from updating.

New Code For Our New States

So… what should a start screen and an gameover screen actually do?

It seems to me a simple online game startscreen needs to do three things:

  1. Show the game’s title
  2. Explain how to play
  3. Explain how to move from the start screen to the main game

Similarly a gameover screen has two jobs:

  1. Show a gameover message
  2. Explain how to move from the gameover screen back to the start screen

In a real game we would hire a real artist to design some attractive screens for us. They would probably choose some lovely fonts and throw together a cool background filled with lasers and explosions.

But this is a game programming tutorial, not a game design tutorial, so I’m just going to throw together some text and call it a day.

//Draw the start screen with game title and instructions
function drawStartScreen(){
   var canvas = document.getElementById('gameCanvas');
   var context = canvas.getContext('2d');

   //Draw background
   context.fillStyle = '#dcdcdc';
   context.fillRect(0,0,600,400);

   //Draw black text
   context.fillStyle = '#000000';
   context.font = 'bold 70px impact';
   context.fillText("DEFRAG CYCLE", 20, 150);
   context.font = '20px impact';
   context.fillText("- Defrag the hard drive by avoiding pits and viruses", 20, 200);
   context.fillText("- When the counter reaches 1000 GB you win!", 20, 230);
   context.fillText("- LEFT and RIGHT arrow keys to move", 20, 260);
   context.fillText("- UP arrow key to jump", 20, 290);
   context.fillText("- Graze viruses to speed up the defrag counter", 20, 320);
   context.fillText("- Press UP arrow key to start game", 20, 350);
}

//Draw the gameover screen
function drawGameoverScreen(){
   var canvas = document.getElementById('gameCanvas');
   var context = canvas.getContext('2d');

   //Draw background
   context.fillStyle = '#000000';
   context.fillRect(0,0,600,400);

   //Draw green text
   context.fillStyle = '#00CC00';
   context.font = 'bold 80px impact';
   context.fillText("GAME OVER", 40, 200);
   context.font = '30px impact';
   context.fillText("Press UP arrow to retry", 120, 250);
}

Now all that’s left to do is fill in those two new update methods, which is really easy since all they do is check for the up key and then switch states (remember the flowchart):

//Check to see if the user is ready to start the game
function updateStartScreen(){
   if(playerInput.up){
      gameState = STATE_RUNNING;
   }
}

//Check to see if the user is ready to restart the game
function updateGameover(){
   if(playerInput.up){
      gameState = STATE_START_SCREEN;
   }
}

And with that the game now starts on the start screen and can be transitioned to the main game by tapping up. We’ve also built in the link between the gameover screen and then start screen. All that’s left is to link in the main game to the gameover screen.

Once again this is pretty easy. We already have a deathCollision flag that’s being set everytime we hit a virus and we already check to see if the player has fallen off the bottom of the screen. All we have to do is find inside the main updateGame function (it’s right at the bottom):

//Reset the player to default location when they fall off the screen
if(player.y > 400){
   player.x = 100;
   player.y = 100;
}

And change it to this:

//Gameover if the player falls of the screen or has hit a virus
if(player.y > 400){
   player.x = 100;
   player.y = 100;
   gameState = STATE_GAMEOVER;
}

if(deathCollision){
   gameState = STATE_GAMEOVER;
}

And now the game can flow between all three different states. Just ram yourself into a virus or fall into a pit and watch that transition to gameover.

This Is Actually Pretty Terrible

So… those of you who tried out your updated code probably noticed that it’s a little rough around the edges. Actually, that’s an understatement. These edges are downright serrated:

  • You can see the cycle jerk back into default position after falling off the screen but right before the game over message
  • Even if you just tap the up arrow key it will usually skip through both the gameover and start screen too fast to see
  • If you hit a virus you will immediately hit it again after you restart the game

This is obviously not anywhere near playable. But our goal was just to get the state switching working and that we have done!

Next time around we’ll start cleaning up some of these issues in preparation for adding the scoring system and a way to actually win.

Let’s Program A JavaScript Game 11: This Post Isn’t About Malware, Honest

Let’s Get Dangerous

We have a cycle for the player and an endlessly scrolling screen of platforms for them to jump along. The only piece we’re missing are the deadly virus enemies for the player to avoid.

Viruses are going to be implemented more or less the same as platforms. We’ll have an array of viruses that scroll that to the left. When a virus has moved entirely off screen we drop it from the front of the list and then pin a new virus to the back of the list. In the future we will randomize the location and timing of new viruses to make things a little less predictable but for now a couple viruses marching in a steady line will let us test everything we need to test.

Writing Simple Enemies

The code for the virus obstacles is almost identicle to the code for the platforms. Generate an array of objects, move them a little to the left every frame and check for collisions with the player. So nothing here should be especially mind blowing.

First up, we generate the original list of viruses at the top of code by putting this code right after the platform setup code:

var viruses = new Array();
var virusStartingOffset = 1000;
var maxVirusCount = 2;
var maxVirusGap = 400;
var virusWidth = 50;
var virusHeight = 50;

//Generate starting viruses (all off screen at first)
for(i = 0; i < maxVirusCount; i++){
   var newVirus = new Object();
   newVirus.x = virusStartingOffset + i * (virusWidth + maxVirusGap);
   newVirus.y = 200;
   newVirus.width = virusWidth;
   newVirus.height = virusHeight;
   viruses[i] = newVirus;
}

You also need to include this image related code somewhere so we can draw the viruses. I suggest putting it right after the cycle image code:

var virusImage = new Image();
virusImage.src = "virus.png";

Next up is adding virus code to the updateGame method. Just drop this in right after the big block of platform code:

//Virus logic
for( i = 0; i < viruses.length; i++){
   //Have all viruses move towards the player
   viruses[i].x-=5;
   
   //See if the player is grazing this virus
   if(intersectRect(viruses[i], grazeHitbox)){
      grazeCollision = true;
   }

   //See if the player has had a lethal collision with this virus
   if(intersectRect(viruses[i], deathHitbox)){
      deathCollision = true;
   }
}

//Remove viruses that have scrolled off screen and create new viruses to take their place
if(viruses[0].x + viruses[0].width < 0){
   //Drop first virus by shifting entire list one space left
   for( i = 0; i < viruses.length-1; i++){
      viruses[i] = viruses[i+1];
   }

   //Add new platfrom to end of list by placing it a certain distance after second to last platfor
   var newVirus = new Object();
   newVirus.x = viruses[viruses.length-2].x + virusWidth + maxVirusGap;
   newVirus.y = 200;
   newVirus.width = 50;
   newVirus.height = 50;
   viruses[viruses.length-1] = newVirus;
}

And finally we draw the viruses by adding this simple loop somewhere in our drawScreen method

//Draw viruses
for(i = 0; i < viruses.length; i++){
   context.drawImage(virusImage, viruses[i].x, viruses[i].y);
}

That’s it. You now have a couple of virus obstacles scrolling across the screen along with the platforms. You can jump near them and into them and watch your “graze” and “death” collision status change. These collisions won’t actually do anything yet, but just keeping track of them is the first step towards building a real game-over and bonus point system.

Both “Graze Collision” and “Death Collision” are true, showing we got just a little too close during this test

Both “Graze Collision” and “Death Collision” are true, showing we got just a little too close during this test

Why We Did What We Did

This entire branch of code was mostly just copy pasting the platform code and then renaming the variables, so no big ideas need to be explained. But there was one tiny design decisions that I think deserve a little extra analysis: Why did we give each virus a specific height and width instead of just using the height and width of the global virus image?

Two big reasons.

Reason one: Our collision detection function expects to be given two rectangle like objects that know their own x position, y position, width and height. Giving every virus a copy of this information means we can drop them directly into the collision detection function.

Reason two: We may not want our viruses to always be the same size as their picture. In the future we might decide that we want the virus’s collision box to be smaller than the virus picture in order to make collisions easier to avoid. So by keeping the virus’s height and weight independent form the size of the graphics we draw we give ourselves the freedom to make major changes in the future without breaking anything.

Next Up: Game-Over

With most of the basic game mechanics in place the next thing to do is finally let player’s lose, which is a surprisingly big tasks since it means we will have to introduce ideas like “game states” and “multiple possible screen renderers”.

But don’t worry, it’s actually a pretty simple once you get into it. And it involves flowcharts! Everyone loves flowcharts!

Let’s Program A JavaScript Game 10: Letting The World Pass By

A World, Or The Illusion Of A World?

Our end goal is to let the player spend two or three minutes jumping from platform to platform and avoiding viruses. But how do we go about accomplishing this?

My first instinct was to build a hundred or so platforms and position them around the game world. Then for each frame of the game we would check whether or not the player had hit any of the platforms and finish up by drawing any platforms that were currently on screen.

And this would work. Keeping track of a few hundred objects and possible object collisions is no sweat for a modern computer.

But there are a few reasons that keeping track of an entire world of platforms might not be such a great idea for this particular game:

  • We only have room for two or three platforms on the screen at one time. Keeping track of the extras is a waste (even if it is one we can afford)
  • The player can never move backwards so we don’t have to keep track of platforms we have already passed.
  • Building an entire world ahead of time would make it impossible to adjust the game for players who are doing well. Players who get a lot of graze points should start finding small platforms and big gaps much earlier than players who don’t. Otherwise they might win the game through graze points without ever hitting any difficult jumps.

So instead of creating an entire world of platforms I’m only going to create a list of 5 platforms. When a platform gets left behind by the player I will delete it and then generate a new platform to add to the end of the list.

To the player this will still look like a complete world with hundreds of platforms. There will always be two or three platforms on screen and there will always be a new platform waiting for them as they move to the right. The player will never know that platforms are disappearing behind them or that they are popping into existence mere seconds before they are needed.

All Motion Is Relative

Now that we’ve decided how to build the platforms we also have to decide how we’re going to scroll the screen. After all, the entire game is based around the player constantly moving to the right.

You might think that if the game is about the player moving to the right the only solution is to make the player actually move to the right, maybe by increasing their x position by a constant amount every turn. But if we do that the player would eventually drive right off the right side of the screen, which would be bad.

So instead of moving the player forwards we’re going to move the entire world backwards. It’s not even that hard to do. Every frame we just iterate through out list of five platforms and adjust their x position backwards.

Infinite Platforms Demo

To put this all into play we need to make the following changes to our code:

  • Create a list of platforms
  • Populate the list with five starter platforms
  • Move those platforms to the left during each frame
  • Check for player collision with all five platforms during each frame
  • Delete platforms that scroll entirely off the screen
  • Add a new platform to the end of the list every time one gets deleted from the front
  • Draw any platforms that happen to be on screen

Let’s start by creating and populating the platform list. This code goes before any function declarations and replaces our old testObject1 and testObject2 declarations:

var platforms = new Array();
var maxPlatformCount = 5;
var maxPlatformLength = 200;
var maxPlatformGap = 150;

//Generate starting platforms
for(i = 0; i < maxPlatformCount; i++){
   var newPlatform = new Object();
   newPlatform.x = i * (maxPlatformLength + maxPlatformGap);
   newPlatform.y = 350;
   newPlatform.width = maxPlatformLength;
   newPlatform.height = 20;
   platforms[i] = newPlatform;
}

Now we need to go down to our updateGame method and replace our testObject collission code with this:

var feetHitbox = getFeetHitbox(player.x, player.y);

//Platform logic
for( i = 0; i < platforms.length; i++){
   //Create illusion of player moving forward by scrolling all platforms backwards
   platforms[i].x-=5;

   //See if the player has landed on this platform
   if(intersectRect(platforms[i], feetHitbox)){
      feetCollision = true;
      player.yVel=0;
      player.y=platforms[i].y-48;
      player.onGround=true;
   }
}

Few things to notice: We now create one set of player hitboxes per frame and then use them multiple times inside the loop. This is slightly more efficient than creating the hitboxes multiple times inside the loop.

We are also using the loop to both update the position of each platform and check for platform collisions. This is slightly more efficient than having two seperate loops: one for updating position and one for checking for collisions.

Now we can draw the platforms by replacing the testObject related drawing code in drawScreen with this:

//Draw platforms
context.fillStyle = '#008800';
for(i = 0; i < platforms.length; i++){
   context.fillRect(platforms[i].x, platforms[i].y, platforms[i].width, platforms[i].height);
}

Now if you try to actually run the game at this point you should see five moving platforms… but as soon as they all scroll past the screen you get stuck in an endless loop of falling of the screen again and again and again. Let’s fix that by going back up to updateGame and adding in code to remove old platforms and add new ones in. This particular code should come right after the end of the foreach loop we used for updating the platforms:

//Remove platforms that have scrolled off screen and create new platforms to take their place
if(platforms[0].x + platforms[0].width < 0){
   //Drop first platform by shift entire list one space left
   for( i = 0; i < platforms.length-1; i++){
      platforms[i] = platforms[i+1];
   }

   //Add new platfrom to end of list by placing it a certain distance after second to last platform
   var newPlatform = new Object();
   newPlatform.x = platforms[platforms.length-2].x + maxPlatformLength + maxPlatformGap;
   newPlatform.y = 350;
   newPlatform.width = maxPlatformLength;
   newPlatform.height = 20;
   platforms[platforms.length-1] = newPlatform;
}

And that’s that. You now have an infinitely scrolling world of platforms and gaps. It’s a pretty boring world, to be honest, and we’ll definitely want to mix things up a little before giving this to an actual player. But as a piece of proof of concept code this all pretty good.

Jump. Jump. Jump. Forever.

Jump. Jump. Jump. Forever.

Feeling Lost? Here’s A Map

My last few posts have included a lot of instructions to “delete this” and “insert that” and I’ll admit that can be vague and confusing. So here’s a snapshot of my code right now. Follow the link to try it out or save it to your computer to read through my code. Just put it in the same folder as the cycle.png image and it should run just fine.

Things Are About To Get More Dangerous

With platforms live and moving the next major feature to work on are the deadly viruses that the player is supposed to avoid and graze. So tune in again next time to see how that works out.

Let’s Program A JavaScript Game 8: That Sinking Feeling

Newton Would Be Proud


In the real world gravity is a universal force that causes things to constantly accelerate downwards, moving faster and faster until they eventually hit a solid object like the ground.


We want our game gravity to work similarly. The player should be pulled towards the bottom of the screen at faster and faster speeds every frame until they hit a solid platform or fall into a bottomless pit and get a game over.


This is actually pretty easy to simulate. We just keep track of how fast the player is moving and every frame we adjust that speed to point slightly more downwards. It’s as easy as incrementing a variable every turn.


But for really good gravity we also want to consider terminal velocity. In the real world falling objects eventually start moving so fast that air pressure prevents them from accelerating any further. Similarly we can program our game gravity to max out at a certain speed and prevent the player from ever falling faster than that set maximum. This is a useful strategy for preventing falling characters from speeding up to extreme velocities that make the game hard to control.


The only remaining issue is deciding how strong our game gravity should be and how fast our terminal velocity should be. If gravity and terminal velocity are too low the player will feel floaty. If they are too high the player will feel like he can barely get off the ground. Figuring out the perfect balance usually requires some play-testing though, so for this test I’m just going to grab some numbers that feel decent. We can fine tune them later.


Introducing The Ground


It’s hard to test gravity without something to land on between jumps. Eventually we will have an entire map full of tricky platforms but for now we’ll just create one really big platform along the bottom of the screen. So go back to the top of your script and redefine testObject like this:


var testObject = new Object();
testObject.x = 0;
testObject.y = 350;
testObject.width = 600;
testObject.height = 20;


We also want to upgrade our player object to keep track of two new pieces of information: Its current Y velocity and whether or not it is sitting on the ground (Only cycles on the ground can jump.)


var player = new Object();
player.x = 100;
player.y = 100;
player.yVel = 0;
player.onGround = false;


And with that we can now implement simple gravity by just adding this code somewhere inside of updateGame, like right after the player input checks.


player.y += player.yVel;
player.yVel +=1;
if(player.yVel >= 15){
   player.yVel=15;
}


This is a very simple, semi-realistic approach to gravity. Every turn the character moves up or down based off of their current Y velocity. Their Y Velocity is then slightly increased, to represent that gravity is causing them to move towards the earth. This will result in them falling faster and faster each frame until they reach a terminal velocity of 15 pixels per frame.


I Don’t Believe In Ghosts


If you were to run the game now you would notice that the motorcycle tends to fall downwards but that when it hits the “ground” it just passes through and falls off the screen. We obviously can’t have that so let’s make the testObject a little more solid by having a collision between player and testObject result in the player coming to an abrupt stop.


The code is already testing for collisions between the player’s feet hitbox and the testObject, so all we have to do is add a little code to that statement to prevent the player from falling forever.


if(intersectRect(testObject, getFeetHitbox(player.x, player.y))){
   feetCollision = true;
   player.yVel=0;
   player.y=testObject.y-48;
   player.onGround=true;
}


Simple enough. If the player hits the testObject we stop their downward movement, align them so they are barely touching the ground (remember, the cycle picture is 48 pixels tall) and then make a note that they are currently on the ground and ready to jump.


Of course, next frame the motorcycle will start to accelerate downwards again and start falling through the ground. This will result in a second collision and the cycle will once again have to be stopped and moved to the surface of the ground. This pattern will actually repeat for every single frame the cycle is on the ground.


You might think that constantly dipping into the earth and being pushed back up would lead to some jittery up and down motion, but because we do all the falling and ground checking before we draw any graphics the whole up/down cycle is hidden and the end result makes it look like the motorcycle is smoothly gliding along the ground.


I Believe I Can’t Fly


So we can fall and hit the ground, but there’s still the issue that the game lets player directly move up and down. Since we want the player to jump not fly it’s time to fix that.


First off we delete the if(playerInput.down) statement since we don’t need it anymore. We don’t want to let the player fall faster than normal so we don’t really need to worry about whether or not the down key is pressed.


Now we want to change the if(playerInput.up) statement from flight to a simple jump.


if(playerInput.up && player.onGround){
   player.yVel=-15;
   player.onGround=false;
}


You can see we’re bringing in our onGround variable to make sure the player is actually in a position they are allowed to jump from. If they are then we give them an upwards velocity of 15 and disable jumping (at least until they hit testObject and onGround gets reset).


An image of a cycle sprite landing on the ground

A cycle sitting on the ground after landing a jump. Much more exciting in action than as a still image.


And that’s all it takes. We now have gravity and jumping. Try it out for yourself.


Missing The Ground


There is one last important detail I want to mention, and that is the risk of missing the ground.


The player moves multiple pixels per frame, and we only check for collisions at the final location. So if the player was falling at 50 pixels per frame it could completely skip over a 10 pixel object in it’s path. This would lead to the player ghosting through objects they should have hit.


To avoid this you just have to make sure that the player’s and obstacles hitboxes are thick enough to clip each other even at max speed.


In our test code the player’s max falling speed is 15 pixels per frame. The player’s feet hitbox is 5 pixels tall, and the “ground” testObject is 20 pixels tall.


This is a safe combination, because there is no way for a 5 pixel object to jump through a 20 pixel object by moving 15 pixels at a time. (Bonus question: How fast would it have to be going?)


But what if the ground object were much thinner, say only 2 pixels tall? Now the 5 pixel feet hitbox moving at 15 pixels per frame could easily skip over it. If you want to see this in action, shrink the height of textObject and see what happens when you jump or even just fall from the default starting position.


This is also one area where increasing your framerate can help.


An object falling 20 pixels per frame 20 times a second looks identical to an object falling 10 pixels per frame 40 times per second. But the second strategy lets us check for collisions every 10 pixels, allowing for much smaller and more precise hitboxes. So if you want to program a game with lots of fast moving tiny objects you might want to increase your frame rate.


Another option is to keep a low frame rate but design a more advanced collision algorithm that checks whether or not object paths overlap, not just the objects themselves. This can be a lot of work for both programmer and computer but it does eliminate all ghosting problems.


Fortunately it looks like we won’t have any ghosting problems so we can just stick with 20 frames per second, 20 pixel thick platforms and our simple collision checking. I just wanted you to know about this issue for your future game programming needs.


Digital Genesis


We have gravity. We have jumping. Now we can move ahead and build an entire world for the player to jump and gravity along. That’s right, next time we’ll be randomly generating a bunch of floating platforms.

Let’s Program A JavaScript Game 7: When Worlds Collide For Real

Knowing Is Only Half The Battle


Last time we covered the theory behind hitboxes and decided that our digital motorcycle needs three different hitboxes:

Hitbox Diagram For A Motorcycle

Remember This?

So now let’s actually put that idea into practice with some code.


Hitbox Creation Functions


Obviously our game is going to keep track of where the player is on the screen. But for collision detection what we really need is a way to transform that position into a set of three hitboxes.


The most straightforward solution is to write three functions that each accept an x and y coordinate representing the player’s position and then returns a complete hitbox object.


Now to be honest creating a bunch of new rectangle objects every everyt ime we want to do a collision check strikes me as potentially wasteful. Maybe it would be smarter to just create the hitboxes at the beginning of the script and then update them every time the character moves.


But I don’t want to waste time obsessing about how to run this code fast until I know for sure that the easy approach really is too slow. So I’m just going to build the hitbox creator functions and see how that runs. I can always optimize later.


Now it’s time for some math.


Our “cycle.png” image (which I recently flipped to face right instead of left) is 75 pixels wide and 48 pixels tall. We want to put a a five pixel tall “feet hitbox” along the bottom of the motorcycle for detecting when we hit platforms. Since the player’s position is measured from the top-left corner of the image that means the feet hitbox needs to be 43 pixels lower than then the player position.


// Get a 5x75 hitbox along the bottom of a 48x75 sprite.
// Used for detecting when the player has landed on a platform
// If you change the player sprite dimension you should update this function too
function getFeetHitbox(xPos, yPos){
   var feetHitbox = new Object();
   feetHitbox.x = xPos;
   feetHitbox.y = yPos+43;
   feetHitbox.width = 75;
   feetHitbox.height = 5;
   return feetHitbox
}


Next we want a relatively small “death hitbox” along the middle of the cycle. It will take some play testing to decide what the best size for it is but for now let’s say… 24 by 50 pixels. That’s about 12 pixels away from each side of the motorcycle which tells us everything we need for setting up the offsets.


// Get a 24x50 hitbox in the middle of a 48x75 sprite.
// Used for detecting when the player has hit an enemy
// If you change the player sprite dimension you should update this function too
function getDeathHitbox(xPos, yPos){
   var deathHitbox = new Object();
   deathHitbox.x = xPos+12;
   deathHitbox.y = yPos+12;
   deathHitbox.width = 50;
   deathHitbox.height = 24;
   return deathHitbox;
}


Finally we need to build the “graze hitbox” to track when the player is close enough to an enemy to start getting bonus points. This box actually need to be larger than the motorcycle graphic. Once again we’ll have to actually play test the game to fine tune the size of the graze box, but for starters lets give it 20 extra pixels on every side of the motorcycle (for an extra 40 pixels of width and height). Note that this actually requires negative offsets in order to put the graze box above and to the left of the player’s main position.


// Get a 88x115 hitbox centered around a 48x75 sprite.
// Used for detecting when the player is grazing an enemy
// If you change the player sprite dimension you should update this function too
function getGrazeHitbox(xPos, yPos){
   var grazeHitbox = new Object();
   grazeHitbox.x = xPos-20;
   grazeHitbox.y = yPos-20;
   grazeHitbox.width = 115;
   grazeHitbox.height = 88;
   return grazeHitbox;
}


Quick Test


Collision detection function? Check!


Hitbox creation function? Check!


Hitbox testing code? Let’s write it!


For starters you’re going to need to update your global variables to this:


var loopCount=0;
var playerInput = new Object();

var player = new Object();
player.x = 100;
player.y = 100;

var testObject = new Object();
testObject.x = 200;
testObject.y = 200;
testObject.width = 50;
testObject.height = 50;

var feetCollision = false;
var grazeCollision = false;
var deathCollision = false;

var cycleImage = new Image();
cycleImage.src = "cycle.png";


And then you’ll need to change your update method in two ways. First, when the user presses a key you need to update the player object instead of the generic xPos and yPos variables. Second, you need to check for collisions and update the global collision variables.


//Update the game by one step
function updateGame(){
   loopCount++;
   if(playerInput.right){
      player.x+=5;
   }

   if(playerInput.left){
      player.x-=5;
   }

   if(playerInput.up){
      player.y-=5;
   }

   if(playerInput.down){
      player.y+=5;
   }

   feetCollision = false;
   grazeCollision = false;
   deathCollision = false; 

   if(intersectRect(testObject, getFeetHitbox(player.x, player.y))){
      feetCollision = true;
   }

   if(intersectRect(testObject, getDeathHitbox(player.x, player.y))){
      deathCollision = true;
   }

   if(intersectRect(testObject, getGrazeHitbox(player.x, player.y))){
      grazeCollision = true;
   }
}


And finally we need to update our draw code to draw the player motorcycle, the test obstacle and a list of what hitboxes are and aren’t being hit:


//Draw the screen
function drawScreen(){
   var canvas = document.getElementById('gameCanvas');
   var context = canvas.getContext('2d');

   //Draw background
   context.fillStyle = '#dcdcdc';
   context.fillRect(0,0,600,400);

   //Draw black text
   context.fillStyle = '#000000';
   context.fillText("Loop Count: "+loopCount, 20, 20);

   if(feetCollision){
      context.fillText("Feet Collision: True", 20, 40);
   }
   else{
      context.fillText("Feet Collision: False", 20, 40);
   }
   
   if(deathCollision){
      context.fillText("Death Collision: True", 20, 60);
   }
   else{
      context.fillText("Death Collision: False", 20, 60);
   }

   if(grazeCollision){
      context.fillText("Graze Collision: True", 20, 80);
   }
   else{
      context.fillText("Graze Collision: False", 20, 80);
   }

   //Draw a red square the player can run into
   context.fillStyle = '#FF0000';
   context.fillRect(testObject.x, testObject.y, testObject.width, testObject.height);

   //Draw a motorcycle as the player's avatar
   context.drawImage(cycleImage, player.x, player.y);
}


If you’ve managed to properly copy all the code so far you should be able to hit the canvas test button and then control the motorcycle graphic by using the arrow keys. Move it towards and over the red box and watch how the three different collision variables react.


A sample screenshot of the collision test.

Close enough to graze and land on the square, but not close enough to hit the “death hitbox”.


I Hope You Remember High School Physics


With collisions working the next big piece of our simulation is a simple gravity system to pull the motorcycle downwards and give the player a reason to jump from platform to platform. So tune in next week as we try to find a gravity algorithm that walks the fine line between realistic and fun.