Let’s Program A Chatbot 4: Let’s Talk About Test Driven Development

Get it? Let’s “talk” about test driven development? Because we’re designing a chatbot. It’s funny*! Yes? No. Okay. Moving on.


What Is Test Driven Development?


Testing is the process of proving that a program can do what it is supposed to do without crashing or generating incorrect output. Good tests also help you find bugs in your programs before your users do. It is very embarrassing to deliver a piece of software that freezes your customer’s computer the first time they start it up. So testing is definitely important.


Software testing is an art unto itself, but the general idea is to come up with a list of sample program inputs that match what you expect real users to try. Then you figure out, by hand, what the program should do for each of those inputs. Finally you feed your inputs into the program one item at a time and double check that the computer does the right thing.


For example, suppose you are programming a bank calculator that figures out monthly payments for car loans. You set up your first test by talking to an accountant and finding out that a $10,000 loan should have a $300 monthly payment. So you feed $10,000 into the loan calculator and make sure it answers correctly. If it doesn’t generate the correct $300 payment then you know you have a bug.


Once you have run the test and fixed any bugs that show up you move on to your next test by talking to your accountant again and generating a new test case. Maybe your bank doesn’t give loans for more than $100,000 at a time so the calculator should return a “Too Large Loan” warning if the user asks for $150,000. So you go back to your calculator, plug in $150,000 and then make sure it prints the warning.


Then it’s back to your accountant, boss or customer for a few dozen more tests to run.


You might have noticed that this sounds really boring and tedious. Who wants to spend an hour feeding input into a program and then going over the output line by line looking for bugs? I don’t!


That’s where automated testing comes in. Instead of running your tests by hand you write a new test program that knows how to talk to your software. You then give your test input and expected output to the test program and let it run all the tests for you. It feeds the input to your program, checks the output for accuracy and then prints up a pretty report letting you know if there were any problems. You still have to come up with the tests on your own, but at least you don’t have to run them.


Automated testing can run thousands of tests with a single click. It’s easier than testing by hand. It’s faster than testing by hand. It’s more accurate than testing by hand. It’s much much less boring then testing by hand. The only real weakness is that it’s hard to automate UI testing or certain types of database driven programs.


You Still Haven’t Mentioned What Test Driven Development Is


Oh, right. My bad. I was having too much fun talking about automated software testing.


Test Driven Development is just the idea that you should setup your automated testing software before you start writing your actual program. You should then run your automated test at least once per day so you can keep track of exactly how much progress you’re making.


It is called “test driven” because the tests are the main driver and motivator of your software project. Your first goal is to write good tests and then the rest of your project focuses on writing code that can pass those tests. This is the opposite of code first development where your first goal is to write your program and only then do you start worrying about how to test it.


Of course, writing the tests before you write the software to be tested means that you are going to be seeing a lot of “errors” the first few times you run your tests. In fact, a test that doesn’t show 100% errors on a blank program probably has a few errors of its own**.


But the 100% error stage doesn’t last long. Once you know your testing software works you can start writing your actual program and before you know it you’ll pass your first use case and change from 100% failure to 1% success. And then you just keep writing and testing your software until the tests finally return zero errors. At that point you can feel very confident that your program really works, that you didn’t forget any features and that your code is as bug free as possible.


Why Would I Want To Use Test Driven Development?


Automatic tests sound cool, but why would anyone build the test before the thing to be tested? Isn’t that a little backwards? Why bother writing a test if you know it’s going to just return 100% failure? Although not a good fit for ALL programming tasks there are several advantages to starting with tests:


First, it lets you catch mistakes as soon as you make them. If your code used to have a 60% success rate but your latest “improvement” dropped that down to 40% then you know there is a big bug somewhere in your most recent code. This makes it easy to find and fix the bug because you only have a few dozen lines to examine. If you had waited to test until your program was “done” you would have had to search the entire code base to find that bug.


Second, writing tests is a good way to double check that your design document is complete. Imagine that you are writing a test to make sure that the program can handle negative numbers in the input. You flip to the design document to look up the “negative input” use case and realize that you forget to decide what should happen. Whoops! Better go back and discuss that with your manager / customer / alter-ego before you go any further.


Third, testing can help schedule your programing. Not sure exactly what to program next? Just find a test that is failing and write the code it needs to succeed.


Finally, test driven development can give you an emotional boost by letting you see progress as it happens. Sometimes in software we can spend weeks writing code without feeling like any progress is being made. This is especially bad if your boss also thinks progress isn’t being made. Having a set of automated tests lets you watch the completion rate climb with every new function and gives you something to show management. “Sure, the user interface is still incomplete but these tests show that we have made significant improvement in the invisible database layer.”


Tools For Tests


Testing software brings with it all the questions associated with normal software. Should you program your own testing suite or use an existing tool? Open source or proprietary? Do you need a powerful tool with all the bells and whistles or will a simple testing tool be enough? Do you want your testing tool to integrate with your programming environment or be a standalone program?


You get the idea. Lots of options to fit every coding scenario you run into.


As for this Let’s Program, we probably don’t need much power. DELPHI is going to be a very simple program that does nothing but listen to user input and then generate output. So instead of messing around with existing testing tools I’m just going to write my own mini-test. Shouldn’t take more than an hour.


The DELPHI Test Suite


As I mentioned, DELPHI only does one thing: process user text input and generate response text. So to test DELPHI all we need to do is come up with a list of sample input along with the DELPHI response we hope to get. Then we just cycle through all the input and raise a warning every time DELPHI says the wrong thing.


Doing the same thing again and again on slightly different pieces of data suggests our test program should involve some sort of loop. And for the sake of convenience it would be great if we could put all the test input and expected responses into a big list.


After thinking about that a little I came up with the idea of putting all of the input/response pairs into one big two dimensional array; basically a two column table where every row will be a different test. The first item in each row will be the sample input and the second item will be the expected response.


Now we can run all of our tests from inside of a single loop. I’ll be using a foreach loop that will run our test code once for every single row in our test array.


Inside the testing loop I will ask DELPHI to come up with a reply based on the input from the current test row. I’ll then compare that response to the expected response from the test row. If they’re the same I’ll tally up a success for DELPHI. If they’re different I’ll print a nice error message to the screen that lets me know which input failed, what response I was expecting and what DELPHI actually said.


With that background knowledge even a non-Perl programmer should be able to make sense of the following test code. A few Perl tricks to look out for though:

    • “use strict” tells the compiler to yell at me if I bend the rules. Without it Perl will let you get away with bad code. Ignoring strict is useful for quick experiments, but on a serious project you always want “use strict”
    • $ indicates a variable with only one value, like a number or string or an individual item in an array
    • @ indicates an entire array
    • You’ll notice that I create the array with the @ symbol and then switch to the singular $ syntax when filling it’s individual members with data. This is because individual array slots only have one value
    • In Perl strings and numbers have different comparison operators. ‘ne’ is the string version of ‘!=’
    • You might notice that within the for loop I access array values with $test->[0] instead of just $test[0]. This is because $test is actually a reference to an array instead of being a true array. Don’t worry about it too much.


With that Perl trivia out of the way here is Version 1.0 of the DELPHI Tester:


#! /usr/bin/perl -w

use strict;

my @testCases;

$testCases[0][0] = "Will this test pass?";
$testCases[0][1] = "I predict that this test will pass";

$testCases[1][0] = "Is the sky blue?";
$testCases[1][1] = "Fate indicates that the sky is blue";

$testCases[2][0] = "Does this program work?";
$testCases[2][1] = "Fate indicates that this program works";

$testCases[3][0] = "Do computers compute?";
$testCases[3][1] = "Fate indicates that computers compute";

$testCases[4][0] = "Do my readers enjoy this blog?";
$testCases[4][1] = "Fate indicates that your readers enjoy this blog";

$testCases[5][0] = "Is it better to be loved or feared?";
$testCases[5][1] = "Fate indicates the former";

$testCases[6][0] = "Why is natural language processing so hard?";
$testCases[6][1] = "Because of reasons";

$testCases[7][0] = "Pumpkin mice word salad?";
$testCases[7][1] = "I'm sorry, could you try rewording that?";

$testCases[8][0] = "Pumpkin mice word salad";
$testCases[8][1] = "I don't want to talk about that. Please ask me a question";

$testCases[9][0] = "Why do you say things like that";
$testCases[9][1] = "Did you forget a question mark? Grammar is important!";

my $testCount=0;
my $successCount=0;

foreach my $test (@testCases){
    my $output = generateResponse($test->[0]);
    if( $output ne $test->[1] ){
        print "Test Case $testCount Failed!!!\n";
        print "Input: ".$test->[0]."\n";
        print "Output: $output\n";
        print "Expected: ".$test->[1]."\n";
    }
    else{
        print "Test Case $testCount Passed\n";
        $successCount++;
    }

    $testCount++;
}

print "--------------------";
print "\n";
print "Passed $successCount out of $testCount tests\n";
if($testCount == $successCount){
    print "All Tests Passed!\n";
}
else{
    print "Test Failure!!!\n";
}

sub generateResponse{
    return "";
}


The ten test cases in this first test represent a pretty good sample of yes/no questions, either or questions, why questions and non-question input. I also tried to get a good mix of singular, plural, first person and third person questions. I’ll probably add a few more tests as the project continues and I realize new conversation patterns that need to be supported.


The First Run


Now that I have a test I should run it and make sure it works. Except that it obviously won’t.


Why not?


See that line inside the foreach loop where it asks for DELPHI to “generateResponse”? That function doesn’t exist yet so my test code won’t even compile.


The best way around this is to write a temporary place-holder function that will pretend to be DELPHI until we can write some actual DELPHI code. Place holder and prototype functions are the only bits of code you are allowed to write before your tests in Test Driven Development. For example, a test driven loan calculator would probably start out with an empty “caluculatePayment”.


Anyways, here is our DELPHI place holder.


sub generateResponse{
    return "";
}


This DELPHI dummy just responds with a blank string no matter what you say to it. Obviously worthless, but it gives the tests something to talk to and allows our code to compile. And now that the code compiles we can run our first test:


Test Case 0 Failed!!!

Input: Will this test pass?

Output:

Expected: I predict that this test will pass

Test Case 1 Failed!!!

Input: Is the sky blue?

Output:

Expected: Fate indicates that the sky is blue

Test Case 2 Failed!!!

Input: Does this program work?

Output:

Expected: Fate indicates that this program works

Test Case 3 Failed!!!

Input: Do computers compute?

Output:

Expected: Fate indicates that computers compute

Test Case 4 Failed!!!

Input: Do my readers enjoy this blog?

Output:

Expected: Fate indicates that your readers enjoy this blog

Test Case 5 Failed!!!

Input: Is it better to be loved or feared?

Output:

Expected: Fate indicates the former

Test Case 6 Failed!!!

Input: Why is natural language processing so hard?

Output:

Expected: Because of reasons

Test Case 7 Failed!!!

Input: Pumpkin mice word salad?

Output:

Expected: I’m sorry, could you try rewording that?

Test Case 8 Failed!!!

Input: Pumpkin mice word salad

Output:

Expected: I don’t want to talk about that. Please ask me a question

Test Case 9 Failed!!!

Input: Why do you say things like that

Output:

Expected: Did you forget a question mark? Grammar is important!

——————–

Passed 0 out of 10 tests

Test Failure!!!


We failed all the tests! Which means we succeeded! All those blank output lines show that the DELPHI placeholder is doing it’s job and the 100% failure rate means that our test code is correctly flagging mistakes for us.


Conclusion


Now that the testing framework is done the stage is set for starting to actually work on the chatbot. Finally, after four posts, we’re going to “Let’s Program A Chatbot” for real.


* Bad jokes are an important part of computer programming. If you can’t handle this you may want to consider a career in a different field. Like accounting.


** Yes, you have to test your test programs before using them. But please try to avoid falling into an infinite loop of testing the tests that test your tests for testing tests.
Let’s Program A Chatbot 3: Choosing A Programming Language

How To Choose A Programming Language


Modern programming languages are 99% interchangeable. If you can do something in C you can also do it in Java, Lisp, Visual Basic, Python and so on. There are very few scenarios where you absolutely “need” to use a specific language.


But that doesn’t change the fact that every language has strengths and weaknesses. A program that would be difficult to write in Java might be easy to write in Python. A program that runs slow in Lisp might be easy to optimize in C.


But the language’s strengths and weaknesses aren’t the only thing you need to think about when starting a project. You, as a programmer, have strengths and weaknesses too. If you have ten years of experience with C++ but have never touched Ruby then odds are you should stick to C++, especially if you have a deadline coming up and can’t spare the time to learn a new language*.


So when trying to choose a programming language you need to ask yourself three questions:

      1. How well does this language match my problem?
      2. How comfortable am I with this language?
      3. How much time can I spare for learning new language features?


Sometimes you get lucky and find out that your favorite language is a perfect match for the problem you need to solve. Hooray!


But other times you’ll have to make a tough choice between a familiar language you know you can *eventually* succeed with and a less familiar language that has some really great features that would instantly solve all your problems if you could just get your code to stop throwing weird errors.


And sometimes the choice is so hard you just give up, eat a gallon of ice cream and decide to join an isolated community where computers are illegal and speaking jargon is punishable by death.


Perl: A Good Pattern Matching Language


With all that theory out of the way we can move on to choosing a language for our chatbot. Since our chatbot is going to be based primarily off of pattern matching we’re going to want a programming language that makes matching patterns easy. And pattern matching should make you think of regular expressions**. And regular expressions should make you think of Perl.


I can see a few of you getting a little nervous. Doesn’t Perl have a reputation for being a hard to read language? And aren’t regular expressions famous for causing more problems than they solve? Weren’t we supposed to choose a language we feel comfortable with?


Well don’t worry. I use both Perl and regular expressions at work and while I’m no guru I can at least get my code to work 9 times out of 10. Furthermore, I promise to write clean code and will do my best to avoid the Perl code shortcuts that are responsible for making it hard for newcomers to understand.


Side note: Although Perl and regular expressions work together really well I should point out that you can also use regular expressions with other languages. In fact, most languages have either built in support for regular expressions or easy to find regex libraries.


So if you like C# you can regex in C#. If you’re a Java guy you can regex in Java. Just because I chose Perl for my chatbot doesn’t mean you have to. In fact, porting my chatbot to your favorite language might be a fun exercise for beginning programmers looking for a challenge.


Although I suppose I’ll have to actually write this thing before anybody can port anything.


Proof of Concept: Can We Really Perl Up A Chatbot?


On paper Perl looks a really good pattern matching chatbot language. It has built in support for regular expressions, tons of text processing functions and cross platform support makes it easy to share code with other people (like you, my wonderful readers).


But I still feel a little twinge of doubt. Is this really a good idea? I figure the best way to find out is to write some Perl and see if I can make it do what I want.


Spoilers: The answer is yes. You can now safely skip to the next post without missing anything. But if you want to see the tests I hacked together to prove this, feel free to read on. Just don’t be surprised if the code is hard to follow. This isn’t production code or even reader education code, just a quick and sloppy experiment.


Test 1: Pattern Matching And Response Generation… in Perl


The core feature of our chatbot will be the ability to check whether or not the user’s input matches a specific pattern and then build an appropriate response. So that seems like the most logical thing to test first. And so here is my first test:


#! /usr/bin/perl

$testInput = "Is Perl a good choice for this program?";

if($testInput =~ /\AIs ([a-zA-Z]+) (.+)\?\z/){
   print "DELPHI: Fate confirms that $1 is $2\n";
}
else{
   print "Didn't work\n";
}


This also marks the first bit of code in the Let’s Program and OH MY WHAT IS WRONG THAT IF STATEMENT!?


Well, wonderful reader, that if statement happens to be a regular expression. I’ll talk about those more later on. For now just trust me when I say that that bizarre list of characters and symbols translates to “Match a sentence that begins with ‘Is’, ends with ‘?’ and has at least two words in between them”.


That regular expression also gives us a copy of the words that it found between the ‘Is’ and ‘?’, which we then slip into the output. That’s what the symbols $1 and $2 are doing.


Don’t worry if that didn’t make sense. This is just a test. I’ll explain things more in depth when I start actually programming the chatbot. For now the important thing is that running this program produces this output:


DELPHI: Fate confirms that Perl is a good choice for this program


Test 1 is a success. We managed to write Perl code that matched user input and transformed it into an appropriate chatbot response.


Test 2: Can We Make A List Of Regular Expressions… In Perl?


Now we know that Perl can help us match user input to one pattern. But for our chatbot we’re going to need to try and match the user’s input against at least a dozen different patterns. Is there an easy way to do this or is our program going to turn into a giant pile of if and elsif? Time to find out:


#! /usr/bin/perl

$testInput = "Is Perl a good choice for this program?";
$testInput2 = "Why is Perl a good choice for this program?";

$inputPatterns[0]=qr/\AIs ([a-zA-Z]+) (.+)\?\z/;
$inputPatterns[1]=qr/\AWhy (.+)\?\z/;

if($testInput =~ $inputPatterns[0]){
   print "DELPHI: Fate confirms that $1 is $2\n";
}
else{
   print "Didn't work\n";
}

if($testInput2 =~ $inputPatterns[1]){
   print "DELPHI: Because I said so\n";
}

if($testInput1 =~ $inputPatterns[1]){
   print "This shouldn't match!\n";
}

if($testInput2 =~ $inputPatterns[0]){
   print "This shouldn't match either!\n";
}


Once again, don’t worry if you didn’t catch all that. In this test I basically just stored the regular expressions inside an array instead of writing them directly inside of the if statements. If this works then we can write our chatbot with a nice, clean pattern matching loop instead of endless if statements. But does it work?


DELPHI: Fate confirms that Perl is a good choice for this program
DELPHI: Because I said so


Success!


Test 3: Connecting Output Patterns To Input Patterns… In Perl!


Last test proved that we can move our regular expressions out of the if statements and into a nice, clean array. Can we do the same thing with our responses? Here goes nothing…


#! /usr/bin/perl

$testInput = "Is Perl a good choice for this program?";
$testInput2 = "Why is Perl a good choice for this program?";

$chatPatterns[0][0]=qr/\AIs ([a-zA-Z]+) (.+)\?\z/;
$chatPatterns[0][1]="DELPHI: Fate confirms that $1 is $2\n";

$chatPatterns[1][0]=qr/\AWhy (.+)\?\z/;
$chatPatterns[1][1]="DELPHI: Because I said so\n";

if($testInput =~ $chatPatterns[0][0]){
   print $chatPatterns[0][1]
}

if($testInput2 =~ $chatPatterns[1][0]){
   print $chatPatterns[1][1];
}


Which produces this output:


DELPHI: Fate confirms that is
DELPHI: Because I said so


Uh oh. Everything matched up properly but something went wrong with the response generation. I was actually expecting this. I want to build DELPHI’s responses using information from the user’s input, but the response array is being built before the user gets a chance to say anything.


So if I want to store response patterns in an array I’m going to need to add a little extra code in order to splice the user’s input into the response after it is pulled out of the array but before it gets printed to the screen. Hmm… let’s try this:


#! /usr/bin/perl

$testInput = "Is Perl a good choice for this program?";
$testInput2 = "Why is Perl a good choice for this program?";

$chatPatterns[0][0]=qr/\AIs ([a-zA-Z]+) (.+)\?\z/;
$chatPatterns[0][1]="DELPHI: Fate confirms that UIF0 is UIF1\n";

$chatPatterns[1][0]=qr/\AWhy (.+)\?\z/;
$chatPatterns[1][1]="DELPHI: Because I said so\n";

if(@UIF = ($testInput =~ $chatPatterns[0][0])){

   $response = $chatPatterns[0][1];
   for($i=0; $i<@UIF; $i++){
      $find = "UIF$i";
      $replace = $UIF[$i];
      $response =~ s/$find/$replace/g;
   }

print $response;
}

if(@UIF = ($testInput2 =~ $chatPatterns[1][0])){

   $response = $chatPatterns[1][1];
   for($i=0; $i<@UIF; $i++){
      $find = "UIF$i";
      $replace = $UIF[$i];
      $response =~ s/$find/$replace/g;
   }

print $response;
}


You’re still not allowed to panic, this is just a test. What I’ve basically done is change the code to generate a list of individual pieces from the original input (Which I call User Input Fragments or UIF). When a match is found the program uses a special type of regex to find every place that the input has a special UIF word and then replace it with data from the actual input.


Don’t look at me like that. I said I’ll explain it better later. Just wait one or two more posts. For now the important thing is that running my new test code produces this beautiful output:

DELPHI: Fate confirms that Perl is a good choice for this program
DELPHI: Because I said so


Success! I can store responses in an array right alongside the input patterns they are related to. This means that I can teach the chatbot new conversation tactics by just adding new patterns to the master array. No need to write new code!


Conclusion


Our test have all passed and the language of this Let’s Program is going to be Perl. With that final piece in place we can finally jump into some actual coding. Are you excited? I’m excited!


Please be excited.


* I once failed a mildly important college project because I decided it would be fun to code everything in a new language that I knew almost nothing about. By the time I realized I would have been better off sticking with a language I knew it was too late. Don’t let the same thing happen to you!


** Regular Expressions are a sort of miniature programming language that specialize in pattern matching. They are a powerful tool for all sorts of text analysis programs.

Let’s Program A Chatbot 2: Design Before You Code

My Obsession With Design Documents

Design documents are an important part of writing software. How important? So important that Jesus used the software design process in one of his parables!


28: For which of you, intending to build a program, sitteth not down first, and counteth the requirements, whether he have sufficient time and skill to finish it?

29: Lest haply, after he hath written much code, and is not able to finish it, all that behold it begin to mock him,

30: Saying, This man began to code, and was not able to finish.

Luke 14:28-30


OK, I may have paraphrased that a bit. But you get the idea. The first step in a successful project is sitting down and deciding exactly what you’re trying to accomplish and then figuring out whether or not it is actually accomplishable.


Careful planning also gives you a chance to notice problems while they are still theoretical and easy to fix. Realizing that you need to add sound effects to a program that is 99% complete requires you to rewrite and debug painfully large amounts of code. But if you realize that you need sound effects during the planning stage you can naturally add them into the code as you work. Much easier.


Example: The Chatbot That Probably Would Have Never Been Finished

Now it’s time for a real life example of how good design documents made my life easier.


When I first started this Let’s Program the one big question was what exactly my chatbot should chat about. Usually when I can’t figure out a topic for a practice project I default to table-top fantasy gaming on the basis that most computer geeks have played Dungeons and Dragons, played a Dungeons and Dragons inspired computer game or at the very least seen a fantasy movie where people hit monsters with swords.


So my first idea was to create a chatbot that could help Dungeon Masters design new adventures. A chatbot that could talk about plot hooks and dungeons and even automatically generate treasure hordes and room descriptions.


And I was so excited by this idea that I was very tempted to just jump straight into playing with code. But I resisted the urge and spent some time doing a nice requirements write-up for all you lovely people in the audience. And during that write-up I realized that I didn’t have nearly enough free-time to build this thing.


Writing a pattern-matching bot that can intelligently talk about fantasy adventures was going to be hard. Programming functions for generating treasures and rooms was going to be tedious. And linking input patterns to function calls instead of output patterns was going to involve advanced coding techniques that I felt would unfairly draw attention away from the simple “chatbot” focus I had planned for this Let’s Program.


So I’m saving that project for a future date.* Thanks to the power of design documents I’ve avoided an embarrassingly ambitious project and you’ve been spared the pain of watching me fail.


Design Document 2: The Fortune Teller Chatbot That I Can Build

I’ve already thrown away one project for being too complex for a good example of introductory chatbot design. What am I going to do instead?


Well, I’m going to write a fortune teller. Where by “fortune teller” I actually mean “random guessing machine”. The basic idea is to create a chatbot that can recognize when it’s being asked a question and then makes a wild guess at what the answer should be. If the user doesn’t ask a question the chatbot will prompt them to do so.


I also plan to make the chatbot as goofy and sarcastic as possible. Not only because I enjoy funny computer programs but also because the humor will hopefully disguise the fact that the chatbot isn’t actually smart enough to know what’s going on. But I’ll talk about that more in the future when I get to the ELIZA effect.


I shall call the chatbot DELPHI because I was an extreme mythology geek in my youth.


UI Design

The user interface is one of the most important parts of a good design document. It should include mockups of every page on a website, every screen on an app and a clear explanation of what every single button should do. It should give you a good idea of everything the user will be able to do and everything they should expect to see.


A good UI design can take up a lot of space!


But this is a text based program so our UI Design will only take a couple paragraphs. What a relief!


Official UI Design: The user opens the program via the command line. The program will print a line prompting them to begin communication. The user is allowed to type text. After they hit enter the program will generate a new line of text that responds to the user’s input as relevantly as possible.


Computer output will be proceeded by the string “DELPHI: ”.


User input will be prompted by the ‘>’ symbol.


Program Interface Mockup:


DELPHI: Welcome! What soul searching questions have you brought me today?

>Will Scott post his next Let’s Program soon?

DELPHI: The stars say it is very unlikely that Scott will post his next Let’s Program soon.

>Why not?

DELPHI: Because space aliens are interfering with the astrological radiation from Jupiter.

> You’re making that up.

DELPHI: I sense you’re not being honest with me. What questions do you really have?

>Goodbye

DELPHI: Until next time


Use Cases

Use Cases rank right up there with thorough UI design when it comes to valuable software development tools. For those few of you who aren’t familiar with the technique the whole point of use cases is to come up with a big list of how you expect your users to user your program. Then you write down what the program should do.


So let’s consider a few of the major question types we expect to see.


Use Case 1: Yes/No Questions

The most obvious questions that a fortune teller will encounter are those that have a simple yes or no answer. Most of these inputs will start with the word “Will”, “Is” or “Do” and end with a question mark. Example:

Will I get a promotion?
Is my code bug free?
Do androids dream of electric sheep?


In this scenarios DELPHI should respond with a randomly chosen positive or negative answer that includes appropriate portions of the user’s question. Example:

The stars agree you will get a promotion.
Ether vibrations suggest it is impossible that your code is bug free.
Fate calculations show that androids dream of electric sheep.


Use Case 2: Why Why Why Why?


Another popular type of question is the “Why” question. As in “Why won’t my code compile?”, “Why is the sky blue?” or “Why won’t my toddler stop asking me why questions?”.


In these scenarios DELPHI should respond with a randomly chosen excuse. The list of possible explanations should be large enough that casual users don’t catch on that answers are being chosen randomly. Explanations might include:

Because of the alignment of the stars.
Because great Cthulhu is beginning to awaken.
I would tell you but it is a secret to everyone.
I used to know, but I forgot.


Use Case 3: A or B?

Users may ask DELPHI to choose between multiple options. This will be signified by the word “or” as seen in these sample inputs:

Should I buy a sports car or a motorcycle?
Do I want chocolate or strawberry ice cream?
Is that a moon or a space station?


In these cases DELPHI should generate a response that randomly agrees with the first or second option. By actually using the words first and second DELPHI will not need to actually include information from the original post. Consider these sample responses:

I've got a good feeling about the first one.
My prognostication engine suggests the later.
Definitely the former... assuming you trust Saturn.


Use Case 4: Goodbye

If the user types “Goodbye” the program will exit.


Default Use Case

It is very very likely that users will say things that do not fit any of our specific use cases. Especially if the user decides to not actually ask a question. In these scenarios DELPHI should generate a random response that urges the user to try again with a question. Possible responses might include:

Chatting is nice, but please ask me question instead.
I'm bored. Go ahead, ask me why I'm bored.
Sorry, I didn't hear you. What was you're question?


Conclusion

I feel like I have a really good grip on what DELPHI version 1.0 needs to do and I hope you do too. Which means the only thing standing between us and some actual programing is choosing an implementation language.


Three guesses what my next post is going to be about.


* Possibly after a zombie apocalypse has left me trapped in my own basement with nothing but months of bleak free time ahead of me.

Let’s Program A Chatbot 1: Introduction And Theory

What Is Let’s Program?

You’ve probably heard of “Let’s Play”, where someone plays a videogame and then posts their experience online. There are usually plenty of screen-shots or even videos with the player’s voice dubbed over the game.


They can be a lot of fun.


This has inspired me to try and create the first (that I know of) “Let’s Program”. I am going to write a program and blog about the process. There will be code samples and screen-shots. (UPDATE: A few months after writing this I stumbled upon a bunch of older coding blogs with titles like “Let’s Code” which just goes to show that no matter how much online research you’ve done for your “original idea” you probably still haven’t done enough)


I can hear your complaints already. “Scott,” you hypothetically ask, “How is this any different from the thousands of other code tutorials online like that handy MongoDB series you wrote last month?”


Good question. “Let’s Program” is different because it’s going to be much less formal than a normal tutorial. Also, I’m calling it something different. That’s two whole differences! More than enough for != to return true.


Sure, you might argue otherwise… but you’re on the other side of the Internet and I can’t hear you. Take that hypothetical complaining reader!


Anyways, let’s get things started!


Chatbots A.K.A. How To Make Friends And Imitate People

A chatbot is a program that simulates human conversation. Usually typed conversation. For example, here is a sample of someone interacting with ELIZA, a classic program that pretends to be one of those annoying psychiatrists that does nothing but parrot back everything you say in the form of a question. The program is the one talking in all caps:


Men are all alike.

IN WHAT WAY?

They're always bugging us about something or other.

CAN YOU THINK OF A SPECIFIC EXAMPLE?

Well, my boyfriend made me come here.

YOUR BOYFRIEND MADE YOU COME HERE?

He says I'm depressed much of the time.

I AM SORRY TO HEAR YOU ARE DEPRESSED.


ELIZA is a little stiff but not obviously inhuman. Pretty good for a bunch of ones and zeros zipping through a chunk of silicon. My goal is to build something similar. Which shouldn’t be too hard since the creator of ELIZA was nice enough to publish a paper on how he did what he did.


How Do Chatbots Work?

There are tons of theoretical ways to simulate human conversation, but the most popular and widely used technique is simple pattern matching. If the user says X the computer says Y. If the user says A the computer says B. If the user says “I need a vacation” the computer says “Why do you need a vacation?”.


But that seems really tedious. If we need a different rule for every single thing the user might say we would have to program billions and billions of rules. Isn’t there a better way?


Yes there is! Instead of matching specific user inputs to specific computer responses we can just look for generic patterns. So instead of creating a rule for “I need a vacation”, “I need a sandwich”, “I need a nap” and so on we just create a single rule for “I need X”.


We use the same technique for generating computer responses. Instead of writing responses like “Why do you need a vaction?”, “Why do you need a sandwich?” and “Why do you need a nap?” we just write one response “Why do you need X?” where X is pulled straight out of the user’s original input.


Strengths And Weaknesses Of Pattern Matching Chatbots

There is one super huge advantage to pattern matching: it’s easy to program.


And that is a really huge advantage. A program isn’t good for anything until it actually works. A medium quality program that takes a month to develop is much more useful than a high quality program that is so complex that it never actually get’s completed.


But while pattern matching is probably the most pragmatic way to build a simple chatbot it does have a few downsides.


First, a simple pattern matching bot has no memory. You could build a pattern where the user says “My name is X” and the computer responds “Hello X”. But if the user’s next line was “What is my name?” there is no way for the computer to respond appropriately. The name variable X has already disappeared.


Second, pattern matching bots tend to panic when people don’t talk exactly like the program expects. If the user types “I really need a vacation” but the program only has an “I need X” pattern it won’t recognize the match. That extra word “really” breaks everything.


The same problem shows up with contractions. If the program is looking for “I can not” and the user types “I can’t” then we’ve got a problem.


Third, pattern matching bots aren’t smart enough to deal with context. As a human you know that there is a huge difference between the phrases “I am Scott” and “I am sleepy” but to a pattern matcher both of those sentences just look like “I am X”.


There are ways around most of these problems. For instance, with a little extra work you can give your bot the ability to remember simple facts like the user’s name and then use those facts as part of it’s pattern matching and responses. And you can fix the contraction problem by having the program expand “can’t” into “can not” before trying to find a matching pattern.


Pattern Matching Priority

There is one final trick to pattern matching chatbots that we need to think about. What if the user’s input matches two different patterns? Let’s imagine we have three rules:


“I feel sick” => “You should see a doctor.”

“I feel X” => “Why do you feel X?”

“I X” => “Is it always about you?”


Hopefully you can see that if the user types “I feel sick” it will match all three input patterns. How do we decide which response to use? The solution is to assign every pattern rule a priority. When user input matches more than one pattern we use the response from the highest priority rule.


In this situation we would probably decide that “I feel sick”, being a very specific rule, should get a higher priority than the more generic “I feel X”. And we would probably give the super-generic “I X” a very low priority since we only want to use it as a last resort when nothing else matches.


Now we can use these priorities to determine that the appropriate response to “I feel sick” is “You should see a doctor”. These priorities also help us figure out the right response to input like “I feel sad” (Why do you feel sad?) and “I don’t want to talk to you anymore.” (Is it always about you?).


Hey, I Found A Bunch OF Chatbot Programs Online! Why Write Another One?

One of the best way to get better at programming is to practice programming. Whether or not the final product is useful really doesn’t matter; the important part is what you learned during the development process.


It’s actually a lot like jogging. You spend thirty minutes running around the block only to wind up back where you started. What a waste! Except for the fact that all that “pointless” jogging is keeping your heart, lungs and legs healthy.


So no, this chatbot isn’t going to ever be used for anything important. But the process of writing it will hopefully help me and my readers to become better software developers.


Plus, programming is fun and I always wanted to be able to say “I wrote an AI capable of basic human speech”.


Conclusion

Tune in next time as I take this Let’s Program to the next level with some actual design documents outlining where I hope to take this program.


References

Finding a good book on chatbot design is surprisingly hard. I personally had the most luck with Paradigms of Artificial Intelligence Programming: Case Studies In Common Lisp by Peter Norvig.


Chapter 5 is an in-depth study of ELIZA, the ancestor of pretty much all pattern matching chatbots. Later chapters also tackle the much more difficult problem of natural language processing, which could be interesting to anyone who wants to go beyond simple chatbots and explore the heavy duty problems and techniques involved in getting a computer to really handle human language.


Plus it has a chapter on writing an advanced AI for playing Othello. And who doesn’t love boardgames?


One warning: This book is a little on the difficult side and is written in a very formal, academic tone that takes some getting used to. It also focuses entirely on the programming language Lisp, which (unfortunately) isn’t exactly super popular anymore.


So if the idea of learning an entire new language with some very unique syntax seems overwhelming you might want to pass on this particular book. But that’s where I learned the techniques I’m going to use in this Let’s Program so I felt I owed it to Mr. Norvig to mention his excellent book.

MongoDB and PHP: An Intermediate Tutorial

MongoDB is an exciting and (relatively) new database technology that’s gaining popularity among developers. And odds are you’re here for one of two reasons:

  1. You want to practice using MongoDB in a PHP environment
  2. You got lost on the Internet and don’t know why you’re here

If you’re here for reason number 1 then you’re in luck because I happen to have an intermediate level tutorial all prepared that will take you step by step through the process of designing and coding a MongoDB web application.

Part 1: Introduction

Part 2: Project Design

Part 3: Getting Familiar With MongoDB

Part 4: Reading The Database With PHP

Part 5: Sorting Data

Part 6: Finding One Unique Document

Part 6.5: Fixing itemView.php

Part 7: User Friendly Data Input

Part 8: Deleting Items

Part 9: Final Feature Is Search

Download Complete Tutorial Code

I strongly suggest following the tutorials and writing your own code as you go. But I’ve also included a complete copy of the project’s code if you need a reference or are having trouble getting a particular bit of code to work. As long as you have properly configured your server and PHP environment to work with MongoDB you should be able to just drop these files into a server directory and watch it work.

mongodbtutorialcode

MongoDB Tutorial Part 9: Final Feature Is Search

Now Where Did I Put That Wand…


Way back in tutorial 3 we talked about how to use find and the command line tool to search for entire groups of items inside a collection. Now we’re going to do the same thing with PHP and connect it all to a user friendly form that makes searching for treasure as easy as clicking a button. This is the last major feature of Treasure Bag. After this we’ll be done and you will have successfully built a complete MongoDB web application.


Bad Design Warning


We’re going to create the treasure search form by copy pasting and then slightly modifying the JavaScript and HTML from the treasure creation form. And in order to print our search results we’re going to copy paste the treasure listing code from “index.php”.


In a big, professional project duplicating code like this is a major mistake. Duplicating code means you risk duplicating bugs. And even if you don’t accidentally copy and paste a bug all over your code you might decide you need to upgrade your program and now you’re stuck finding and rewriting every piece of duplicate code.


If you find yourself copy pasting a certain bit of code it’s usually a better idea to turn that code into a function or a class that only has to be written once but can be used by multiple files. Then fixing bugs and making upgrades is as simple as updating one piece of code.


But this isn’t a big, professional project. It’s just a tiny practice project and we’re not concerned about security bugs or clients demanding new features. So in this case we can get away with being a little sloppy and copy pasting a bit.


Just don’t let me catch you doing it anywhere else.


Creating The Search Form


Our search form is going to be called “search.php” and will be made up of two halves. The first half of the file will be a JavaScipt enhanced HTML form that lets the user tell us what he is searching for. The second half of the file will be a PHP script that takes the user’s treasure requirements, finds any items that match and then prints them to the screen.


Let’s start by creating a new “search.php” file. Since this is a MongoDB tutorial I’m just going to dump the boring form code on you with minimal explanation. It’s virtually identical to the treasure creation form in “add.php” with only three slight difference.


First, inputs that expect numbers have been split into a Max and Min field. So instead of just asking the user for “Price” they will be asked for “Max Price” and “Min Price”.


Second, the form is now of type “GET” instead of “POST”.


Third, the drop down value for not selecting a treasure type is now the empty string ” instead of ‘none’. As you read the rest of the code I’m sure you’ll be able to figure out why we made these changes.


<?php
include('header.php');
?>
<script>
	function addTypeSpecificAttributes(){
		var specificAttributesDiv =  document.getElementById('typeSpecificAttributesDiv');
		var typeSelect = document.getElementById('typeSelect');
		var currentType = typeSelect.options[typeSelect.selectedIndex].value;
		switch(currentType){
			case 'Ring':
				specificAttributesDiv.innerHTML="Special Attribute:<input type='text' name='Special Attribute'/><br/>";
				break;
			case 'Staff':
				specificAttributesDiv.innerHTML="Spells (One at a time):<input type='text' name='Spells'/><br/>Min Charges:<input type='text' name='minCharges'/><br/>Max Charges:<input type='text' name='maxCharges'/><br/>";
				break;
			case 'Wand':
				specificAttributesDiv.innerHTML="Spell:<input type='text' name='Spell'/><br/>Min Charges:<input type='text' name='minCharges'/><br/>Max Charges:<input type='text' name='maxCharges'/><br/>";
				break;
			case 'Weapon':
				specificAttributesDiv.innerHTML="Min Bonus:<input type='text' name='minBonus'/><br/>Max Bonus:<input type='text' name='maxBonus'/><br/>Special Attributes (One at a time):<input type='text' name='Special Attributes'/><br/>";
				break;
			default:
				specificAttributesDiv.innerHTML='';
		}
	}
</script>

<h1>Search Treasures</h1>
<form method='get' action='search.php'>
Name: <input name='name' type='text' /><br/>
Min Price: <input name='minPrice' type='text' /><br/>
Max Price: <input name='maxPrice' type='text' /><br/>
Type: <select name='type' id='typeSelect' onchange='addTypeSpecificAttributes();'>
			<option value=''>---</option>
			<option value='Ring'>Ring</option>
			<option value='Staff'>Staff</option>
			<option value='Wand'>Wand</option>
			<option value='Weapon'>Weapon</option>
		</select><br/>
<div id='typeSpecificAttributesDiv'>
</div>
<input type='submit' value='Search' />
</form>

<?php

//MongoDB code will go here

include('footer.php');
?>


The Search Flow


That’s it for the first half of “search.php”. Now for the second, MongoDB focused half.


Let’s start by reviewing what we want to happen when visiting the search page. If we don’t have any user search requirements we will just display every treasure in the collection. If we do have search requirements we only want to show treasures that match.


Now a quick reminder on how we can use the PHP version of find both to search for items and to just display everything.


In order to search a collection you have to pass find an array of key/value pairs.


If instead you just want to access every single item in a collection you can either give find zero arguments or you can pass it an empty array.


This means that the easiest way to do what we want to do is to create an empty array, fill it with user search requirements and then give it to the database. If there are no user search terms the array will stay empty and we’ll get every item out of the collection, just like we wanted. If there are search requirements then find will only give us matching items, which is also what we want.


So let’s it get our MongoDB focused code started like this:


$criteria = new array();

//Fill $criteria with search criteria here

$connection = new Mongo();
$cursor = $connection->treasurebag->treasure->find($criteria);

//Print results here


Let’s Copy Paste Some Print Code


Before we start worrying about the user’s input let’s make sure our base case with no input and a blank array works properly. For this we’re going to grab the treasure table printing code form “index.php” and drop it in near the end of “search.php”, after the database call but before we include the footer.


echo '<h2>Search Results</h2>';
echo '<table><tr><td>Name</td><td>Price</td><td>Type</td></tr>';
while($document = $cursor->getNext()){

    $treasureID = $document['_id'];
    $name = $document['Name'];
    $price = $document['Price'];
    $type = $document['Type'];

    echo "<tr><td><a href='viewItem.php?id=$treasureID'>$name</a></td>
                <td>$price</td>
                <td>$type</td></tr>";

}
echo '</table>';


If everything is working properly you should be able to refresh “search.php” and see a compelete listing of the treasures in your treasure collection.


Checking For Input


Now that you know the empty case is working it’s time to start working on what our code should do if the user has actually entered some search criteria. All the rest of the code in this tutorial belongs after declaring the empty $criteria array but before we make our call to the database, so make some space in your code and let’s get started!


Between our four different treasure types and all their unique attributes there are a lot of different pieces of data that might or might not be inside of the $_GET array. And for every single one of those pieces of data we’re going to do the same thing.


if( !empty( $_GET['ATTRIBUTE NAME'] ) ){
   //Add search term to criteria area
}


For example:


if(!empty($_GET['name'])){
   //Add name to search criteria
}


Using this example go ahead and write the basic if statement for all the other possible attributes. You can figure out what they are from examining the HTML form and form modification script, or you can just use this handy list (case is important): name, minPrice, maxPrice, type, Special_Attribute, minCharges, maxCharges, Spells, Spell, minBonus, maxBonus, Special_Attributes.


Searching For Exact Matches With MongoDB and PHP


Now that we can figure out which search terms the user has or hasn’t filled out we can finally start building the search criteria array. There are three major types of searches we might run into as part of Treasure Bag and I’m going to give each one their own mini-section.


The easiest and most straightforward search is when we are looking for an exact match. The user only wants treasures named “Orc Poker” or the user only wants items of type “Ring”. To search MongoDB for an exact match all you have to do is add the key value pair to the criteria array. Let’s use “name” as an example of how to do this in code:


if(!empty($_GET['name']) ){
   $criteria['Name'] = $_GET['name'];
}


It’s pretty simple. When we see that the user is asking for a specific name all we do is add a ‘Name’ entry to our array and assign it whatever value the user is looking for. And that’s all you need to know in order to fill out all the other exact match entries: type, Special_Attribute and Spell.


Greater Than And Less Than In MongoDB with PHP


The second type of search we’ll run into is numeric searches. These are a little more difficult because they include entire ranges or values instead of just a single exact value. For example, the user might be looking for items worth 500 or more.


In order to ask MongoDB to do a comparison search we actually have to put an array inside our criteria array. The keys to these inner array will be the names of special MongoDB comparison instructions and the value will be the base number we are comparing against.


The special MongoDB comparison instructions and what they mean are:

$gt = greater than

$gte = greater than or equal

$lt = less than

$lte = less than or equal

$ne = not equal


Here are a few quick samples to show how this works

//Examples only. Do not put in search.php!

//All documents with an item value greater than 500
$criteria['Price'] = array ( '$gt' => 500 );

//All documents with an item value equal to 10000 or less
$criteria['Price'] = array( '$lte' => 10000 );

//All documents with an item value between 300 and 5000
$criteria['Price'] = array ( '$gt' => 500, '$lt' => 5000);


But that’s not the only way to build an array inside an array in PHP. Consider this:


//These two pieces of code will both result in the same MongoDB search
$criteria1['Price'] = array( '$gte' => 500 );
$criteria2['Price']['$gte'] = 500;


For our code we are going to use the second method. This will make it easy to add a maximum search criteria to an array that already has minimum search criteria.


Having trouble understanding how that will work? Maybe this code will help clear things up:


if(!empty($_GET['minPrice'])){
   $criteria['Price']['$gte'] =intval($_GET['minPrice'])
}

if(!empty($_GET['maxPrice'])){
   $criteria['Price']['$lte'] = intval($_GET['maxPrice']);
}


Now follow this same pattern to fill in the code for minBonus, maxBonus, minCharges and maxCharges.


Searching MongoDB When Documents Have Arrays


The last kind of search we will run into deals with values that actually have more than one value. For example, Staffs have a “Spells” attribute that can hold multiple items. When we search for a Staff with a specific spell we don’t want to limit ourselves to Staffs that only have that one exact spell. We want to find any Staff that has that spell anywhere in it’s Spells list.


MongoDB has lots of different array searching tricks for the different ways you might want to search through arrays inside of documents inside of collections. Finding any array that features a particular item at least once, like we want to do, is actually one of the easiest searches to program. It even uses the exact same syntax as looking for an exact match. Here’s an example using Spells:


if(!empty($_GET['Spells'])){
   $criteria['Spells']=$_GET['Spells'];
}


Even though this code looks like something we’ve already done it’s important to know to understand that MongoDB will treat it differently . When a keyword only has one value this syntax means “Find an exact match”. But when keyword has an entire array of values this syntax means “Matches any array that has this value no matter what else is in the array”.


Now based off this pattern you can fill in the Special_Attributes if statement, which should be your last one.


No Results


If you’ve been messing around with your new search form you might have noticed that some searches have zero results. When this happens your code will still print the beginning of the treasure list table, it just won’t have anything besides the column names. This is pretty ugly looking. Why not change the code so that an empty result set generates an apologetic warning instead of a mutilated table?


In order to generate an empty result warning we’re going to need some way to tell when our results are empty. Forunately, MongoDB has us covered. Remember the cursor class that we’ve been using to cycle through search results? Well that class also has a handy little function called count that lets you know exactly how many results you have to work with. So checking for empty results is as easy as checking whether count is returning zero.


if( $cursor->count() == 0 ){
   echo "<h2>No Matching Treasure Found</h2>";
}
else{
   //Inventory table code you already wrote goes here
}


And that’s it! You’ve successfully implemented every use case in our design document. Or at least, you should have. It’s time to test whether your code actually works.


Testing


There are tons of use cases for search. Here are a few to think about:

  • Search by item type. Make sure no items of the wrong type show up. Make sure that all the items of the right type do show up.
  • For minimum and maximum values make sure that items on the edge show up. If the user asks for treasures with a minimum price of 1000 then items worth exactly 1000 should still show up.
  • Create multiple staffs that all share one spell but otherwise have different Spells arrays. Make sure that they all show up when you search for that one spell. Make sure they don’t all show up if you choose a spell that only one staff has.
  • Search for multiple attributes at the same time and make sure only items that fit all requirements show up. If you choose item type “ring” and max price 500 you should have no non-ring or above 500 items.

Screen Shots

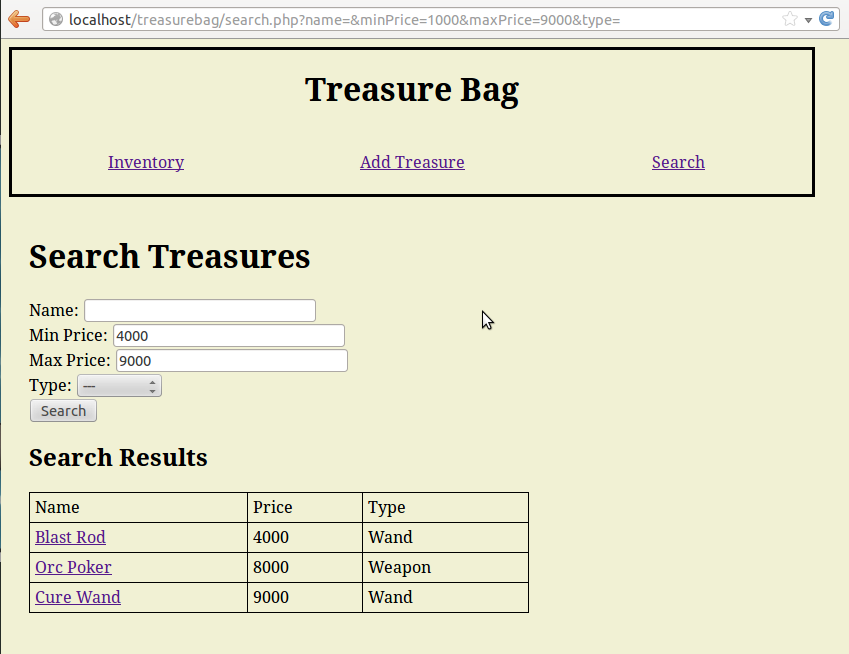
Searching all treasure types at once to find item inside a specific price range

Searching all treasure types at once to find item inside a specific price range

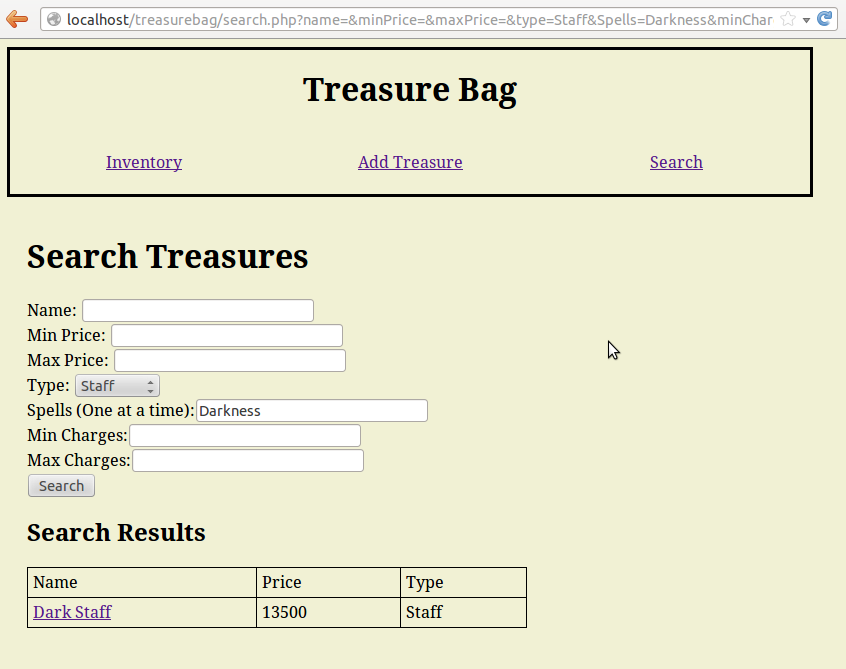
The Dark Staff has multiple spells, but because at least one of those is "Darkness" it shows up for this search

The Dark Staff has multiple spells, but because at least one of those is “Darkness” it shows up for this search

Complete Code

Here is what my final “search.php” file looked like:


<?php
include('header.php');
?>
<script>
    function addTypeSpecificAttributes(){
        var specificAttributesDiv =  document.getElementById('typeSpecificAttributesDiv');
        var typeSelect = document.getElementById('typeSelect');
        var currentType = typeSelect.options[typeSelect.selectedIndex].value;
        switch(currentType){
            case 'Ring':
                specificAttributesDiv.innerHTML="Special Attribute:<input type='text' name='Special Attribute'/><br/>";
                break;
            case 'Staff':
                specificAttributesDiv.innerHTML="Spells (One at a time):<input type='text' name='Spells'/><br/>Min Charges:<input type='text' name='minCharges'/><br/>Max Charges:<input type='text' name='maxCharges'/><br/>";
                break;
            case 'Wand':
                specificAttributesDiv.innerHTML="Spell:<input type='text' name='Spell'/><br/>Min Charges:<input type='text' name='minCharges'/><br/>Max Charges:<input type='text' name='maxCharges'/><br/>";
                break;
            case 'Weapon':
                specificAttributesDiv.innerHTML="Min Bonus:<input type='text' name='minBonus'/><br/>Max Bonus:<input type='text' name='maxBonus'/><br/>Special Attributes (One at a time):<input type='text' name='Special Attributes'/><br/>";
                break;
            default:
                specificAttributesDiv.innerHTML='';
        }
    }
</script>

<h1>Search Treasures</h1>
<form method='get' action='search.php'>
Name: <input name='name' type='text' /><br/>
Min Price: <input name='minPrice' type='text' /><br/>
Max Price: <input name='maxPrice' type='text' /><br/>
Type: <select name='type' id='typeSelect' onchange='addTypeSpecificAttributes();'>
            <option value=''>---</option>
            <option value='Ring'>Ring</option>
            <option value='Staff'>Staff</option>
            <option value='Wand'>Wand</option>
            <option value='Weapon'>Weapon</option>
        </select><br/>
<div id='typeSpecificAttributesDiv'>
</div>
<input type='submit' value='Search' />
</form>

<?php

$criteria = array();
if(!empty($_GET['name'])){
    $criteria['Name']=$_GET['name'];
}
if(!empty($_GET['minPrice'])){
    $criteria['Price']['$gte'] =intval($_GET['minPrice']);
}
if(!empty($_GET['maxPrice'])){
    $criteria['Price']['$lte'] = intval($_GET['maxPrice']);
}
if(!empty($_GET['type'])){
    $criteria['Type']=$_GET['type'];
}
if(!empty($_GET['Special_Attribute'])){
    $criteria['Special Attribute']=$_GET['Special_Attribute'];
}
if(!empty($_GET['minCharges'])){
    $criteria['Charges']['$gte']=intval($_GET['minCharges']);
}
if(!empty($_GET['maxCharges'])){
    $criteria['Charges']['$lte']=intval($_GET['maxCharges']);
}
if(!empty($_GET['Spells'])){
    $criteria['Spells']=$_GET['Spells'];
}
if(!empty($_GET['Spell'])){
    $criteria['Spell']=$_GET['Spell'];
}
if(!empty($_GET['minBonus'])){
    $criteria['Bonus']['$gte']=intval($_GET['minBonus']);
}
if(!empty($_GET['maxBonus'])){
    $criteria['Bonus']['$lte']=intval($_GET['maxBonus']);
}
if(!empty($_GET['Special_Attributes'])){
    $criteria['Special Attributes']=$_GET['Special_Attributes'];
}

$connection = new Mongo();
$cursor = $connection->treasurebag->treasure->find($criteria);

if($cursor->count()==0){
    echo "<h2>No Matching Treasure Found</h2>";
}
else{
    echo '<h2>Search Results</h2>';
    echo '<table><tr><td>Name</td><td>Price</td><td>Type</td></tr>';
    while($document = $cursor->getNext()){

        $treasureID = $document['_id'];
        $name = $document['Name'];
        $price = $document['Price'];
        $type = $document['Type'];

        echo "<tr><td><a href='viewItem.php?id=$treasureID'>$name</a></td>
                    <td>$price</td>
                    <td>$type</td></tr>";

    }
    echo '</table>';
}

include('footer.php');
?>


Why Did We Use MongoDB?


Now that we’ve finished up the search interface and you’ve proved to yourself that it works let’s take a moment to appreciate the flexibility of MongoDB. Do a couple searches based on minimum and maximum price. Notice how the results (probably) include a mix of all four different types of items.


I’ll let that sink in.


This entire project uses only one MongoDB collection, but we were able to keep track of four different kinds of items with it. And because we are only using one collection we can search and sort all of our treasures with only one database call.


To do the same thing in MySQL we would probably have to have a different table for every different type of treasure. Creating, sorting or searching a list of all of our treasures would probably require joining multiple tables together.


MongoDB isn’t a miracle cure and it has a few weaknesses that make it a poor choice for certain applications. But this program also shows that there are certain things that only MongoDB can do. Next time you find yourself struggling to design a database that can work well with sets of irregular data, remember the flexibility of MongoDB.


Conclusion

Congratulations! You’ve successfully completed my intermediate MongoDB tutorial and have proved yourself capable of using PHP and MongoDB. If you feel like you still need more practice why not go back to the start of the tutorial and complete all the BONUS exercises I included at the end of each tutorial.


If you’ve already completed all the BONUS exercises, I have nothing left to teach you. Go forth, programmer, and show your MongoDB prowess unto the world!


BONUS!

All you character database enthusiasts probably know what’s coming. Build a search form that lets you search your character database based off of character name, class, level or whatever it is you’ve been storing during your exercises.


BONUS BONUS!!

This has nothing to do with MongoDB, but wouldn’t it be nice if our search form automatically filled itself with the user’s current search terms instead of resetting itself every time the user hit’s search? Add some PHP to the form so that it can detect $_GET variables and fill itself out accordingly. Nothing too hard here, just tedious.

MongoDB Tutorial Part 8: Deleting Items

Here One Day, Gone The Next


Practically every application that lets you add items to a database is also going to need a way to remove them. A dealership just sold a car and needs it removed from their inventory database. An employee quit and needs to be removed from the staff database. Or in our case, a player has sold or lost one of his treasures and wants to remove it from his Treasure Bag.


Deleting data is important!


Fortunately, this tutorial on removing items from a MongoDB database is going to be really short and simple. If you remember back to tutorial 3 the syntax for finding items and deleting items is almost identical. Which means that if you know how to find a specific item you also know how to delete a specific item. And we already covered finding one specific item back in tutorial 6 with “viewItem.php”.


With that in mind, let’s review “viewItem.php” really quickly. Remember the steps we used to find a specific item based off of it’s id?


$itemID = $_GET['id'];
$criteria['_id'] = new MongoId($itemID);

$c = new Mongo();

$itemAttributes=$c->treasurebag->treasure->findOne($criteria);


delete.php


The code for “delete.php” is going to look very similar to the item viewing code we just reviewed. Open your editor, create a file named something like “delete.php” and type in the following code:


$itemID = $_GET['id'];
$criteria['_id'] = new MongoId($itemID);

$c = new Mongo();

$c->treasurebag->treasure->remove($criteria);


It’s identical to our item viewing code except for that last line. Instead of using findOne, like we did for item viewing, we’re using the remove function. You just give remove a set of key/value pairs and it will remove any items in the collection that match.


In our case, we’re passing it a unique match between _id and a specific MongoID, so it should only ever delete one item. But you can also use this function to delete multiple items all at once. For example, you could delete all Weapon type items with a call like:


//Deletes all weapons. Do not include in delete.php!!
$newCriteria['type']='Weapon';
$c->treasurebag->treasure->remove($newCriteria);


So when writing code that will use remove always double check what information you’re passing it. It’s not fun to accidentally wipe out half a collection when you actually only wanted to remove three items.


Finishing Up delete.php


Calling remove deletes the item… but now what do we do with the user? Well, if you check back to our design document we decided that after deleting an item the user should be returned to the main index. So at the very end of “delete.php” we should include this line:


header('Location:index.php');


That’s it! We’re done with delete.php.


Getting To Delete.php


You can now delete any item by visiting “delete.php?id=mongoID_of_item_to_delete”. But manually finding and typing in MongoIDs would be a nightmare. It would be much better to automatically generate delete URLs for the user.


Actually, if you look at the design document we originally planned on having a delete link at the bottom of every item’s detailed view. So let’s open up “itemView.php” and put it in there! All you have to do is go down near the bottom of the code, after the switch statement that prints the item but before the call to include(‘footer.php’). Then add this simple link generator:


echo "<br/><a href='delete.php?id=$itemID'>DELETE</a><br/>";


This code takes the $itemID we used to generate the detailed item view and creates a new link for deleting that item. Now deleting an item is as simple as finding on the main page, clicking its name for a detailed view and then clicking the delete link at the bottom.


Testing


Testing this is pretty straightforward. Find or create a treasure that you want to delete. Click on it’s name in the index to see the detailed view. Click on delete and make sure you get automatically returned to the index. Double check the index and make sure the treasure is gone.


Complete Code


Updated “viewItem.php”

<?php
include('header.php');
$itemID = $_GET['id'];
$criteria['_id'] = new MongoId($itemID);

$c = new Mongo();

$itemAttributes=$c->treasurebag->treasure->findOne($criteria);

echo '<b>Name:</b> '.$itemAttributes['Name'].'<br/>';
echo '<b>Type:</b> '.$itemAttributes['Type'].'<br/>';
echo '<b>Price:</b> '.$itemAttributes['Price'].'<br/>';

switch($itemAttributes['Type']){
    case 'Ring':
        echo '<b>Special Attribute:</b> '.$itemAttributes['Special Attribute'].'<br/>';
        break;
    case 'Weapon':
        echo '<b>Bonus:</b> '.$itemAttributes['Bonus'].'<br/>';
        if( !empty($itemAttributes['Special Attributes']) ){
            echo '<b>Special Attributes:</b>';
            echo '<ul>';
                foreach($itemAttributes['Special Attributes'] as $specialAttribute){
                    echo "<li>$specialAttribute</li>";
                }
            echo '</ul>';
        }
        break;
    case 'Wand':
        echo '<b>Charges:</b> '.$itemAttributes['Charges'].'<br/>';
        echo '<b>Spell:</b> '.$itemAttributes['Spell'].'<br/>';
        break;
    case 'Staff':
        echo '<b>Charges:</b> '.$itemAttributes['Charges'].'<br/>';
        echo '<b>Spells:</b>';
        echo '<ul>';
            foreach($itemAttributes['Spells'] as $spell){
                echo "<li>$spell</li>";
            }
        echo '</ul>';
        break;
}

echo "<br/><a href='delete.php?id=$itemID'>DELETE</a><br/>";

include('footer.php');
?>

“delete.php”

<?php
$itemID = $_GET['id'];
$criteria['_id'] = new MongoId($itemID);

$c = new Mongo();

$c->treasurebag->treasure->remove($criteria);

header('Location:index.php');

?>

Conclusion


Treasure Bag is starting to feel like a real piece of software. We can add treasures, delete them, sort them and examine them. The only thing left is to build a useful search tool. So join me next time as we tackle our final challenge.


BONUS!


If you’ve been diligently doing the bonus challenges you should have a character system that lets you create and view various heroes and villains. Now create a “deleteCharacter.php” script so you can clean out unused characters in the same way you delete unneeded treasures.

MongoDB Tutorial Part 7: User Friendly Data Input

Let’s Be User Friendly


Our current Treasure Box web application lets us sort and examine our treasure, but we still have to use the MongoDB command line tool to manually insert new items. There are a lot of obvious problems with managing our database by hand, mostly the fact that it’s just not very user friendly. Non-programmers would be overwhelmed by the idea of typing in MongoDB commands just to add a new treasure and even us programmers tend to make mistakes when we have to type really long insert commands.


What we need is a nice friendly user interface. A compact little web form that prompts the user to enter treasure information and then makes sure only good data makes it into the database. Something simple enough a non-programmer can use it and smart enough that we don’t have to worry about what happens if someone has a typo. Something like the treasure creation form we prototyped way back in the design document. Today we’re going to build that.


Creating a Treasure Entry Form


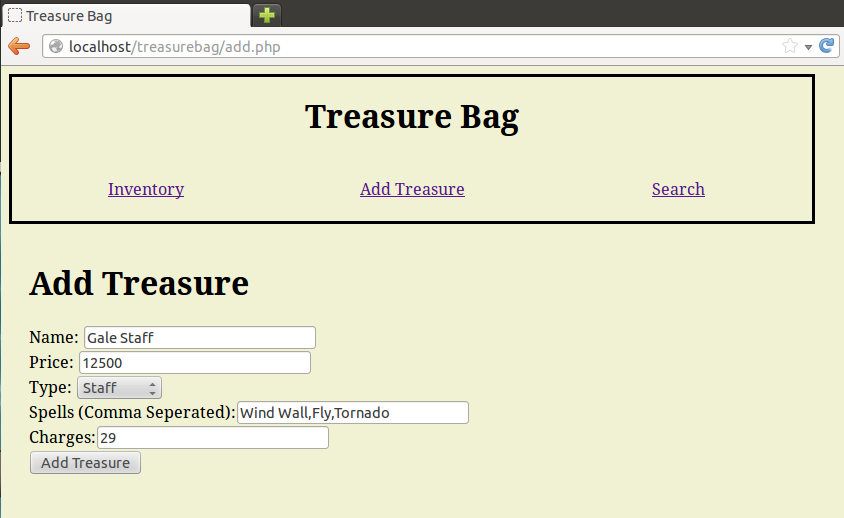
If you look at our header, we already have a link for “Add Treasure” pointing to a non-existant page called “add.php”. That’s where we want to put our treasure creation form, so create a new “add.php” form and get ready to fill it with code. Our goal for the page is pretty simple. Every treasure has a name, price and type so the page needs an input field for each of those. The treasure type should be a dropdown list and once the user has chosen a specific treasure type we should add input fields for the extra attributes related to that type. So if the user chooses “Wand” from the type dropdown the form should add a “Charges” and “Spell” field.


Now this is a MongoDB tutorial, not an HTML or Javascript tutorial, so I’m just going to give you a simple add.php page instead of walking you through it line by line. It’s not the prettiest thing ever, nor is it the best Javascript ever built but it gets the job done and is sufficient for a practice program. Feel free to write your own input form if you need the practice or just can’t stand using anything other than perfect standards-compliant web forms.

 <?php
include('header.php');
?>
<script>
    function addTypeSpecificAttributes(){
        var specificAttributesDiv =  document.getElementById('typeSpecificAttributesDiv');
        var typeSelect = document.getElementById('typeSelect');
        var currentType = typeSelect.options[typeSelect.selectedIndex].value;
        switch(currentType){
            case 'Ring':
                specificAttributesDiv.innerHTML="Special Attribute:<input type='text' name='Special Attribute'/><br/>";
                break;
            case 'Staff':
                specificAttributesDiv.innerHTML="Spells (Comma Seperated):<input type='text' name='Spells'/><br/>Charges:<input type='text' name='Charges'/><br/>";
                break;
            case 'Wand':
                specificAttributesDiv.innerHTML="Spell:<input type='text' name='Spell'/><br/>Charges:<input type='text' name='Charges'/><br/>";
                break;
            case 'Weapon':
                specificAttributesDiv.innerHTML="Bonus:<input type='text' name='Bonus'/><br/>Special Attributes (Optional, Comma Seperated):<input type='text' name='Special Attributes'/><br/>";
                break;
            default:
                specificAttributesDiv.innerHTML='';
        }
    }
</script>

<h1>Add Treasure</h1>
<form method='post' action='processNewTreasure.php'>
Name: <input name='name' type='text' /><br/>
Price: <input name='price' type='text' /><br/>
Type: <select name='type' id='typeSelect' onchange='addTypeSpecificAttributes();'>
            <option value='none'>---</option>
            <option value='Ring'>Ring</option>
            <option value='Staff'>Staff</option>
            <option value='Wand'>Wand</option>
            <option value='Weapon'>Weapon</option>
        </select><br/>
<div id='typeSpecificAttributesDiv'>
</div>
<input type='submit' value='Add Treasure' />
</form>

<?php
include('footer.php');
?>


Adding Data To MongoDB With PHP


Do you remember how to add data to MongoDB from the command line? If not, go back to tutorial 3. You should see something a lot like this:


use treasurebag
db.treasure.insert( { “Name” : ”The Precious”, 
         “Price” : 10000, “Type” : “Ring”, 
         “Special Attribute” : “Invisibility”} )


It’s almost the same in PHP:


$connection->treasurebag->treasure->insert( array( “Name” => “The Precious”, 
                         “Price” => 10000, “Type” => “Ring”, 
                         “Special Attribute” => “Invisibility” ) );


I’m sure you can see the pattern. Choose the right database, choose the right collection and then insert a bunch of key/value pairs. Simple stuff.


One important thing to know is that as long as you have an array of key/value pairs it doesn’t matter whether you create the array on the same line as the insert or prepare it earlier. For example, this code will work the exact the same as the PHP sample above:


$insertData[“Name”] = “The Precious”;
$insertData[“Price”] = 10000;
$insertData[“Type”] = “Ring”;
$insertData[“Special Attribute”] = “Invisibility”;

$connection->treasurebag->treasure->insert( $insertData );


Building the key/value array separately like this can be a useful trick for keeping code clean and flexible.


Processing Treasures With processNewTreasure.php


If you look closely at the input form for add.php you’ll notice that the form sends it’s data to processNewTreasure.php. That’s the file where we’re going to be doing all of our real work so fire up your favorite code editor and create a blank processNewTreasure.php to work with.


Processing user input is a three step process. First, you get the user input. Second, you make sure that the input is clean and complete. If any information is missing or wrong you want to avoid putting it in the database and warn the user that they need to try again. Third, once you’re sure the data is OK, you finally insert it into the database.


A professional grade solution would have some heavy duty data and error checking to make sure that all user input was perfect. It would double check that things that are supposed to be numbers are numbers and that strings follow acceptable patterns. It would also have layers of error checking around all database calls to make sure that nothing went wrong while inserting or retrieving data.


But we’re only writing practice code, so we’re going to cut a few corners. We will make sure that the user fully filled out the treasure form, but we’re not going to obsess over exactly what they typed in. We will make sure that numbers are numbers… but if they aren’t we’ll just set them to 0 and move on instead of failing and warning the user. And we’re just going to pretend that databases never fail because on a project this small and local they usually don’t.


Just remember that if you were building this sort of project for a professional client you would want to kick things up a notch. I don’t want to hear any complaints about people using this sort of code on a production server and then getting in trouble when their application crashes and loses a million dollars worth if information.


Printing Errors


As I mentioned above, if the user makes an error we want to let them know so they can try again. Printing a simple message is pretty easy. We just

 
include('header.php');
//Error message here
include('footer.php');


That’s just three lines to create a nice looking page with our error front and center. But there are tons of places in our code where we might need to print an error message and typing the same three lines over and over again can get boring.


Plus, in the future we might change how we want to show errors. Maybe we don’t want to print the entire ‘header.php’ file and instead create a special new page style just for errors. In that case it would be a nightmare to have to track down and modify ever single place we displayed an error.


Instead we’re going to start off processNewTreasure.php with a single function that prints an error. It should accept an error message, print a page with that error message and then exit the program to make sure nothing else happens after the error. For example, if the user forgot to give a treasure a name we don’t want to bother trying to insert it into the database. We should stop right there and let the user know.


function printAndExit($message){
   include('header.php');
   echo $message;
   include('footer.php');
   exit();
}


Now every time we have an error we can rely on one quick function to warn the user and close our code before anything important can break.


Verifying Input


Every treasure has to have a name, price and type. Making sure that the user included all this information is a logical first step for processNewTreasure.php.


We’re going to use the PHP function empty for this task. Empty does two things for us: it checks whether a variable exists and it makes sure it has an actual value. By using this to check POST variables we can make sure that the user put an actual value into every field we care about. We’ll just do a quick check for whether name, price, or type is empty and then print an error message if they are:


if( empty($_POST['name']) or empty($_POST['price']) or empty($_POST['type']) ){
   printAndExit('<h1>INVALID INPUT</h1><h2>Missing treasure name, price or type</h2>');
}


Pretty easy to follow. If any of the three major variables are empty we print a simple HTML warning and then exit the program.


If none of the variables are empty, we can start building the key/value array that we’re going to insert into MongoDB. Notice that as part of creating the array we’re using the PHP function intval to make sure that price is an integer. This function will turn a string number like “123” into an actual number and will turn anything else into 0. So this way even if a user tries to create an item with a non-number price (like Price: “Pinapple”) we still end up with a nice numeric 0.


And while we’re at it we might as well set up a MongoDB connection:


$inputData['Name'] = $_POST['name'];
$inputData['Price'] = intval($_POST['price']);
$inputData['Type'] = $_POST['type'];

$connection = new Mongo();


Type Specific Input


After we’ve made sure the user has given us a name, price and type the next step is to figure out what kind of treasure the user is trying to create and double check that they included the right data types for that treasure. Ex: If they are creating a Ring they better have included a Special Attribute value.


Just like with itemView.php we’re going to use a switch statement to decide which code to run for which treasure types. And as a bonus, we can use the default case to catch errors where the user is trying to create a treasure with an improper type.


switch($_POST['type']){
   case 'Ring':
      //Process Ring
      break;
   case 'Staff':
      //Process Staff
      break;
   case 'Wand':
      //Process Wand
      break;
   case 'Weapon':
      //Process Weapon
      break;
   default:
      printAndExit('<h1>INVALID TREASURE TYPE</h1><h2>UNABLE TO ADD NEW TREASURE TO DATABASE</h2>');
}


Processing A Staff


So what exactly do we need to put into those case statements to make everything work? Let’s use treasure type Staff as an example. Staff treasures have two extra attributes besides the normal name, price and type: Charges and Spells. Charges is a number and Spells is an array of different magic spell names. So the first thing we need to do is make sure that the user included both of these bits of data.


if( empty($_POST['Charges']) or empty($_POST['Spells']) ){
   printAndExit('<h1>INVALID INPUT</h1><h2>Missing staff charges or spells</h2>');
}


Just like before, we print an error message if any of the POST variables are empty.


Once we know we have the data, the next step is to include it inside the key/value array we started building in the first section of the script. Because “Charges” is a number we will use intval to make sure it winds up as an integer. We will also use explode to take the user’s comma separated list of spells (ex: “healing,raise dead,light”) and expand it into the array that the database is expecting:

 
$inputData['Charges']=intval($_POST['Charges']);
$inputData['Spells']=explode(',',$_POST['Spells']);


The $inputData array now has a key/value pair for every Staff attribute: Name, Price, Type, Charges and Spells. All that’s left to do is push the array into the database and let the user know everything went well.


$connection->treasurebag->treasure->insert($inputData);
printAndExit('<h1>NEW STAFF ADDED TO TREASURE BAG</h1>');


Our complete case statement looks like this:

case 'Staff':
   if( empty($_POST['Charges']) or empty($_POST['Spells']) ){
      printAndExit('<h1>INVALID INPUT</h1><h2>Missing staff charges or spells</h2>');
   }
   $inputData['Charges']=intval($_POST['Charges']);
   $inputData['Spells']=explode(',',$_POST['Spells']);
   $connection->treasurebag->treasure->insert($inputData);
   printAndExit('<h1>NEW STAFF ADDED TO TREASURE BAG</h1>');
   break;


Processing a Weapon


For out next example, let’s take a look at Weapons. The Weapon type is very similar to the Staff type. Both have a numeric value (Weapons have Bonus and Staffs have Charges) and an array value (Weapons have Special Attributes and Staffs have Spells). But there is one big difference. Every Staff has to have a list of Spells, but Weapon Special Attributes are optional. We shouldn’t throw an error if the user didn’t include Special Attributes and we shouldn’t create a Special Attributes entry in our input array unless we actually have something to put there. So the Weapon case statement looks a little different:

case 'Weapon':
   if( empty($_POST['Bonus']) ){
      printAndExit('<h1>INVALID INPUT</h1><h2>Missing weapon bonus</h2>');
   }
   $inputData['Bonus']=intval($_POST['Bonus']);
   if( !empty($_POST['Special_Attributes']) ){
      $inputData['Special Attributes']=explode(',',$_POST['Special_Attributes']);
   }
   $connection->treasurebag->treasure->insert($inputData);
   printAndExit('<h1>NEW WEAPON ADDED TO TREASURE BAG</h1>');
   break;


Processing Rings and Wands


You have two examples to look at now, so I’m going to let you write the Ring and Wand case statements on your own. If you need a little extra help I have included a complete copy of my processingNewTreasure.php file down at the bottom of the page. Which shouldn’t be too far away because now that we’ve filled in all four case statements we’re basically done.


Testing


If everything went well you should be able to click on the “Add Treasure” link in the Treasure Bag menu and be taken to our simple treasure form. The form should properly adjust itself when you choose a treasure type and it should properly process new treasures.


To make sure that treasure processing really works try adding at least one new version of every type of treasure. You should also purposely submit some bad data to make sure we really are catching and reporting user input errors. Try to create treasures with no names, wands without spells, weapons without bonuses and so on.


Screen Shots


The treasure input form. Note how choosing "Staff" in the dropdown has added input fields for Charges and Spells

The treasure input form. Note how choosing “Staff” in the dropdown has added input fields for Charges and Spells

Whoops! The user forgot to fill out some important parts of this form.

Whoops! The user forgot to fill out some important parts of this form.

Submitting an incomplete form results in a warning screen

Submitting an incomplete form results in a warning screen

Complete Code

I already listed the complete code for “add.php” near the start of the tutorial. Here’s the complete code for “processNewTreasure.php”.

<?php

function printAndExit($message){
    include('header.php');
    echo $message;
    include('footer.php');
    exit();
}

if( empty($_POST['name']) or empty($_POST['price']) or empty($_POST['type']) ){
    printAndExit('<h1>INVALID INPUT</h1><h2>Missing treasure name, price or type</h2>');
}

$inputData['Name'] = $_POST['name'];
$inputData['Price'] = intval($_POST['price']);
$inputData['Type'] = $_POST['type'];

$connection = new Mongo();

switch($_POST['type']){
    case 'Ring':
        if( empty($_POST['Special_Attribute']) ){
            printAndExit('<h1>INVALID INPUT</h1><h2>Missing ring special attribute</h2>');
        }
        $inputData['Special Attribute']=$_POST['Special_Attribute'];
        $connection->treasurebag->treasure->insert($inputData);
        printAndExit('<h1>NEW RING ADDED TO TREASURE BAG</h1>');
        break;
    case 'Staff':
        if( empty($_POST['Charges']) or empty($_POST['Spells']) ){
            printAndExit('<h1>INVALID INPUT</h1><h2>Missing staff charges or spells</h2>');
        }
        $inputData['Charges']=intval($_POST['Charges']);
        $inputData['Spells']=explode(',',$_POST['Spells']);
        $connection->treasurebag->treasure->insert($inputData);
        printAndExit('<h1>NEW STAFF ADDED TO TREASURE BAG</h1>');
        break;
    case 'Wand':
        if( empty($_POST['Charges']) or empty($_POST['Spell']) ){
            printAndExit('<h1>INVALID INPUT</h1><h2>Missing wand charges or spell</h2>');
        }
        $inputData['Charges']=intval($_POST['Charges']);
        $inputData['Spell']=$_POST['Spell'];
        $connection->treasurebag->treasure->insert($inputData);
        printAndExit('<h1>NEW WAND ADDED TO TREASURE BAG</h1>');
        break;
    case 'Weapon':
        if( empty($_POST['Bonus']) ){
            printAndExit('<h1>INVALID INPUT</h1><h2>Missing weapon bonus</h2>');
        }
        $inputData['Bonus']=intval($_POST['Bonus']);
        if( !empty($_POST['Special_Attributes']) ){
            $inputData['Special Attributes']=explode(',',$_POST['Special_Attributes']);
        }
        $connection->treasurebag->treasure->insert($inputData);
        printAndExit('<h1>NEW WEAPON ADDED TO TREASURE BAG</h1>');
        break;
    default:
        printAndExit('<h1>INVALID TREASURE TYPE</h1><h2>UNABLE TO ADD NEW TREASURE TO DATABASE</h2>');
}

?>

Conclusion


Hopefully everything has worked for you the same way it worked for me and you can add treasures using our friendly form instead of having to rely on long typed out commands. Your Treasure Bag might be starting to feel a little crowded though, so join me next time as we add a handy delete feature to let us clean up our database with a couple clicks.


BONUS!


Those of you out there who have been creating a character management system to go with the treasure management system know what to expect by now. Create an “Add New Character” form that lets you create new characters directly inside of the web application instead of having to rely on direct MongoDB commands.


BONUS BONUS!!


Super observant readers might notice that the design document requires that we return to the index after successfully adding a new treasure. Change the code to navigate to index on success instead of printing a message.

MongoDB Tutorial Part 6.5: Fixing itemView.php

I was working on the next part of this tutorial when I noticed a tiny mistake I made in itemView.php. If you look back at the design document, weapon special attributes are optional. But the code that prints out weapon type treasures acts like every treasure is going to have at least one special attribute. Find this code in itemView.php:


  case 'Weapon':
      echo '<b>Bonus:</b> '.$itemAttributes['Bonus'].'<br/>';
      echo '<b>Special Attributes:</b>';
      echo '<ul>';
      foreach($itemAttributes['Special Attributes'] as $specialAttribute){
          echo "<li>$specialAttribute</li>";
      }
      echo '</ul>';
      break;

Notice how it just jumps right into the foreach loop of $itemAttributes[‘Special Attributes’]? If a particular weapon doesn’t have any special attributes that information won’t exist and we’ll get a minor error. So let’s fix it by changing it to something more like this:


case 'Weapon':
    echo '<b>Bonus:</b> '.$itemAttributes['Bonus'].'<br/>';
    if( !empty($itemAttributes['Special Attributes']) ){
        echo '<b>Special Attributes:</b>';
        echo '<ul>';
            foreach($itemAttributes['Special Attributes'] as $specialAttribute){
                echo "<li>$specialAttribute</li>";
            }
        echo '</ul>';
    }
    break;


Now the code will only try to print special attributes when there are special attributes to print and won’t throw errors when it runs into a boring no-attribute weapon.


That’s all for this mini-update. Tutorial 7 coming soon!

MongoDB Tutorial Part 6: Finding One Unique Document

The Devil Is In The Details


In our last tutorial we improved our treasure list to sort our items. But the treasure list only includes the name, price and type of all of our items. What about the rest of the information we put in the database, like wand spells and weapon bonuses? We want to see that too! So today we’ll be adding a way to look at all the details relating to the treasures in our database.


If you remember back to the design document our end goal is to let users click on treasure names in order to visit a page that lists all the treasure information. So our two tasks for today are creating those links and creating the page they need to point to.


Uniquely Identifying MongoDB Documents


If we want to create a page that shows the full details of one specific treasure the first thing we’ll need is a way to identify which treasure we want the details on. We can’t just tell MongoDB to “give us a ring” because it might give us the wrong ring. And even working with someone more specific, like treasure names, might not be enough. What if we have more than one item with the same name, like two “Swords of Fire” with different prices and weapon bonuses? How do you make sure you get the right one out of the database?


The answer is simple. Remember the _id field from way back in tutorial part 3, that random looking string of letters and numbers that was automatically added to every item we pushed into the database? That special id will be unique for every item in your collection. So if you know an item’s _id you can find it in the database without having to worry about accidentally grabbing the wrong item. Even if you have multiple identicle “Swords of Fire” they will each have a unique _id to help you keep track of which is which.


Getting the _id


You access the _id of a MongoDB document the same way you access any other attribute. In fact, if you copied my sample index.php file you already have it! Does this line look familiar?


$treasureID = $document['_id'];


If you’ve been writing your own pages instead of copying mine then now is the time to add a line like this to your code. Our goal is to get that _id for every item in our list and then create a link with that _id.


This is an intermediate tutorial, so I trust you’re already familiar with creating links. In our case we want to connect to a page named “viewItem.php” and that we want to include an “id” in the URL. To create that sort of link in our treasure list we need to open index.php and find the line where we print the treasure name. We then want to replace the plain name of the treasure:


<td>$name</td>


With an option that wraps the name inside of link. Notice the id argument we’ve added after the main url:


<td><a href='viewItem.php?id=$treasureID'>$name</a></td>


If you don’t see where you need to make the change, scroll to the bottom of this tutorial for a complete updated version of index.php

Creating viewItem.php


A link to viewItem.php isn’t very useful without an actual viewItem.php file to visit. If you tried clicking on a treasure name right now you would just get a page not found error. So our next step should be to create an actual viewItem.php file inside the same folder as the rest of our code. And of course we’re going to start out by inclding our header and footer:


include('header.php');
//Item view code will go here
include('footer.php');


Searching Based On _id


To search our database for a specific _id we need to have an _id to search for. But if you wrote your links properly we should be able to grab it out of the URL as easy as:


$itemID = $_GET['id'];


But wait, there’s more! In PHP MongoDB ids actually have their own class and that string of numbers and letters won’t do you any good until you wrap them up in the MongoId class:


$searchableItemID = new MongoId($itemID);


We’re almost there. Now all we have to do is tell MongoDB that we want to do a specific search for an item with that _id.


Searching in MongoDB is easy and uses the find function that you’re already familiar with. All you have to do is create a set of key/value pairs and include them as an argument to find and you’re done.


Let’s start by creating our key/value pair:


$criteria['_id'] = $searchableItemID;


And now we feed that data into find:


$cursor=$c->treasurebag->treasure->find($criteria);


find VS findOne


Remember how find returns a cursor instead of actual data? And how we had to put the cursor inside a loop to read all the data? That’s kind of pointless when you know you’re only to get one result. Why run an entire while loop just to grab one line of data? Calling $cursor->next() even once feels like a waste.


Luckily for us there is findOne. It works just like find except that it returns one result and it directly returns result data instead of returning a cursor. This makes it really useful for those situations where you’re only expecting one result or where you only care about the first result in a list. So instead of creating a cursor it’s much more convenient to use findOne to grab the needed treasure data all in one place.


$itemAttributes=$c->treasurebag->treasure->findOne($criteria);


Testing


Let’s give this a try and make sure our code is working by creating a page that grabs and id from the URL, creates a MongoID with it, searches for that id and then dumps the results to screen. Give it a try on your own first.


Ready to see my answer?


<?php
include('header.php');
$itemID = $_GET['id'];
$criteria['_id'] = new MongoId($itemID);
$c = new Mongo();

$itemAttributes=$c->treasurebag->treasure->findOne($criteria);

print_r($itemAttributes);

include('footer.php');
?>


If you’ve done everything right then this code should produce a simple page that dumps out all the information related to whatever treasure is in the URL. Feel free to play around with it by going back to the index and clicking on the viewItem links for other items and making sure that they dump different data. When you’re sure it’s working we can move on.


Display Item Details All Pretty Like


Grabbing the id and searching the database were the hard part. Now we just have the busy work of putting that information on the screen in a way that is prettier than a pure data dump.


Thinking back to our design document we notice that every single item is guaranteed to have a name, price and type. So the first thing we should probably do is print that to the screen:

echo '<b>Name:</b> '.$itemAttributes['Name'].'<br/>';
echo '<b>Type:</b> '.$itemAttributes['Type'].'<br/>';
echo '<b>Price:</b> '.$itemAttributes['Price'].'<br/>';


After printing the generic data for the item the next step is to print the type specific information. What information goes with each type is listed in our design document, so if you need a reminder just go back to tutorial 2.


The only sort-of tricky question here is how to handle attributes that can have more than one value. Printing a weapon bonus is as simple as just printing the weapon bonus but what do we do for the multiple Spells inside of each staff? The obvious answer is to put them into an unordered list, which we can build pretty easily with a foreach loop.


Now let’s take a shot at the type specific information printer. I’m using a switch statement here to choose which information to print based on the type of the item:


switch($itemAttributes['Type']){
  case 'Ring':
   echo '<b>Special Attribute:</b>'.$itemAttributes['Special Attribute'].'<br/>';
      break;
  case 'Weapon':
      echo '<b>Bonus:</b> '.$itemAttributes['Bonus'].'<br/>';
      echo '<b>Special Attributes:</b>';
      echo '<ul>';
      foreach($itemAttributes['Special Attributes'] as $specialAttribute){
          echo "<li>$specialAttribute</li>";
      }
      echo '</ul>';
      break;
  case 'Wand':
      echo '<b>Charges:</b> '.$itemAttributes['Charges'].'<br/>';
      echo '<b>Spell:</b> '.$itemAttributes['Spell'].'<br/>';
      break;
  case 'Staff':
      echo '<b>Charges:</b> '.$itemAttributes['Charges'].'<br/>';
      echo '<b>Spells:</b>';
      echo '<ul>';
          foreach($itemAttributes['Spells'] as $spell){
              echo "<li>$spell</li>";
          }
      echo '</ul>';
      break;
}


And that should be enough code to properly display the full attributes of every treasure in the system.


Screen Shots

See all those weird letters and numbers in the URL? That's the Mongo ID

See all those weird letters and numbers in the URL? That’s the Mongo ID


This sword has more than one special attribute

This sword has more than one special attribute

Complete Code

Updated index.php

<?php
include('header.php');

$connection = new Mongo();
$cursor = $connection->treasurebag->treasure->find();
if(isset($_GET['sortby'])){

    if($_GET['sortby']=='Price'){
        $cursor->sort(array('Price'=>1));
    }
    elseif($_GET['sortby']=='Name'){
        $cursor->sort(array('Name'=>1));
    }
}

echo '<h2>Inventory</h2>';
echo '<button onclick="window.location.href=\'index.php?sortby=Name\'">
                           Sort By Name</button>';
echo '<button onclick="window.location.href=\'index.php?sortby=Price\'">
                           Sort By Price</button>';
echo '<table><tr><td>Name</td><td>Price</td><td>Type</td></tr>';
while($document = $cursor->getNext()){

    $treasureID = $document['_id'];
    $name = $document['Name'];
    $price = $document['Price'];
    $type = $document['Type'];

    echo "<tr><td><a href='viewItem.php?id=$treasureID'>$name</a></td>
                <td>$price</td>
                <td>$type</td></tr>";

}
echo '</table>';

include('footer.php');
?>

Complete viewItem.php

<?php
include('header.php');
$itemID = $_GET['id'];
$criteria['_id'] = new MongoId($itemID);

$c = new Mongo();

$itemAttributes=$c->treasurebag->treasure->findOne($criteria);

echo '<b>Name:</b> '.$itemAttributes['Name'].'<br/>';
echo '<b>Type:</b> '.$itemAttributes['Type'].'<br/>';
echo '<b>Price:</b> '.$itemAttributes['Price'].'<br/>';

switch($itemAttributes['Type']){
 case 'Ring':
  echo '<b>Special Attribute:</b> '.$itemAttributes['Special Attribute'].'<br/>';
   break;
 case 'Weapon':
   echo '<b>Bonus:</b> '.$itemAttributes['Bonus'].'<br/>';
   echo '<b>Special Attributes:</b>';
   echo '<ul>';
      foreach($itemAttributes['Special Attributes'] as $specialAttribute){
          echo "<li>$specialAttribute</li>";
      }
   echo '</ul>';
        break;
 case 'Wand':
   echo '<b>Charges:</b> '.$itemAttributes['Charges'].'<br/>';
   echo '<b>Spell:</b> '.$itemAttributes['Spell'].'<br/>';
   break;
 case 'Staff':
   echo '<b>Charges:</b> '.$itemAttributes['Charges'].'<br/>';
   echo '<b>Spells:</b>';
   echo '<ul>';
      foreach($itemAttributes['Spells'] as $spell){
         echo "<li>$spell</li>";
      }
   echo '</ul>';
   break;
}

include('footer.php');
?>

Conclusion

So now we can sort and study all the treasure in our database. But at the moment the only way to put treasure into the system in the first place is to type it by hand straight into MongoDB. That’s not very user friendly! So join me next time as we write a page for entering treasure information through your browser instead of the command line.


BONUS!


What happens to itemView.php if you don’t include and id in the URL or if you type in an id not in the system? Improve the system so that if it can’t find a matching _id it displays a polite error message about not being able to locate the requested treasure.


BONUS BONUS!!


If you’ve been doing the bonus work so far you should already be storing adventurers in your database and have a page that shows them all in a list. Now add a characterView.php file to your application that lets you click on an adventurer and see his detailed stats. If you don’t have any detailed stats, then add some. A bio field with a quick character description might be an easy extra detail to add.