Gengo Girls #15: Who’s On First?


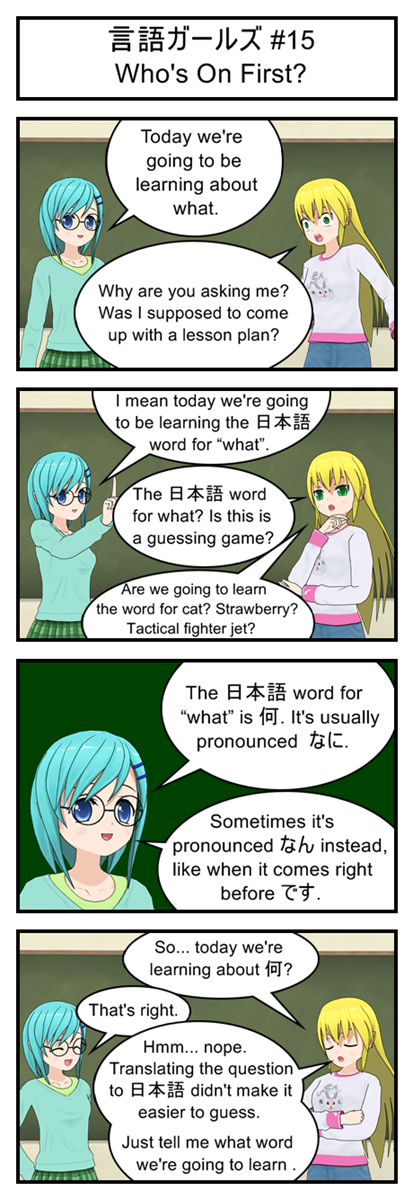
Gengo Girls #15: Who's On First?

In my opinion , or “what”, is one of the most useful Japanese words to know. It shows up a ton in normal conversation and is an important part in asking questions. You can even use it all on its own as an interjection if something has left you really surprised and confused.

It’s also an easy word to pick out when watching Japanese shows and movies since it usually comes near the end of sentences. It’s even easier to notice when someone gets surprised and just yells out “なに!?” at the top of their lungs.

Vocabulary

= なに = what

Transcript

言語ガールズ #15

Who’s On First?

Blue: Today we’re going to be learning about what.

Yellow: Why are you asking me? Was I supposed to come up with a lesson plan?

Blue: I mean today we’re going to be learning the 日本語 word for “what”.

Yellow: The 日本語 word for what? Is this is a guessing game?

Yellow: Are going to learn the word for cat? Strawberry? Tactical fighter jet?

Blue: The 日本語 word for “what” is . It’s usually pronounced なに.

Blue: Sometimes it’s pronounced なん instead, like when it comes right before です.

Yellow: So… today we’re learning about ?

Blue: That’s right.

Yellow: Hmm… nope. Translating the question to 日本語 didn’t make it easier to guess. Just tell me what word we’re going to learn.

Let’s Program A JavaScript Game 5: Press Start To Play

Play A Game Or Watch A Movie?


Pop Quiz: What’s the main difference between a movie and a videogame?


If you answered “Player Input”: Congratulations, you’re exactly right! The main component that makes a game a game is the fact that the player has some control over what happens next. The player isn’t just watching some hero fight a monster, he’s pressing the buttons that make the hero fight.


If you answered anything else: You’re probably still right but that wasn’t the answer I was looking for so it doesn’t count. Try to do a better job of reading my mind next time I ask a semi-rhetorical question.


Anyways, my main point here is that player’s input is important and that’s what I’m going to be programming today.


Getting Input With JavaScript A.K.A. Whoops I Lied To You


Remember how we prototyped a getInput function and put it at the start of our gameLoop? Turns out that doesn’t work so great with JavaScript. Throw away that function and all references to it, we’re going to be doing something completely different.


Don’t look at me like that. This is a Let’s Program, I’m writing these articles at the same time as the code and I don’t always catch my mistakes early enough to fix them before hitting “post”.


Anyways, here is how it should work:


Instead of checking for input during the loop we will ask the browser to run a short piece of code every time a key is pressed. Of course, we may not be ready for player input at that exact moment so we will just have the code store the input for future use. That way if a player presses a key between game loops the input will still be there the next time we update.


As for the potential issue of the player pressing a key during a game loop… it’s not really a problem. Modern browsers can run multiple pieces of JavaScript at once so we don’t have to worry about the game lagging because it is trying to update the game and process input at the same time.


There is still the slight issue of what happens if player input changes halfway through a loop. Maybe the loop starts with the “right” key being pressed and then halfway through the key is released. This could lead to a strange state where we do 50% right key logic and 50% default logic. To prevent this we’ll just have to be sure that we only access player input once per loop so that it doesn’t have time to change on us, maybe by storing a local copy of player input at the start of every loop so that the global input can change without influencing the current frame.


Time For The Code


First off we have to let the browser know that we want the input. One easy way to do this is by adding onkeyup and onkeydown traits to the body tag in your HTML. Just change your code from this:


<body>


to this:


<body onkeydown="doKeyDown(event);" onkeyup="doKeyUp(event);">


Now everytime the user presses a key the browser will automatically run the doKeyDown function we’re about to write. And when they release a key it will automatically run the doKeyUp event that we are also about to code.


One warning: This will capture ALL keyboard input for that page, which is OK for a full page game but can be a bad idea if your game is just one part of a much larger page where people might want to use their keys for scrolling.


Capturing input doesn’t do us any good if we don’t have a place to store it, so let’s start by adding a new object declaration to the top of our script:


var playerInput = new Object()


Now we can write the doKeyDown and doKeyUp functions. They’re both pretty simple functions, with the only trick being that we have to double check whether the user is using Internet Explorer or not because certain code only works on certain browsers. Other than that we just check the numeric code of whatever button the user just pressed, see if the code matches any of the arrow keys and then record it in our playerInput variable.


function doKeyDown(event){
   var keynum;

   if(window.event){ //Browser is IE
      keynum = event.keyCode;
   }
   else{
      keynum = event.which;
   }

   if(keynum == 37){
      playerInput.left = 1;
   }
   else if(keynum == 38){
      playerInput.up = 1;
   }
   else if(keynum == 39){
      playerInput.right = 1;
   }
   else if(keynum == 40){
      playerInput.down = 1;
   }
}

function doKeyUp(event){
   var keynum;

   if(window.event){ //Browser is IE
      keynum = event.keyCode;
   }
   else{
      keynum = event.which;
   }

   if(keynum == 37){
      playerInput.left = 0;
   }
   else if(keynum == 38){
      playerInput.up = 0;
   }
   else if(keynum == 39){
      playerInput.right = 0;
   }
   else if(keynum == 40){
      playerInput.down = 0;
   }
}


Of course, if you are building a game that uses buttons other than the arrow keys you will need more else if statements for whatever buttons you are interested in. For example, maybe you want your running game to let the user use the spacebar to jump. To do so you’d just have to lookup the keycode for “space” and then keep track of a playerInput.space variable.


Introducing The Protagonist Square


We now have code for getting player input, but that’s no good without some way to test it. And while I suppose we could just print some logging text to the console that says “Player has pushed right arrow key” it would be much more fun to have some actual graphics moving around the screen.


So to start go up to the start of your script to where you declared the playerInput variable and add two new variables for xPos (x position) and yPos (y position). Let’s have them default to 100.


var xPos = 100;
var yPos = 100;


And now let’s use those variables to draw a red square on our screen by updating our screen drawing function like this:


//Draw the screen
function drawScreen(){
   var canvas = document.getElementById('gameCanvas');
   var context = canvas.getContext('2d');

   //Draw background
   context.fillStyle = '#dcdcdc';
   context.fillRect(0,0,600,400);

   //Draw black text
   context.fillStyle = '#000000';
   context.fillText("Loop Count: "+loopCount, 20, 20);

   //Draw a red square the player can control
   context.fillStyle = '#FF0000';
   context.fillRect(xPos, yPos, 50, 50);
}


And now we have a little red square that we can move around just by changing xPos and yPos. The logical next step is to use player input to change xPos and yPos, which we can do by rewriting updateGame like this:


function updateGame(){
   loopCount++;
   
   if(playerInput.right){
      xPos+=5;
   }

   if(playerInput.left){
      xPos-=5;
   }

   if(playerInput.up){
      yPos-=5;
   }

   if(playerInput.down){
      yPos+=5;
   }
}


Give It A Try


Save your changes, reload your game page and hit the “Canvas Test” button. You should see a red square appear on the screen, and the red square should move around when you press the arrow keys. If not you have some debugging to do. Make sure you copied the most recent functions correctly and that the playerInput, xPos and yPos variables are all properly declared inside the script tags but before you declare any functions.


And with that we’re done for this week. Next week I’ll probably talk about collision detection. Or maybe gravity. But since gravity isn’t really that useful without a ground to collide with I’m thinking it will probably be collision detection.

Gengo Girls #14: Disclaimer

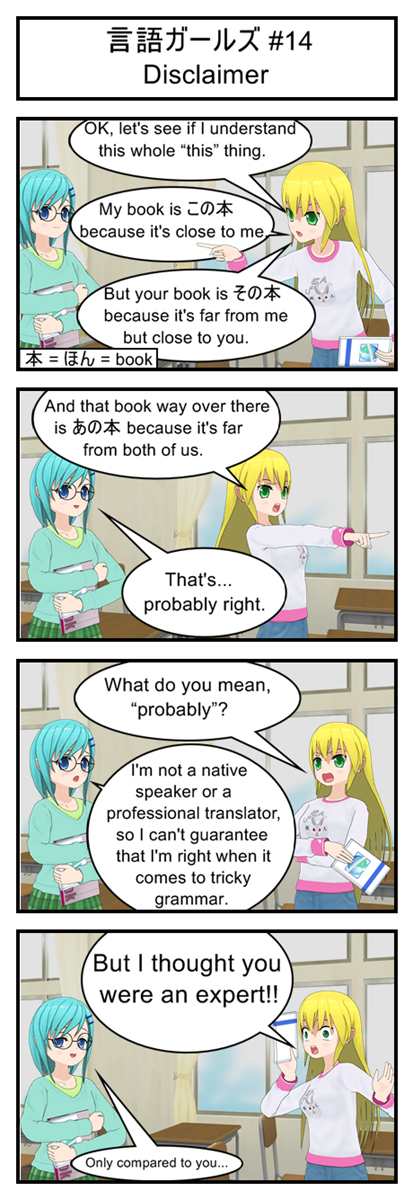
Gengo Girls #14: Disclaimer

Everybody here is aware that I’m only a Japanese hobbyist, right? I know more than enough to teach you grammar and a ton of vocabulary but I’m out of my league when it comes to complex questions like “Which of these very similar words would a native speaker use in this particular scenario?”

So if you ever catch me making a mistake, please let me know in either the comments or by email.

Vocabulary

= ほん = book

Transcript

言語ガールズ #14

Disclaimer

Yellow: OK, let’s see if I understand this whole “this” thing.

Yellow: My book is この本because it’s close to me.

Yellow: But your book is その本because it’s far from me but close to you.

Yellow: And that book way over there is あの本because it’s far from both of us.

Blue: That’s… probably right.

Yellow: What do you mean, “probably”?

Blue: I’m not a native speaker or a professional translator, so I can’t guarantee that I’m right when it comes to tricky grammar.

Yellow: But I thought you were an expert!!

Blue: Only compared to you…

Gengo Girls #13: Go Long

Gengo Girls #13: Go Long

<< Previous Comic

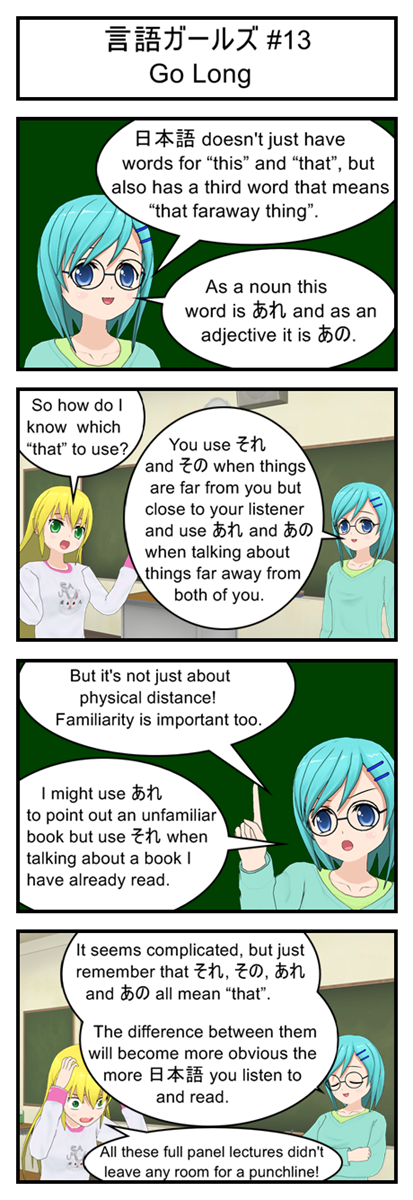
In my experience the shortest words in a language are almost always the most complicated. For some English examples, consider the crazy conjugations of “to be” (am, are, is, was, were) or the many different meanings of common words like run (run away, run a business, run a program, a run of bad luck) or set (set down, set up, set a date, matching set). On the other hand big words like “defenestrate” are usually easy to conjugate and only have one or two specific meanings.

Vocabulary

あれ = faraway that (noun)

あの = faraway that (adjective)

Transcript

言語ガールズ #13

Go Long

Blue: 日本語doesn’t just have words for “this” and “that”, but also has a third word that means “that faraway thing”.

Blue: As a noun this word is あれ and as an adjective it is あの.

Yellow: So how do I know which “that” to use?

Blue: You use それ and そのwhen things are far from you but close to your listener and use あれ and あの when talking about things far away from both of you.

Blue: But it’s not just about physical distance! Familiarity is important too.

Blue: I might use あれto point out an unfamiliar book but use それwhen talking about a book I have already read.

Blue: It seems complicated, but just remember that それ, その, あれ and あの all mean “that”. The difference between them will become more obvious the more 日本語 you listen to and read.

Yellow: All these full panel lectures didn’t leave any room for a punchline!

Gengo Girls #12: How Much Is That Doggy In The Window?

Gengo Girls #12: How Much Is That Doggy In The Window?

Next Comic >>

<< Previous Comic

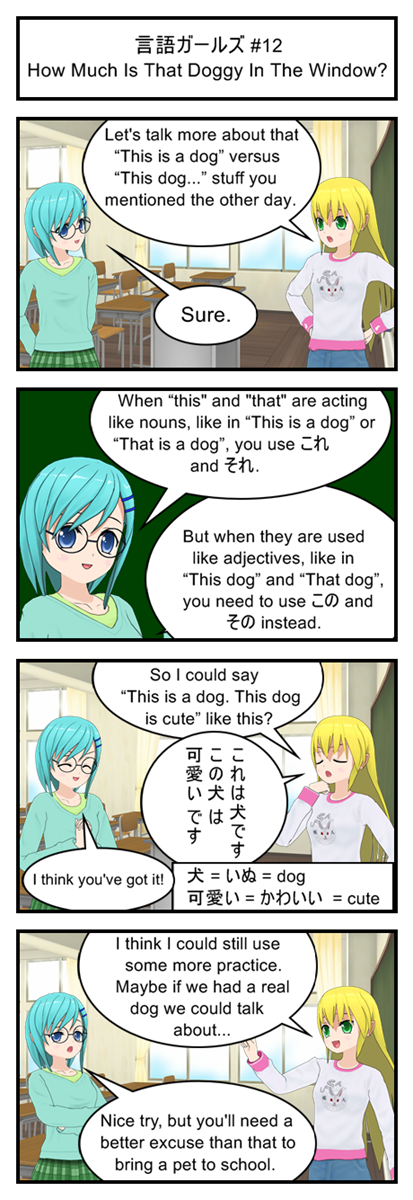
これ vsこの and それ vs そのis the sort of thing that seems hard to remember at first but becomes instinctive after listening to enough Japanese.

Vocabulary

この = this (adjective)

その = that (adjective)

= いぬ = dog

可愛い = かわいい = cute

Transcript

言語ガールズ #12

How Much Is That Doggy In The Window?

Yellow: Let’s talk more about that “This is a dog” versus “This dog…” stuff you mentioned the other day.

Blue: Sure.

Blue: When “this” and “that” acting like nouns, like in “This is a dog” or “That is a dog”, you use これ and それ.

Blue: But when they are used like adjectives, like in “This dog” and “That dog”, you need to use この and その instead.

Yellow: So I could say “This is a dog. This dog is cute” like this?

Yellow: これは犬です

Yellow: この犬 は可愛い です

Blue: I think you’ve got it.

Yellow: I think I could still use some more practice. Maybe if we had a real dog we could talk about…

Blue: Nice try, but you’ll need a better excuse than that to bring a pet to school.

Let’s Program A JavaScript Game 4: V8 600HP Game Engine

Reinventing The Wheel


Let’s be honest: Building our own game engine from scratch is probably not a great idea. There are already open-source JavaScript game engines that do everything we need but better. If you need to quickly and efficiently build a bug free JavaScript game looking at one of these existing solutions would definitely be your first step.


But this is a Let’s Program! Doing things from scratch and learning the hard way is our goal.


Your Game Comes With The Following Pieces…


When you get right down to it, all games are made up of the following two things:


  1. Game Rules: How the game works.
  2. Game State: What is going on in the game right now.


This is true for board games, card games and videogames.


In a board game the rules are usually written on the back of the box and the game’s state is where the pieces are on the board. In a card game the rules usually come in a little pamphlet and the state is the cards in each person’s hand. In a videogame the rules are built into the code and the state is kept track of by computer variables.


Conceptionally there is no real difference between Bob and Sally playing checkers by reading the back of a box and moving pieces around a board and Bob and his computer playing Grand Theft Auto by reading millions of lines of code and moving bits of data around inside memory.


Sure, a video game like Grand Theft Auto has dozens of “turns” per second to simulate real time action, but behind the scenes it’s still just the same old board-game mechanic of “follow the rules”, “make your move”, “update where the pieces are”.


How To Play The Game


Now that we’re all on board with the ideas of game rules and game state we can simplify running a game to a process of three repeating steps:


  1. Check for player input
  2. Update the game state based on the game rules and the player input
  3. Redraw the screen based on the current game state


As an example, let’s imagine that the user presses the up key.


In step one the game checks for input and notices that the user has pressed the up key.


In step two it starts updating the game state. The game rules say that if the player presses the up key while standing on the ground he should “jump” by setting his up velocity to 20. The rules also say that the player and every enemy should move velocity pixels per update, so the game moves the player up 20 pixels and also moves two enemies on screen 10 pixels to the left. The rules also say the game should check for player/enemy collisions but the game doesn’t find any so it stops.


In step three the game now redraws the screen. It draws the player 20 pixels up in the air and draws the two enemies 10 pixels to the left of where they used to be.


50 milliseconds later the loop repeats.


In step one the game checks for input and notices that the user is still pressing the up key.


In step two the game checks the rules. The rules say that the up key only makes the player jump if he is standing on the ground, which he no longer is, so the input gets ignored. But the rules also say that characters in the air should have their velocity decreased by 5, so the player’s upward speed drops from 20 to 15. The game then updates all the characters, moving the player up by 15 pixels and the enemies left by 10. It checks for collisions and still doesn’t find any.


The game now redraws the screen. The player is now 35 pixels up in the air and the enemies are 20 pixels to the left of where they started.


50 milliseconds later the loop repeats a third time. And then a fourth time and a fifth time and so on.


Since the loop happens several dozen times a second the player gets the illusion that everything is happening in real time, but when you get right down to it the whole game could be converted into a turn-based boardgame no problem. Not that anyone would want to play a boardgame where it takes a few hundred turns to cross a room and the rulebook is written mostly in math terms… but the idea is still sound.


Looping In Javascript


Warning: We’re going to be experimenting with loops. Odds are good that you will make a mistake, create a crazy infinite loop, freeze your browser and have to force it to shut down. So don’t panic if your test page suddenly stops responding. Just close the browser and double check whatever code you just typed in.


Now our final goal for the game loop is to have it run once every 50 milliseconds. That’s 20 times a second, which is honestly a little on the low side for a video game but still high enough to feel like smooth-ish animation and interaction. Most importantly it’s slow enough that we can basically guarantee our code will complete inside of each loop, giving us plenty of wiggle room when prototyping messy code. After that’s done we can always go back and adjust the loop to run more often if the game feels too jerky.


Now the most obvious approach to make a loop run once every 50 milliseconds would be be to use “setInterval”, which allows us to schedule a function to repeat again and again every X milliseconds. It sounds perfect and this approach can work. I’ve used it in demo games before.


But running the algorithm once every 50 milliseconds does have one big issue: What happens if your function takes longer than 50 milliseconds? You can wind up in a situation where setInterval triggers a new game loop while the old one is still running, which is a bad bad thing. Having two functions trying to control your game at the same time can corrupt variables, double move characters and generally mess everything up.


To avoid this we will use this strategy instead:

  1. Check what time it is at the start of our game loop.
  2. Check what time it is at the end of our game loop.
  3. If more than 50 milliseconds have passed, immediately call the game loop function again.
  4. If less than 50 milliseconds have passed, use setTimeout, which lets us schedule a function to be called only once after a timer runs out.


Because we don’t schedule the next game loop until after we know the current game loop has finished we can now guarantee that we will never end up with multiple game loops interfering with each other. If a loop takes longer than 50 milliseconds we just wait for it finish before moving on. This will cause slight lag, but that’s better than having the engine actually break.


Now on to the nitty gritty technical details. When using setTimeout the first argument has to be a STRING copy of the code you want to run and the second argument is how many milliseconds the browser should wait before running it.


Making sure the first argument is a string is important. If the first argument is actual code it will be called immediately* instead of after the timer goes off. You can see this for yourself by experimenting with code like this:


//Wrong! The alert is called immediately
setTimeout(alert('Time Is Up!'), 2000);
//Right! The code inside the string gets called after two seconds
setTimeout("alert('Time Is Up!')", 2000);


The big risk here is creating infinite loops. For instance, our upcoming gameLoop function ends by scheduling another gameLoop. If you accidentally call gameLoop immediately instead of properly quoting it and scheduling it for later you will end up with an infinite loop of hyper-fast gameLoops instead of the steady one-loop-per-50-milliseconds you were hoping for. This will also probably freeze your browser. Happened to me. Don’t let it happen to you.


Prototyping The Loop


Open up the test code from two posts ago and replace whatever script you had with this:


var loopCount=0;

function canvasTest(){
   gameLoop();
}

//The main game loop
function gameLoop(){
   var startTime = Date.now();
   getInput();
   updateGame();
   drawScreen();

   var elapsedTime = Date.now()-startTime;
   if(elapsedTime>=50){ //Code took too long, run again immediately
      gameLoop();
   }
   else{ //Code didn't take long enough. Wait before running it again
      setTimeout("gameLoop()",50-elapsedTime);
   }
}

//Get the player's input
function getInput(){
   //Empty prototype
}

//Update the game by one step
function updateGame(){
   loopCount++;
}

//Draw the screen
function drawScreen(){
   var canvas = document.getElementById('gameCanvas');

   var context = canvas.getContext('2d');
   
   //Draw background
   context.fillStyle = '#dcdcdc';
   context.fillRect(0,0,600,400);

   //Draw black text
   context.fillStyle = '#000000';
   context.fillText("Loop Count: "+loopCount, 20, 20);
}


Now click the “Canvas Test” button and watch that counter climb at a speed of approximately 20 loops per second.


Let’s walk through the code really fast.


Clicking the button triggers canvasTest like usual, and canvasTest calls gameLoop.


gameLoop takes a note of what time it is (in milliseconds) by calling Date.now. The game loop then runs the three steps of our game (get player input, update game, and draw screen) and then checks how much time has passed by comparing the stored “startTime” to a second call to Date.now. If 50 or more milliseconds have passed we are running slow and need to call gameLoop again immediately. Otherwise we set a timer and have gameLoop run again later.


The three steps of the game are pretty empty at this point. We don’t care about player input so we leave that function blank. Our only game update is to increase the global “counterLoop” and painting the screen involves nothing but redrawing the background and printing a message about how many loops we have seen.


Next Time: Let’s Get Interactive


We’ve just built a simple but serviceable game engine skeleton. Now it’s time to start filling in the prototype functions, starting with getInput. Join me next week to see how that goes.


* There is one scenario where putting a function call in setTimeout would be a good idea: When the function’s main purpose is to return a string containing the code you actually want to schedule. Maybe you have a “builScheduledCode” function that returns different string wrapped functions depending on the state of the program. Like, if the debug flag is set it returns “logState();runLogic();” but if the debug flag is clear is only returns “runLogic()”;
Gengo Girls #11: Mouthwatering Metaphor

Gengo Girls #11: Mouthwatering Metaphor

Next Comic >>

<< Previous Comic

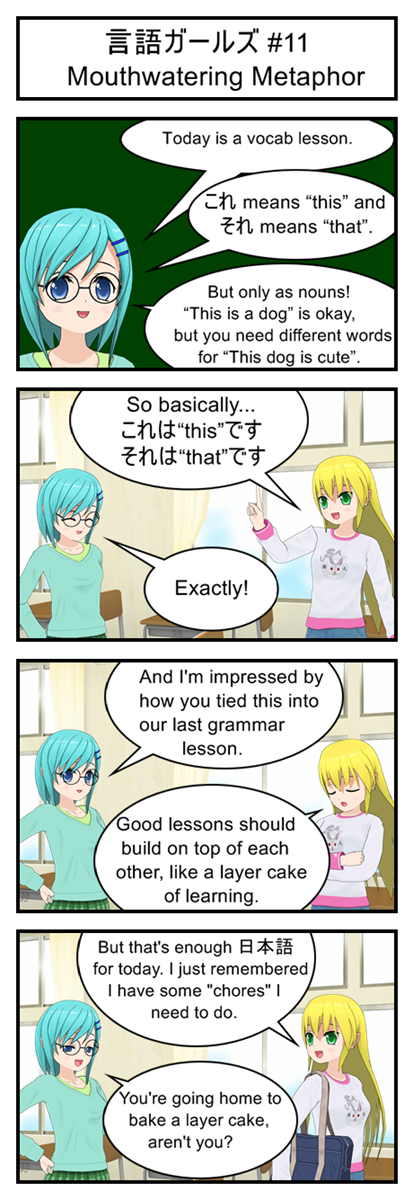
What’s better than a cake? Two cakes glued together with frosting.

What’s better than two cakes glued together with frosting? Three cakes glued together with frosting!

Vocabulary

これ = this (noun)

それ = that (noun)

Transcript

言語ガールズ #11

Mouthwatering Metaphor

Blue: Today is a vocab lesson.

Blue: これ means “this” and それ means “that”. But only as nouns!

Blue: But they can only be used as nouns!

“This is a dog” is okay, but you need different words for “This dog is cute”.

Yellow: So basically…

これは“this”です

それは“that”です

Blue: Exactly!

Blue: And I’m impressed by how you tied this into our last grammar lesson.

Yellow: Good lessons should build on top of each other, like a layer cake or learning.

Yellow: But that’s enough 日本語 for today. I just remembered I have some “chores” I need to do.

Blue: You’re going home to bake a layer cake, aren’t you?

Gengo Girls #10: Shhh… They’re Listening

Gengo Girls #10: Shhh... They're Listening

Next Comic >>

<< Previous Comic

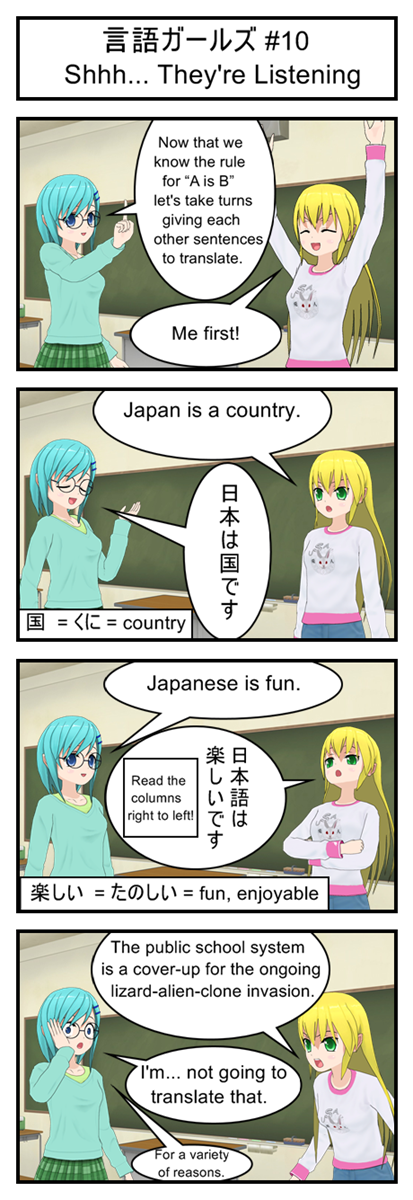
I did my best to come up with a comically outrageous conspiracy theory… but instinct tells me there’s probably at least one person out there who sincerely believes this. Which is silly because we all know the real alien threat is cybernetically enhanced war hamsters, not lizard clones.

Vocabulary

= くに = country

楽しい = たのしい = fun, enjoyable

Transcript

言語ガールズ #10

Shhh… They’re Listening

Blue: Now that we know the rule for “A is B” let’s take turns giving each other practice sentences to translate.

Yellow: Me first!

Yellow: Japan is a country.

Blue: 日本は国です

Blue: Japanese is fun.

Yellow: 日本語は楽しいです

Note: Read the columns right to left!

Yellow: The public school system is a cover-up for the ongoing lizard-alien-clone invasion.

Blue: I’m… not going to translate that.

Blue: For a variety of reasons.

Gengo Girls #9: Fill In The Blanks

Gengo Girls #9: Fill In The Blanks

Next Comic >>

<< Previous Comic

Esperanto is an artificial language specially designed to be easy for Europeans and other Westerners to learn. It’s actually been really successful as far as artificial languages go but it doesn’t look like it’s ever going to become the universal, global tongue the inventors hoped it could be.

Transcript

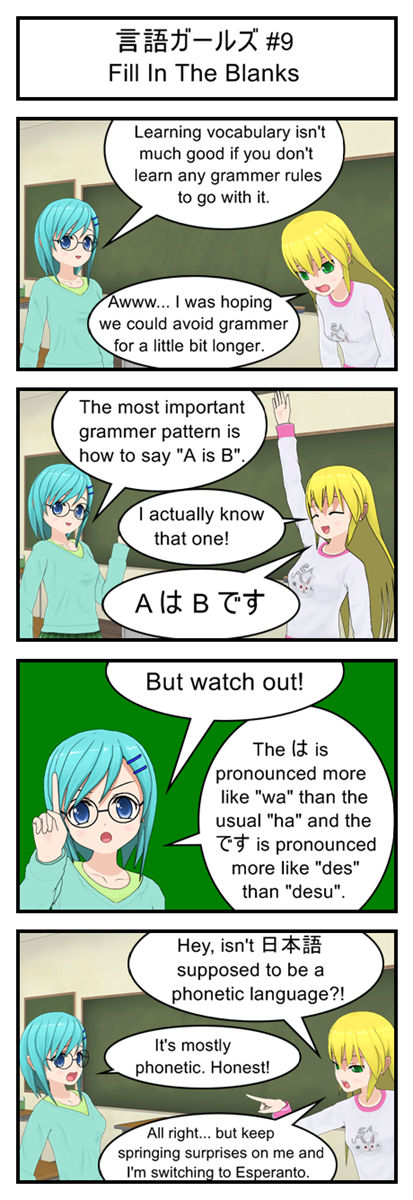
言語ガールズ #9

Fill In The Blanks

Blue: Learning vocabulary isn’t much good if you don’t learn any grammer rules to go with it.

Yellow: Awww… I was hoping we could avoid grammer for a little bit longer.

Blue: The most important grammer pattern is how to say “A is B”.

Yellow: I actually know that one!

Yellow: AはB です “.

Blue: But watch out!

Blue:The は is pronounced more like “wa” than the usual “ha” and the です is pronounced more like “des” than “desu”.

Yellow: Hey, isn’t 日本語supposed to be a phonetic language?!

Blue: It’s mostly phonetic. Honest!

Yellow: All right… but keep springing surprises on me and I’m switching to Esperanto.

Let’s Program A JavaScript Game 3: Designing “Defrag Cycle”

Some Obvious Game Design Theory


Videogames are a combination of gameplay and theme.


In Dragon Quest, an RPG, gameplay consists of exploring grids, navigating menus and trying to make your team’s numbers go up while the enemy team’s numbers go down. But the theme is “Fantasy Adventure” which turns the grids into dungeons and the number manipulations into tense combat with all sorts of magic and monsters.


In Counter Strike, an FPS, gameplay is all about moving around a big piece of geometry and trying to tag other players with various vectors. But the theme turns the geometry into a modern day battlefield and the vector tagging into guns and bullets.


When designing a game sometimes you start with a gameplay idea and then come up with a theme that fits it. Other times you start with a theme in mind and then come up with gameplay that lets you tell the story you want. And quite often the theme and gameplay evolve together in the designer’s mind, each one influencing the other.


Designing Our Gameplay


For this Let’s Program we’re going to take a “Gameplay First” approach to design. Mostly because we’re here as programmers and as programmers our main focus is on writing interesting code, not writing interesting stories. We can talk about the fine art of game theme design some other time.


One easy way to design a game is to play a lot of other games and then adopt (a.k.a. shamelessly copy) whatever gameplay elements you enjoy the most. This Let’s Program is going to focus on the “Running” genre of casual browser games. These are games where the player controls an avatar that constantly runs to the right and the player’s goal is to jump over various obstacles in order to see how far they can go.


Here are a few examples (built using Flash, not JavaScript, but you get the idea):


These games were both built by people with significantly more time and artistic talent than me, so my final product isn’t going to look anywhere near as nice or have as many special features. But I will still be following the same basic gameplay pattern.


A Picture Is Worth A Thousand Words


OK, so the basic idea is that the player has to move along a path while avoiding obstacles. In my game the two main obstacles are going to be:

  1. Gaps in the path
  2. Moving projectiles


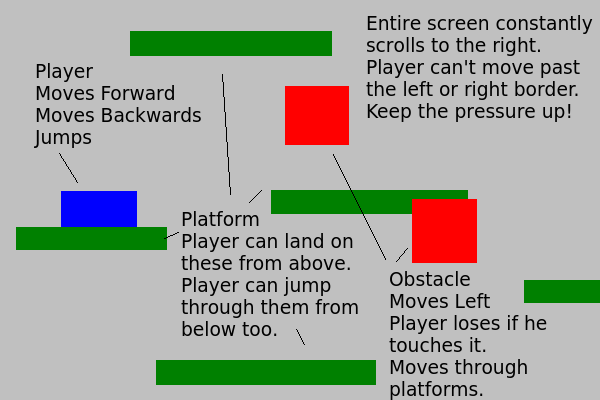
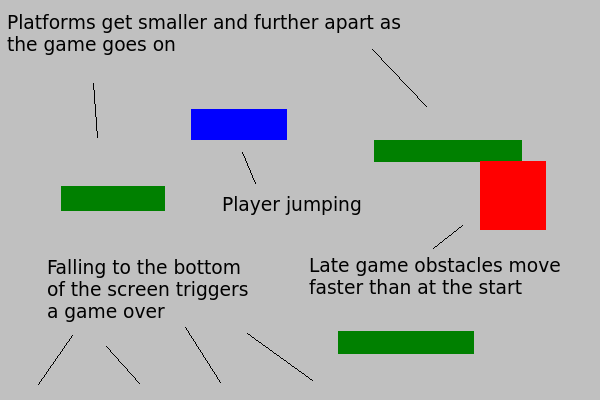
In order to avoid these obstacles the player can move left, right and perform simple jumps. To help keep the pressure on the player the entire screen will scroll constantly, forcing them to keep moving. We will also make the game get harder as it goes on by making the projectiles faster and the platforms smaller as time goes on.


Here are a couple rough pictures that help explain the gameplay I’m aiming for.

roughdesign1

Try to imagine all the pieces moving around

roughdesign2

Try making some sound effect noises while looking at this picture. It helps.

Introducing: Defrag Cycle!


Now that we have the basic gameplay under control we can start working on adding a theme to the game.


Our gameplay is pretty basic and with the right art you could turn the game into just about anything. A hero jumping along cliffs while avoiding fireballs. A ninja jumping from tree to tree while avoiding shurikens. Or even something completely crazy like a plumber jumping around on pipes while avoiding flying turtles.


But I can’t draw, so my choice of game themes is somewhat limited. I’m going to have to rely on free clipart for all my graphics, like the motorcycle and virus from the canvas tutorial.


In fact, let’s use those two exact graphics. What kind of game theme can we come up with that involves a motorcycle and a bunch of viruses?


How about… the motorcycle represents a “defragmentation” computer program that helps clean up hard drives. The obstacle course that the player has to navigate represents a fragmented hard drive and the viruses represent (obviously) computer viruses. The player’s goal is to completely defrag the harddrive by avoiding the viruses and not failing off the path.


Yeah, I realize it sounds kind of like Tron. But is that really a bad thing?


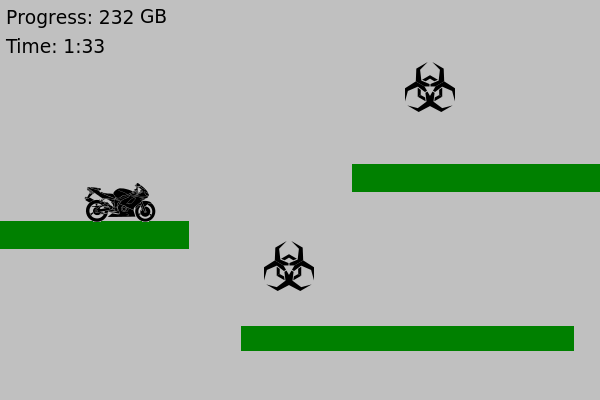
Anyways, the game will have two score counters: a “progress” and a “time”. Both will automatically go up as long as the player isn’t dead. When the “progress” count reaches 1,000 GB the hard drive is completely defragged, the player wins and their total time is shown.


To help reward good players we will introduce a “graze” mechanic where people who get really close to a virus without actually colliding with it will be awarded bonus “progress” points. This will let good players defrag the hard drive faster than usual and give them a much lower total time.


Here are a couple screen shots of what I had in mind:

roughdesign3

Not bad for a game built entirely around two pieces of free clipart

roughdesign4

I don’t actually like games with graze mechanics. Why am I doing this? What I have become!?


Next Time: Start Your (Game) Engines


Now that we have a basic game design document we can start to actually program our game. So join me next week as we take the first step towards building the custom JavaScript we need to actually run our game.